-
Notifications
You must be signed in to change notification settings - Fork 10
Postman guide
Postman is a very powerful tool used by DeX to do integration tests. We made this guide to help you understand how this process works.
- Download and install Postman from the link below
https://www.postman.com/downloads/
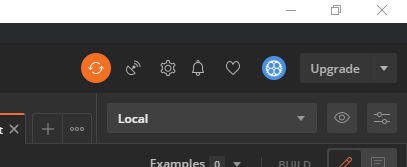
- Disable SSL certificate verification for local testing Click on the cogwheel in the topright corner of the Postman interface --> Settings.
In the general tab disable SSL certificate verification.
- Import environment and collection
--> Click on import on the top left corner in the Postman interface.
--> Click on the folder tab
--> Select the Postman folder in the repository root directory.
--> Confirm import
Collection should show up in the left panel:
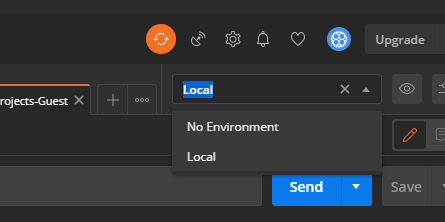
Environment should show up in the top right corner drop down menu.
Newman is a tool used in the CI/CD of our project. It is also required to use on your local machine to run file related tests.
- Install npm. https://www.npmjs.com/get-npm
- Install newman:
npm install -g newman
The collection is a .json file. In this JSON file all requests and tests are stored. Each request executes one endpoint of the API. Each request can contain multiple tests. Examples of common tests are:
- Test response status
- Test response time
- Compare expected and actual data
Beneath some explanation about requests.
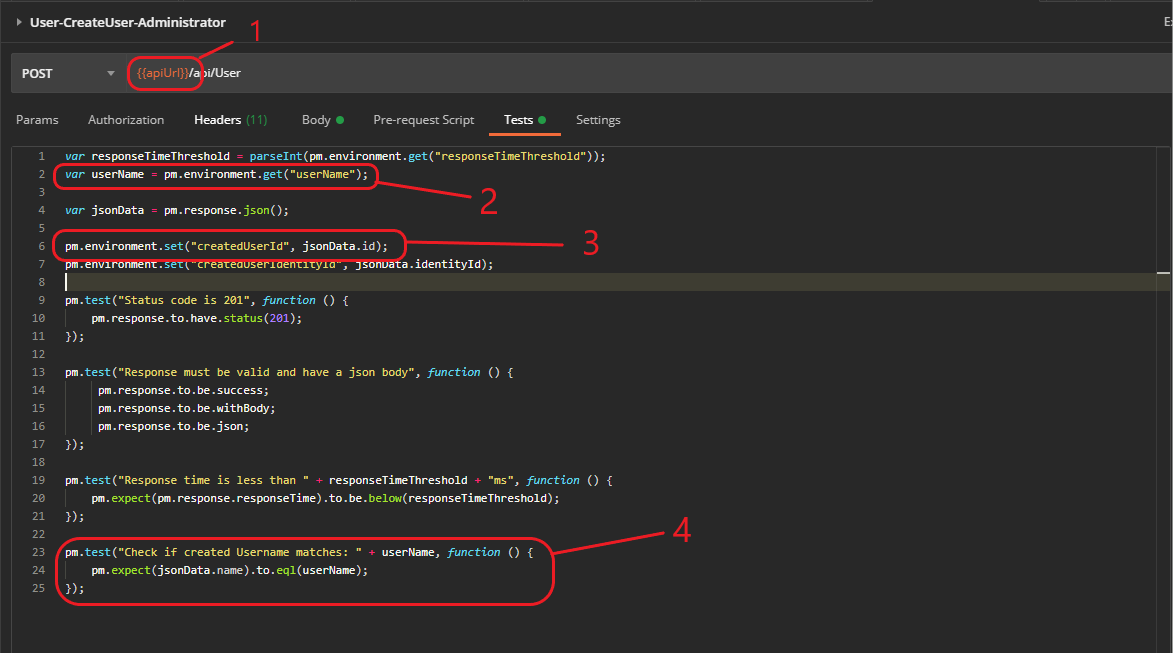
- A environment variable in the body or URL is called this way.
- This is how to get the value of a environment variable in the tests.
- This is how to set the value of a environment variable in the tests.
- This is how to execute a test. In this case the test checks if the response returns the same username value as the send value.
The environment is a .json file. In this JSON file all environment variables are stored. The variables are used in the requests. Without the environment, you can not run the collection. Example of variables is: apiUrl: this variable is used in every request as the base of the URL.
A new environment variable can be added by:
- Click the eye next to the environment (make sure the right environment is selected).
- Click the "Edit" button.
- Scroll down to the last variable
- Insert new variable name, initial value and current value if necessary.
- Press update.
To practice a bit with Postman testing we writed this guide. This guide will help you to make a Postman integration tests for creating a new user.
-
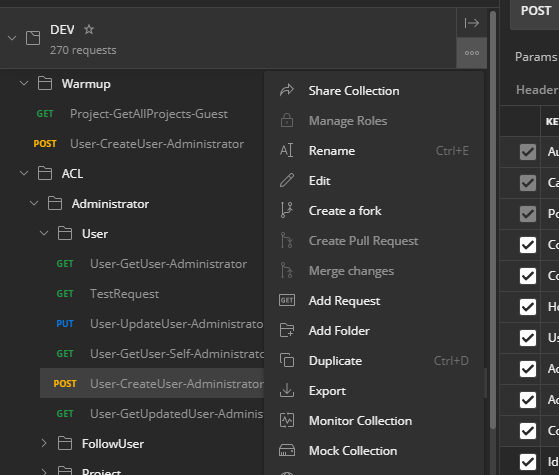
On the left side click collection DEV -> ACL -> Administrator -> User -> Right mouse button.
-
Click Add request.
-
This needs to follow a naming scheme. We will call it User-CreateUser-Administrator2
-
Click save to User. Never copy a test because the authorization header will get set automatically.
-
Select the created test.
-
In The request uri change type from GET to POST.
-
On the right side click the eye icon to open the local variables. You should find the api url variable.
ApiUrl -
In the uri type:
{{apiUrl}}/api/User -
Go to Headers.
-
Create a new header.
Key: IdentityId, value: {{administratorUserIdentityId}} -
If you look at the API schemas and then user. We need at least three values. Name, email and identityId.
-
In the body set text format to raw and then Text to JSON.
-
In the body type:
{ "identityId": "1111", "name": "{{userName}}", "email": "[email protected]" } -
Go to Tests. Add the following:
var responseTimeThreshold = parseInt(pm.environment.get("responseTimeThreshold"));
var userName = pm.environment.get("userName");
var jsonData = pm.response.json();
These are variables to get the response time and the username from the environment. The jsonData variable sets the response data.
pm.test("Status code is 201", function () { pm.response.to.have.status(201); }); Creates the test. Every postman test needs to begin with pm.test
Inside of the pm.test function is pm.response this is what postman returns. In this case if the response is 201 it will pass.
pm.test("Response time is less than " + responseTimeThreshold + "ms", function () { pm.expect(pm.response.responseTime).to.be.below(responseTimeThreshold); });
pm.test("Response must be valid and have a json body", function () { pm.response.to.be.success; pm.response.to.be.withBody; pm.response.to.be.json; });
pm.test("Check if created Username matches: " + userName, function () { pm.expect(jsonData.name).to.eql(userName); });
- Run the test with clicking on Send.
- In the response body go to Test Results all four tests should pass.
If you get the error There was an error in evaluating the Pre-request Script: Error: Unexpected token u in JSON at position 0 It means you need to set the environment in the top right corner to Local.
For more information: https://learning.postman.com/docs/writing-scripts/intro-to-scripts/
1.Clicking the 3 dots --> Exporting
- Choose "Collection v.2.1 (recommended)".
- Overwrite file with old one.
- Click on the "Manage Environment" button. (Most right button in the picture below)
- Click the download button
- Overwrite with the old file in the repository's Postman directory.
An array of response times is collected by adding the following line in the request tab.
eval(pm.environment.get("commonTests"))();
An response time threshhold is set in the environment variables. At the end in the "Global" folder one 'request' is executed which checks if the average time is not higher than the threshhold.
To keep things clear, we would like you to follow the test tab structure as beneath:
- Creation of variables
- Set environment variables
- Performance line as shown in the chapter above
- Tests
Postman tests are executed in following order. Some requests also require another request which is responsible for the cleanup. To make it easy to find cleanup request that belong to a creation request we would like you to do the following:
- Warmup ( Requests that create data relevant to all roles. For example account creations. Deleted in latest Cleanup folder. )
- ACL
2.1 Role
2.1.1 Preperation ( Request that create data relevant to this role, deleted in Cleanup folder(s) at the end of this folder. )
2.1.2 Functionality tests
2.1.8 Functionality tests
2.1.9 Cleanup Role ( Cleanup that can be done with the same role, deletes data created in preperation folder )
2.1.10 Cleanup Administrator ( Cleanup that can only be done by the adminstrator, deletes data created in preperation folder ) - Global ( For now used for performance test )
- Cleanup ( Data that is created in warmup
- Postman interface does not import / export automatically, after for example switching branch import again to have the latest version.
- Response time fails may be caused by your environment or by other systems.
- Make sure to change the IdentityId in the tab 'Headers' of the request to the correct role.
- Reusing existing environment variable may break other tests.
- Postman tests are time consuming in the CI/CD. Please think of an efficient way of testing the endpoints.
- Make sure to cleanup the inserted data somewhere in the collection so the database stays clean.
- Do not make the test rely on a certain database state. The development database is generated by random data. Therefore it is different for everyone.
- Merging Postman collection is easiest by manual copying new requests.
- Use specific checks. For example: pm.response.to.be.success can be response status 2xx. If you use pm.response.to.be.ok it can only be 200 which is more specific.


