-
Notifications
You must be signed in to change notification settings - Fork 68
Workflow: Setting up a multi step job
##This workflow leads to an automated multi-step laser job using vector graphics editing software and LaserWeb.
Courtesy of SuperDave42.
In the vector program of your choice plan out the object you want to make. Think about it in steps and each step will be on it’s own layer. For this example 3 layers are used. A layer for ETCH, a layer for CUT-THROUGH and a layer for CUT-OUTLINE. This example job would be to etch the date “2016” into the surface, then cut through the logo and then finally cut out the shape.

Tip: Place a dot in the bottom left corner (if you allign to that location in LW) on each layer to help align them.
##The process is as follows:
- Turn off the 1st 2 layers and leave the CUT-OUTLINE layer visible. Save this as an .svg file called outline (or whatever makes sense to you).
- Turn off that layer and turn on the CUT-THROUGH layer and save that as an .svg file called logo (or whatever makes sense to you.
- Turn off that layer and turn on the ETCH layer. Save this as a .bmp file called date (or whatever makes sense to you).
You now have 3 saved files that will be used in LaserWeb to create the multi-step job. You can now exit from your vector graphics editing software.
##To create the multistep job:
- Start LaserWeb
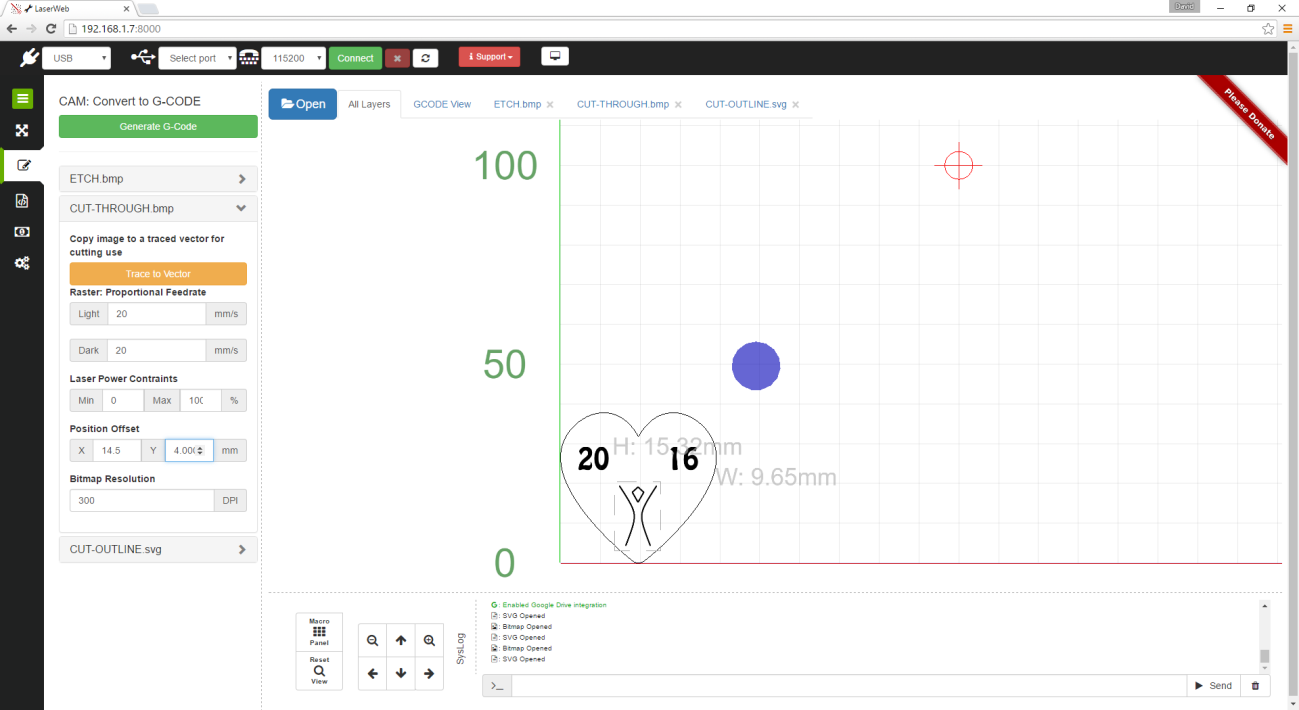
- Load each file into LaseWeb using the "Open" button. As each file opens it will create a tab with the file name.
- The order you open the files determines the order they will be processed in.
- Open the ETCH file called date first.
- Open the CUT-THROUGH file called logo.
- Open the CUT-OUTLINE file called outline.

- After all 3 files are loaded, edit each files parameters for the end result desired.
- The 3 files are manually positioned using the offset functions.

- After everything is in its desired position, and the processing order is correct (Files are processed from left to right of the tabs at the top of the page), press "Generate G Code". It will create 3 sections of GCODE.

- Save the file and/or run the job by pressing the "Process" button at the bottom of the "End GCODE" window or press the "X" icon on the left menu.

- Now press "RUN GCODE"
For support: Please join the Google+ Community LaserWeb