Adding an SSH target
This page explains the process of adding a new SSH target host to Warpgate and allowing users to connect to it.
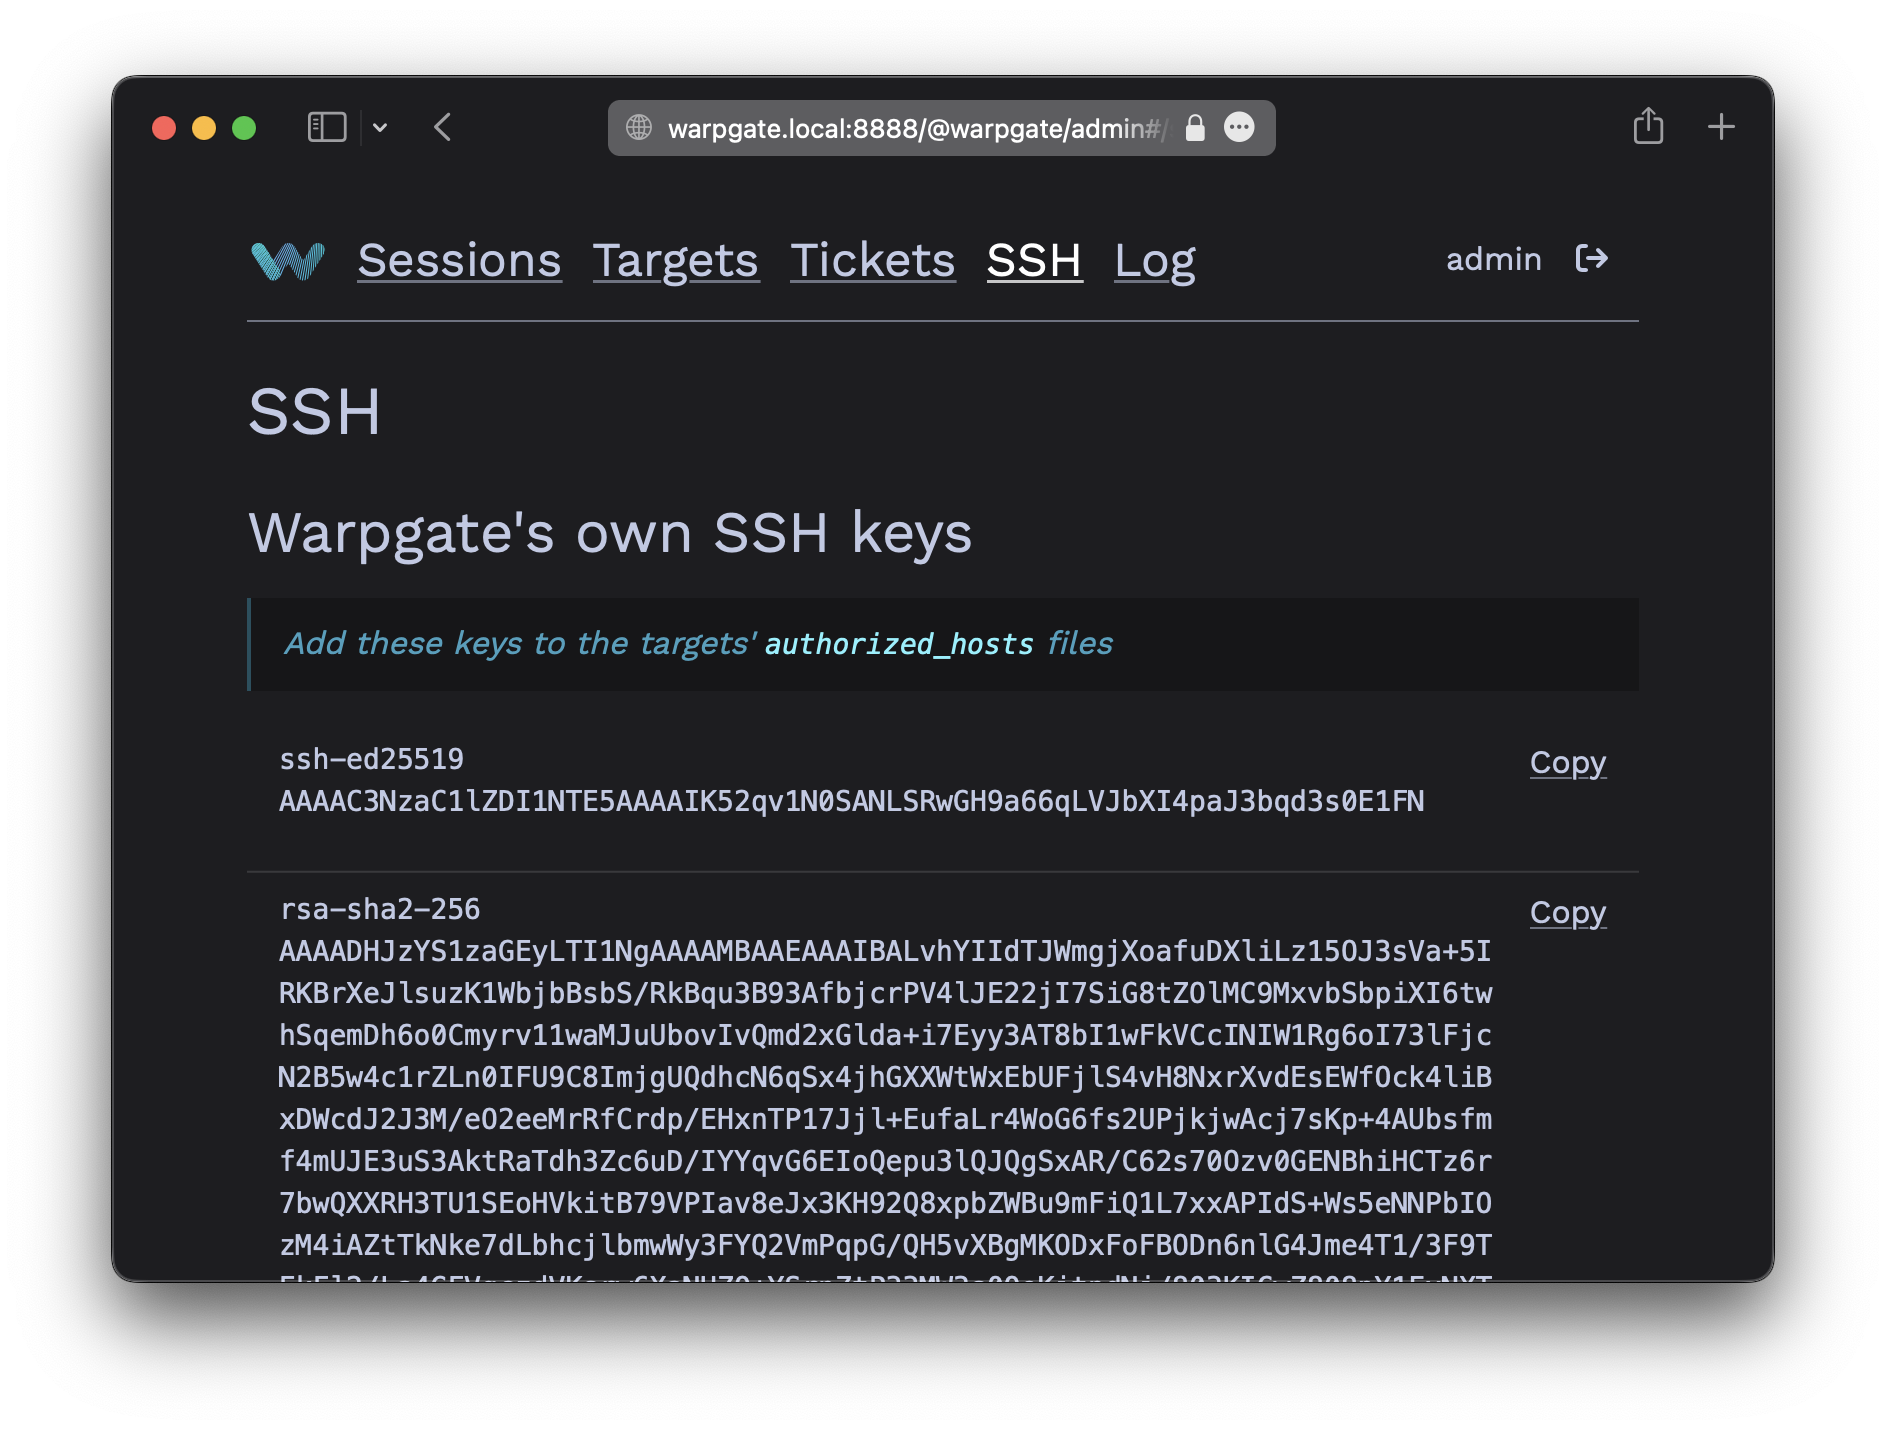
Warpgate has its own set of SSH keys which the target host must trust in order for connections to work.
You can view these keys on the SSH page of the Admin UI, or via the warpgate client-keys CLI command:
$ warpgate client-keys
13:59:41  INFO Using config: "/etc/warpgate.yaml" (users: 1, targets: 2, roles: 1)
Warpgate SSH client keys:
(add these to your target's authorized_keys file)

ssh-ed25519 AAAAC3NzaC1lZDI1NTE5AAAAINt47WEjoLc62RyZkSD5IDkyLjdgq2Kbq+UaM+3RBsT5
rsa-sha2-256 AAAADHJzYS[...]
The keys are listed in the order of preference. Copy one of them and paste it at the end of the ~/.ssh/authorized_keys file on the other side (each target host OS' user has their own authorized_keys file and you will need to create it if it doesn't exist yet).
Although not recommended, you can use a password to authenticate against a target instead.
Isn't storing plaintext passwords unsafe?
It's not as long as the config file itself is secure. Warpgate automatically locks down the config file permissions to the bare minimum required.
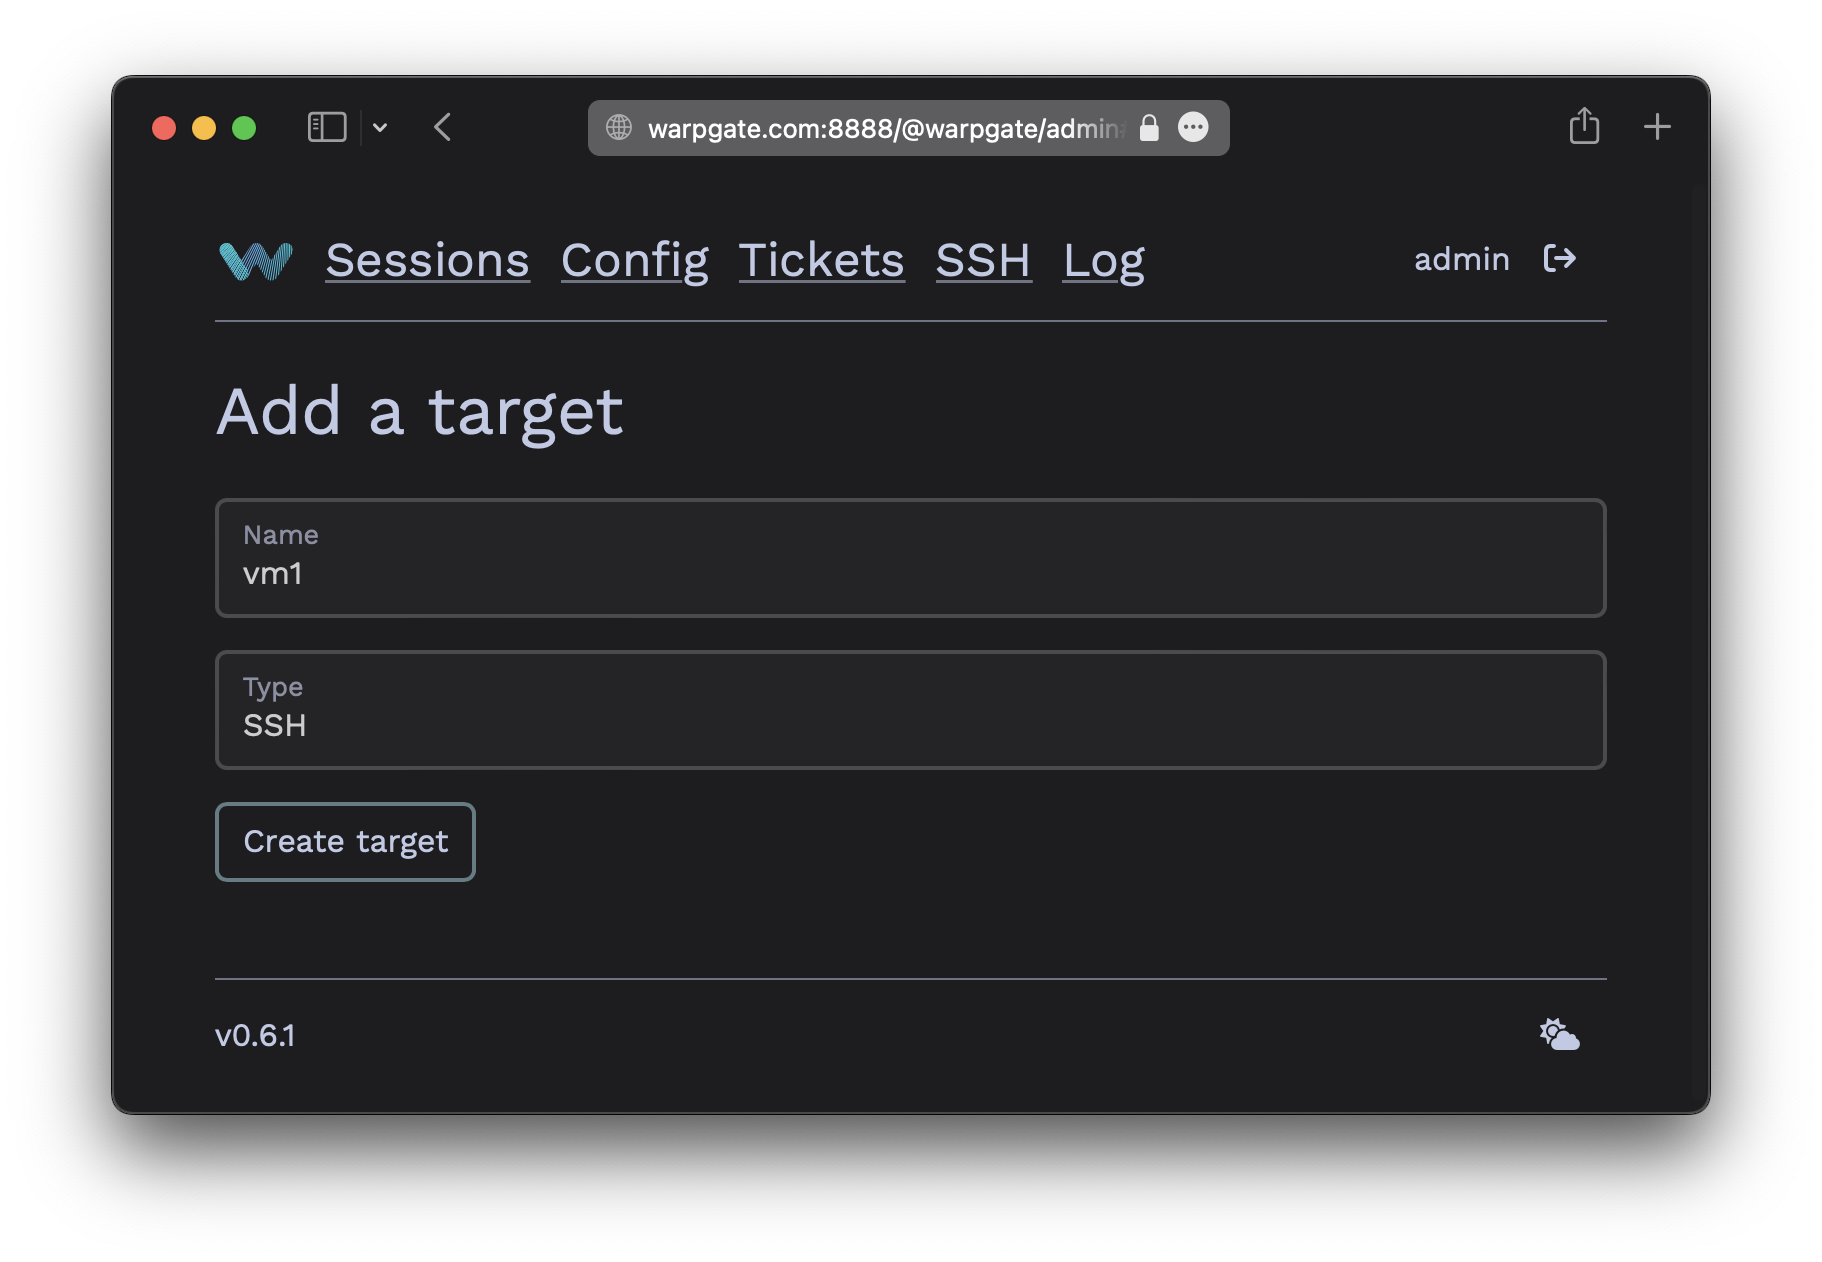
Log into the Warpgate admin UI and navigate to Config > Targets > Add target and give the new target a name:
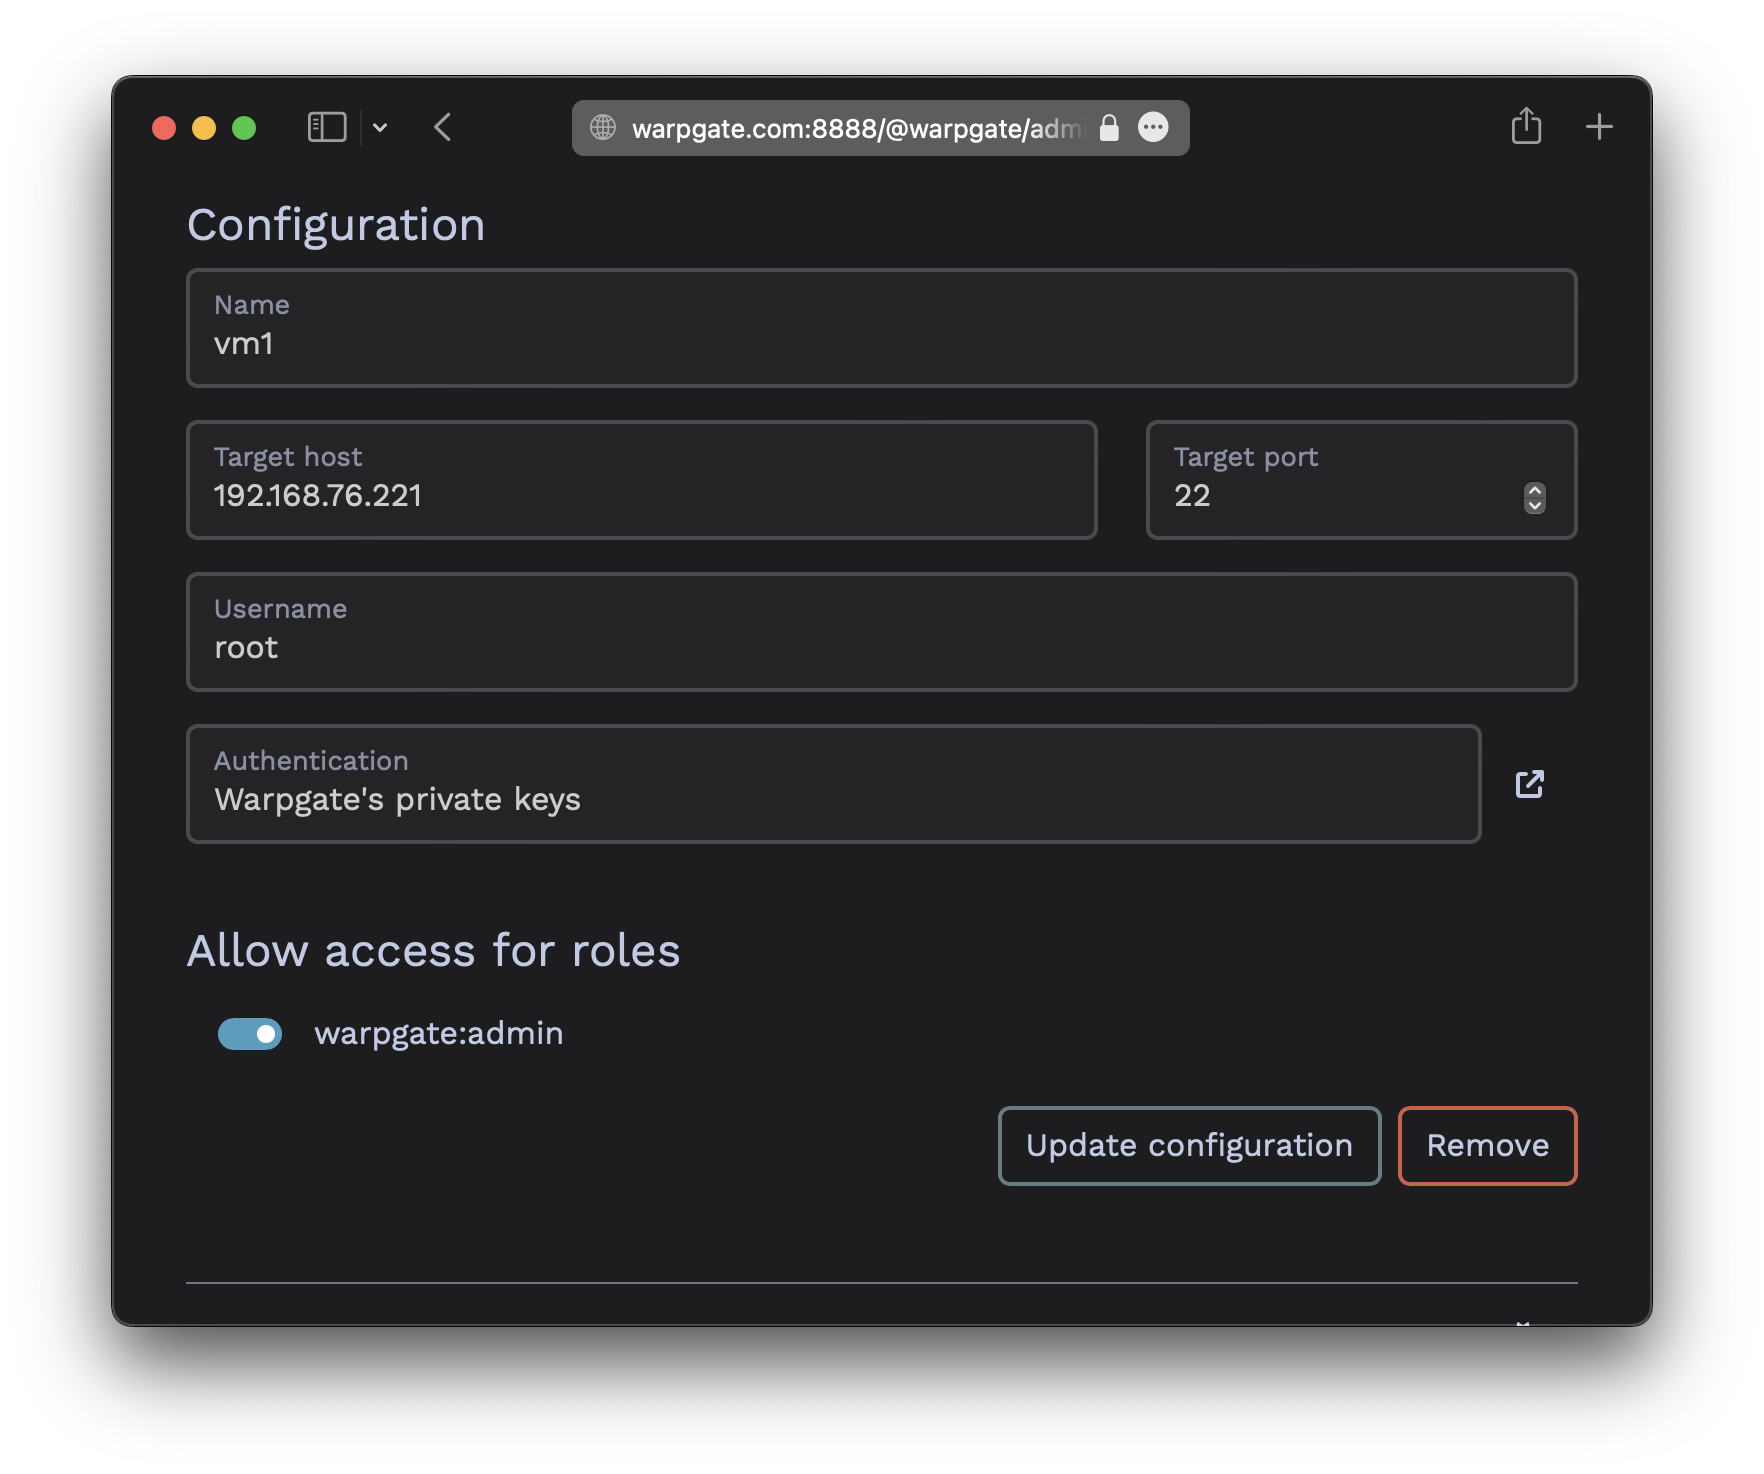
Fill out the connection and authentication info and click Update configuration, for example:
The target should show up on the Warpgate homepage for users that are allowed to access it:

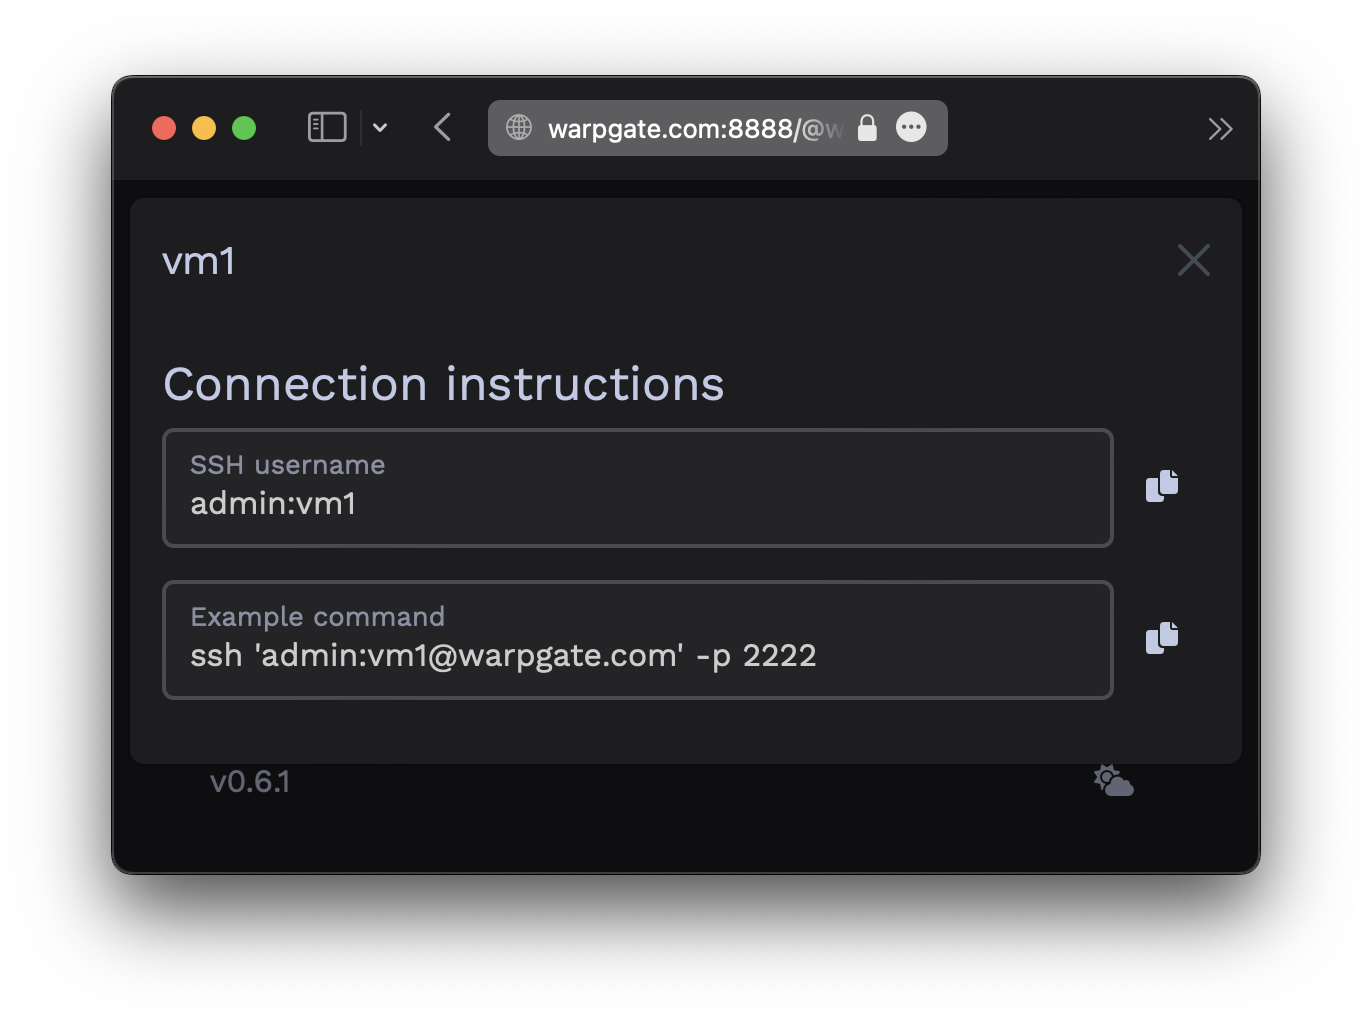
Users will be able to click the entry to obtain connection instructions:
Now, fire up your favorite SSH client and try connecting to Warpgate:
- Host: the Warpgate host
- Port: the Warpgate SSH port (default: 2222)
- Username:
admin:<target-name>, in this example:admin:vm1 - Password: your Warpgate admin password
When connecting for the first time, Warpgate will ask you to check and confirm the target host's SSH host key fingerprint (which you really should do).
Here's what it looks like with OpenSSH:
$ ssh admin:[email protected] -p 2222
admin:[email protected]'s password:

 Warpgate  Selected target: vm1
 Warpgate  Host key (ssh-ed25519): AAAAC3[...]
 Warpgate  There is no trusted ssh-ed25519 key for this host.
 Warpgate  Trust this key? (y/n)

 ✓ Warpgate connected

 root ~   $
From this point on, you can use this as a normal SSH connection, including SFTP etc.
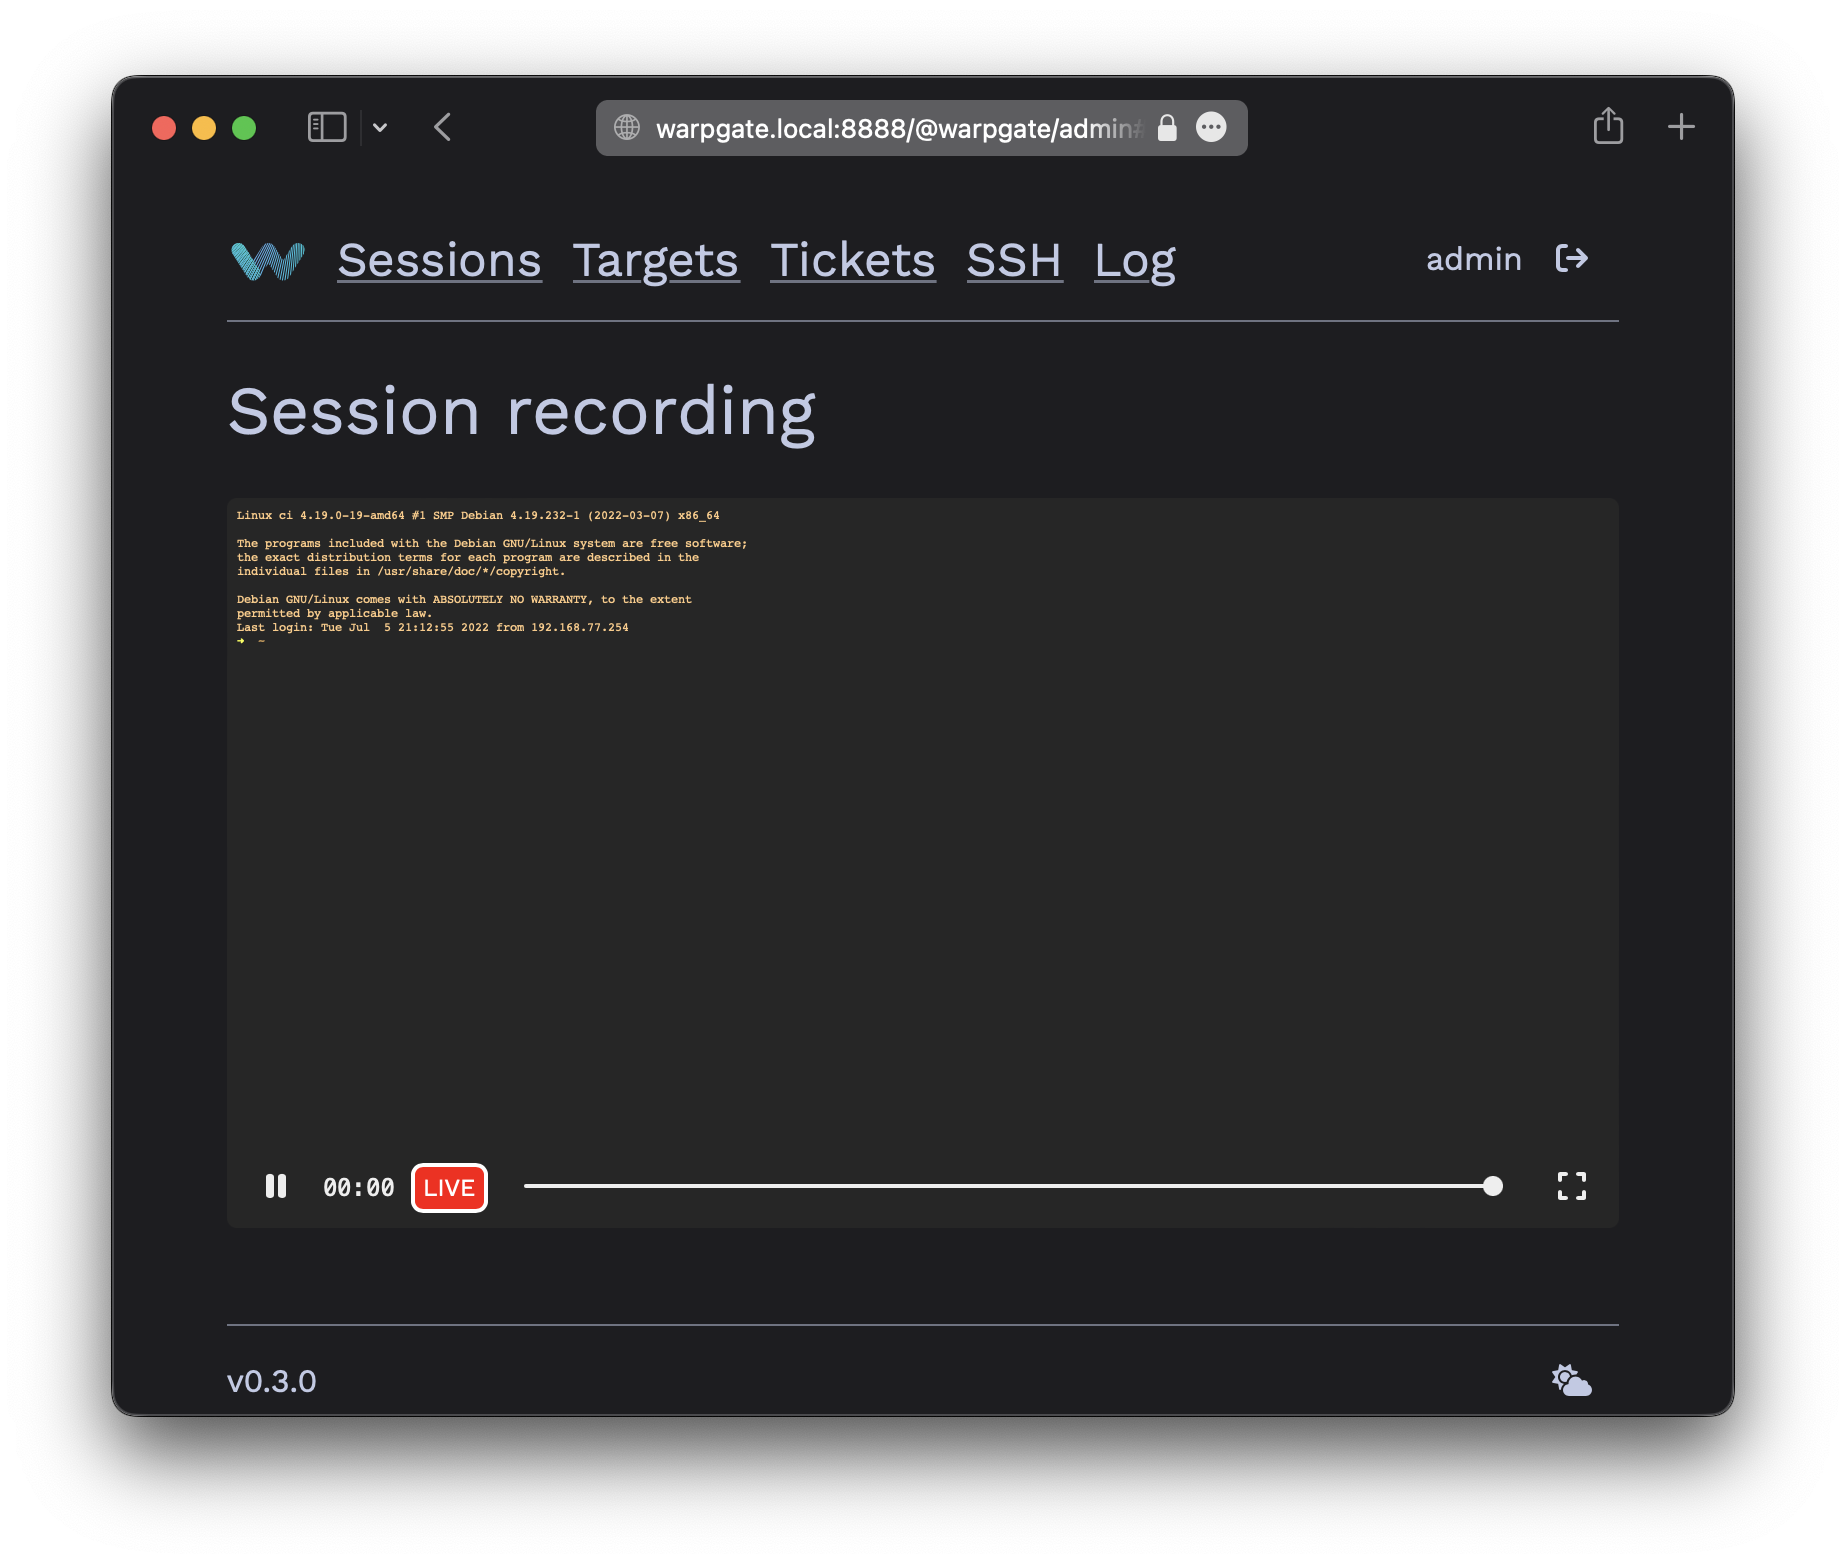
While your SSH session is running, you'll be able to see its status in the Admin UI:
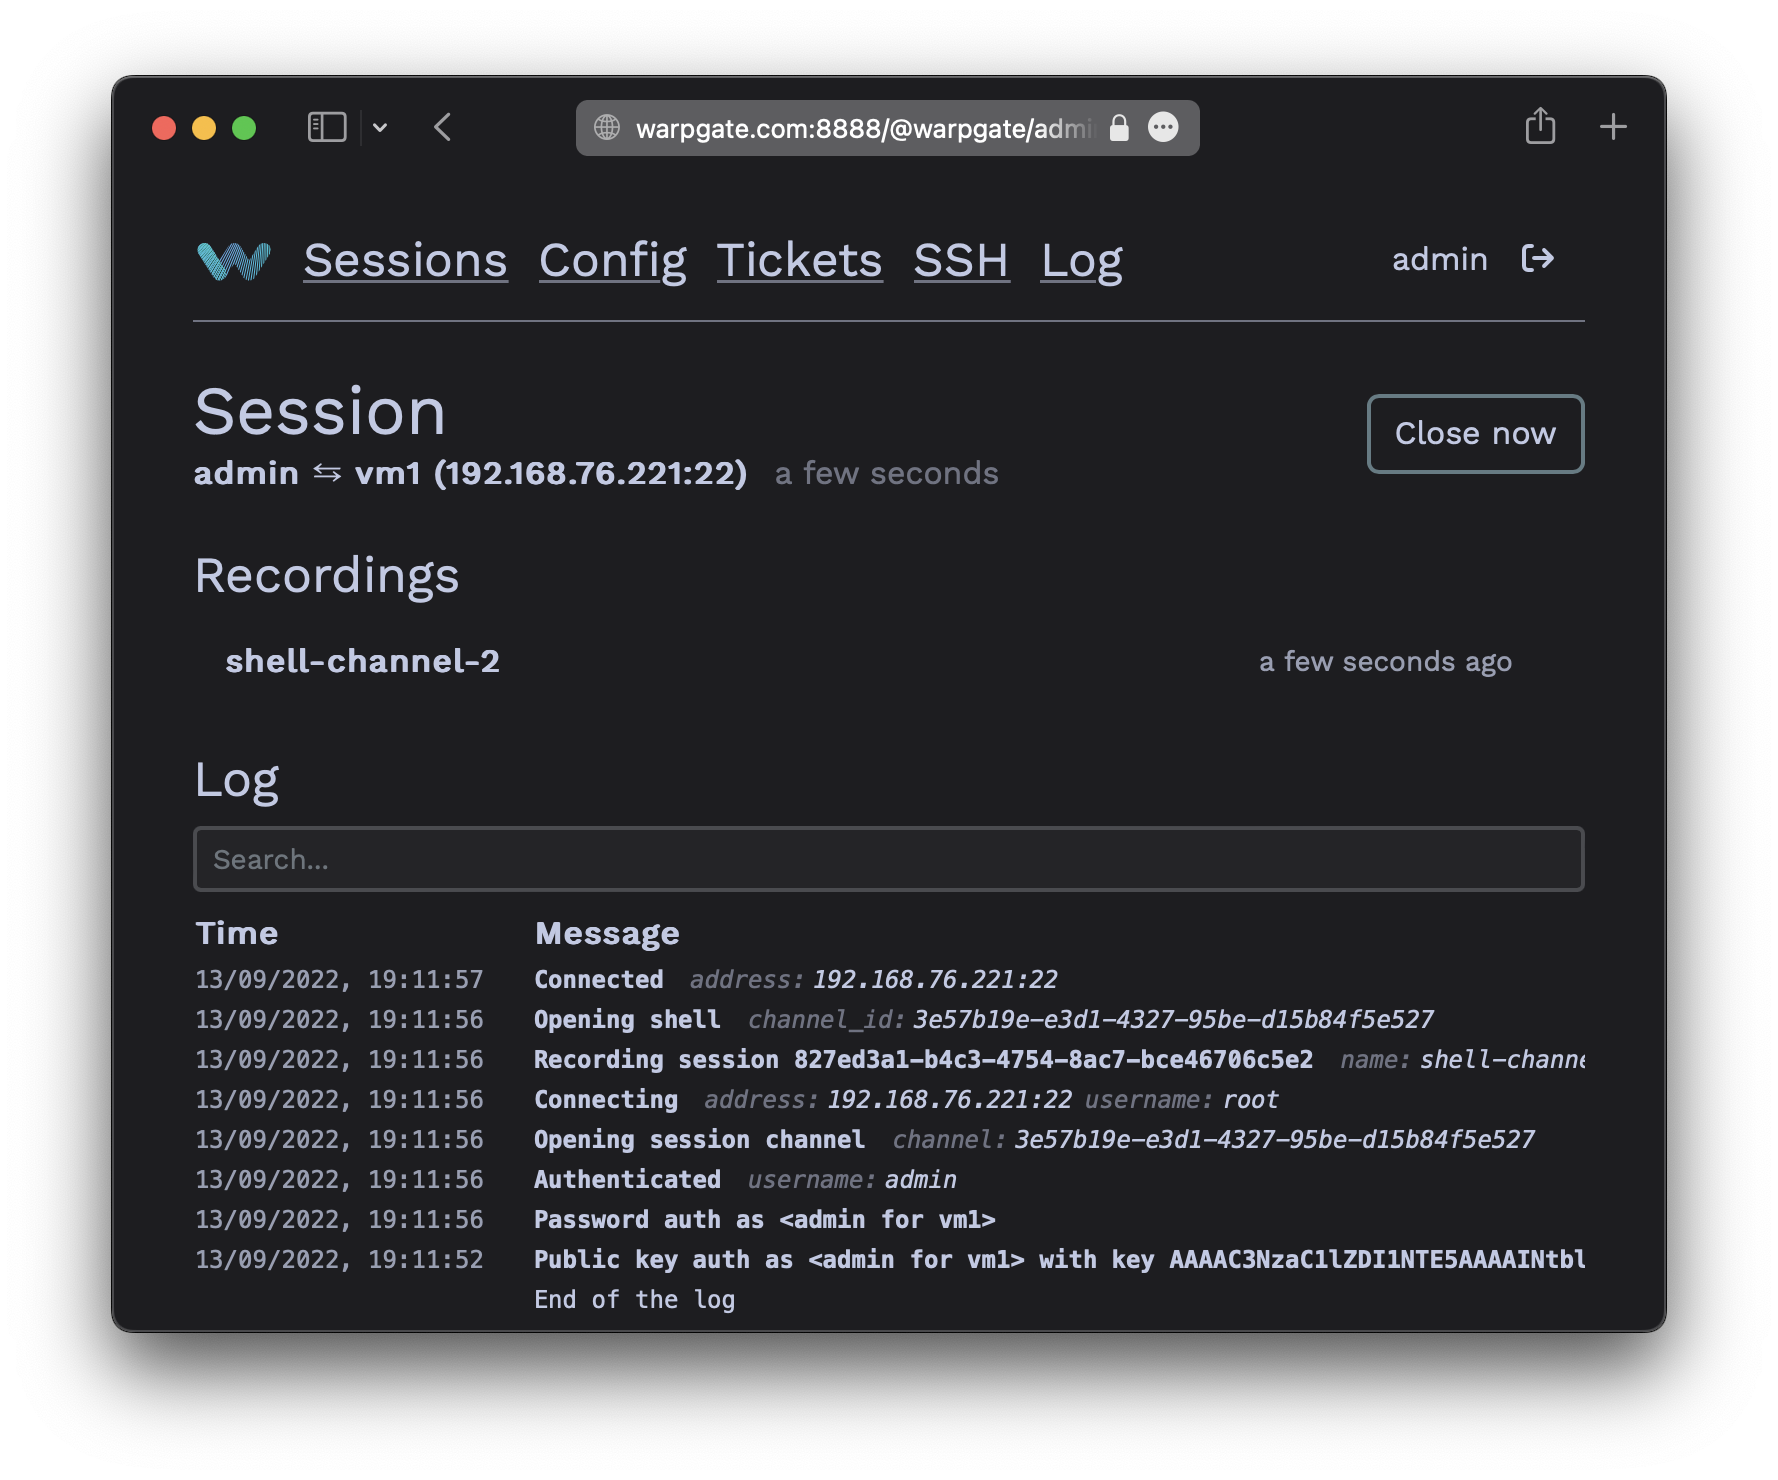
Click the shell session entry in the Recordings section for a live view and replay of the terminal session: