If you've reached the above landing page for the first time, you've come to the right place! In this quickstart, we're going to walkthrough step by step how to connect CDP to your AWS account so that you can begin to provision clusters and workloads.
In order to complete this quickstart, you'll need access to two things.
- The CDP console (if you've reached the above screen, you're good to go there)
- The AWS console
- In the CDP Console, the first thing we're going to do is create our CDP Credential. The CDP credential is the mechanism that allows CDP to create resources inside your Cloud Account.
- From the CDP Home Screen, click the Management Console icon.
- On the left side navigation plane, go to Environments
- From there, in the top left choose Shared Resources, then Credentials
- Click on the Create Credential button on the top right.

-
In the AWS Console (keep the CDP screen open a different tab or window), we're going to create the policy that will be applied to the CDP role.
- In AWS, navigate to IAM
- Click on Policies
- Click on Create policy
- Choose JSON, and paste the provided json from the Create Cross-account Access Policy from the CDP Management Console
- Click Review Policy
- Give it a name and description. The name can be any valid name.
- Click Create policy.
-
Staying in the AWS Console, we'll now create the required role.
- In AWS, navigate back to IAM
- Click on Roles
- Click on Create role
- Under Select type of trusted entity, choose Another AWS Account
- Copy and paste the Service Manager Account ID from the CDP Management Console, and paste it Account ID* field.
- Check Required external ID
- Copy and paste the External ID from the CDP Management Console, and paste it into the External ID field.
- Now, for the name of the policy you created above, and apply it by checking the checkbox next to it.
- Choose Next: Tags
- Choose Next: Review
- Give the role a name and description. The name can be any valid name.
- Click create role
- Staying in the role page in the AWS Console, search for the role you just created, and click on it
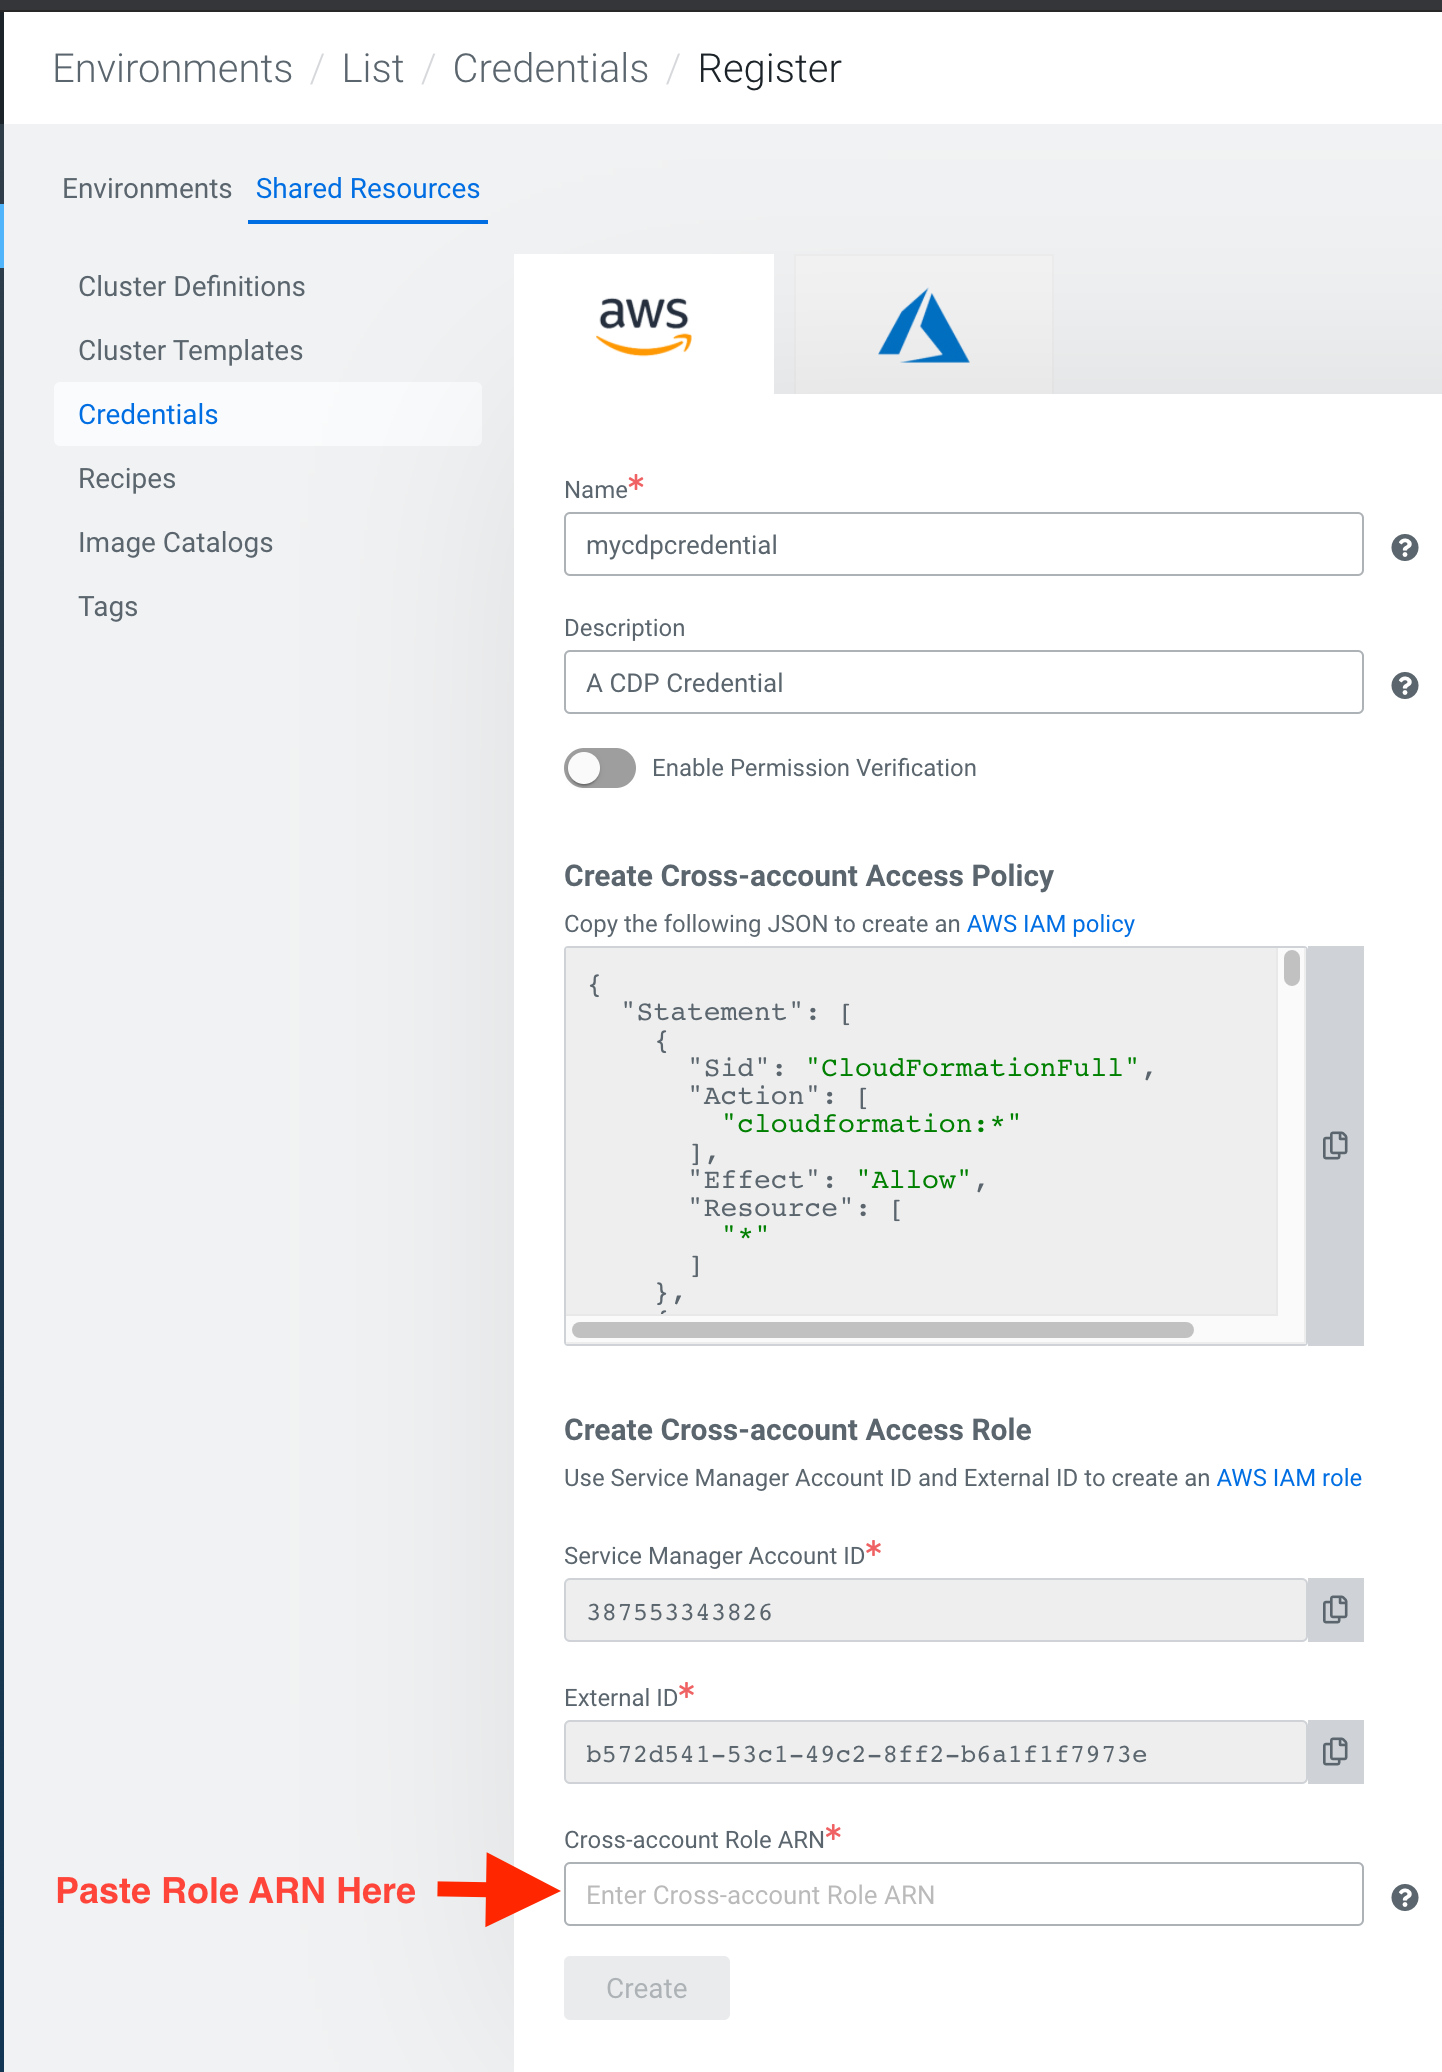
- At the top of the screen, copy the Role ARN

- Head back to the CDP Management console for the final steps in creating the credential.
- Give your CDP credential a name and description. The name can be any valid name.
- Paste the role ARN you copied from the AWS management console, and paste it into the Cross-account Role ARN
-
We'll want to create specific IAM roles and policies for CDP to operate in a secure manner. For background info, a description of what we're building and why can found here. For this quickstart, we'll be using CloudFormation to set all of this up for you.
- Download the provided CloudFormation template here
-
In the AWS Console, we're now going to deploy our CloudFormation template.
-
In AWS Services, search for CloudFormation
-
Click Create Stack in the top right
-
Choose template is ready, and upload a template file

-
Select the template file you just downloaded.
-
Click Next
-
Enter your stack name. This can be any valid name. Below you should change
- LogsLocationBase - choose an unused bucket name and path for the logs, CDP will be creating the bucket for you. The same bueckt can be used for both LogsLocationBase and StorageLocationBase.
- StorageLocationBase - choose an unused bucket name and path for the data, CDP will be creating the bucket for you. The same bueckt can be used for both LogsLocationBase and StorageLocationBase.
- prefix - a short prefix of your choosing to add to the names of the IAM resources we'll be creating.

-
Click Next.
-
At the Configure Stack Options page, click Next
-
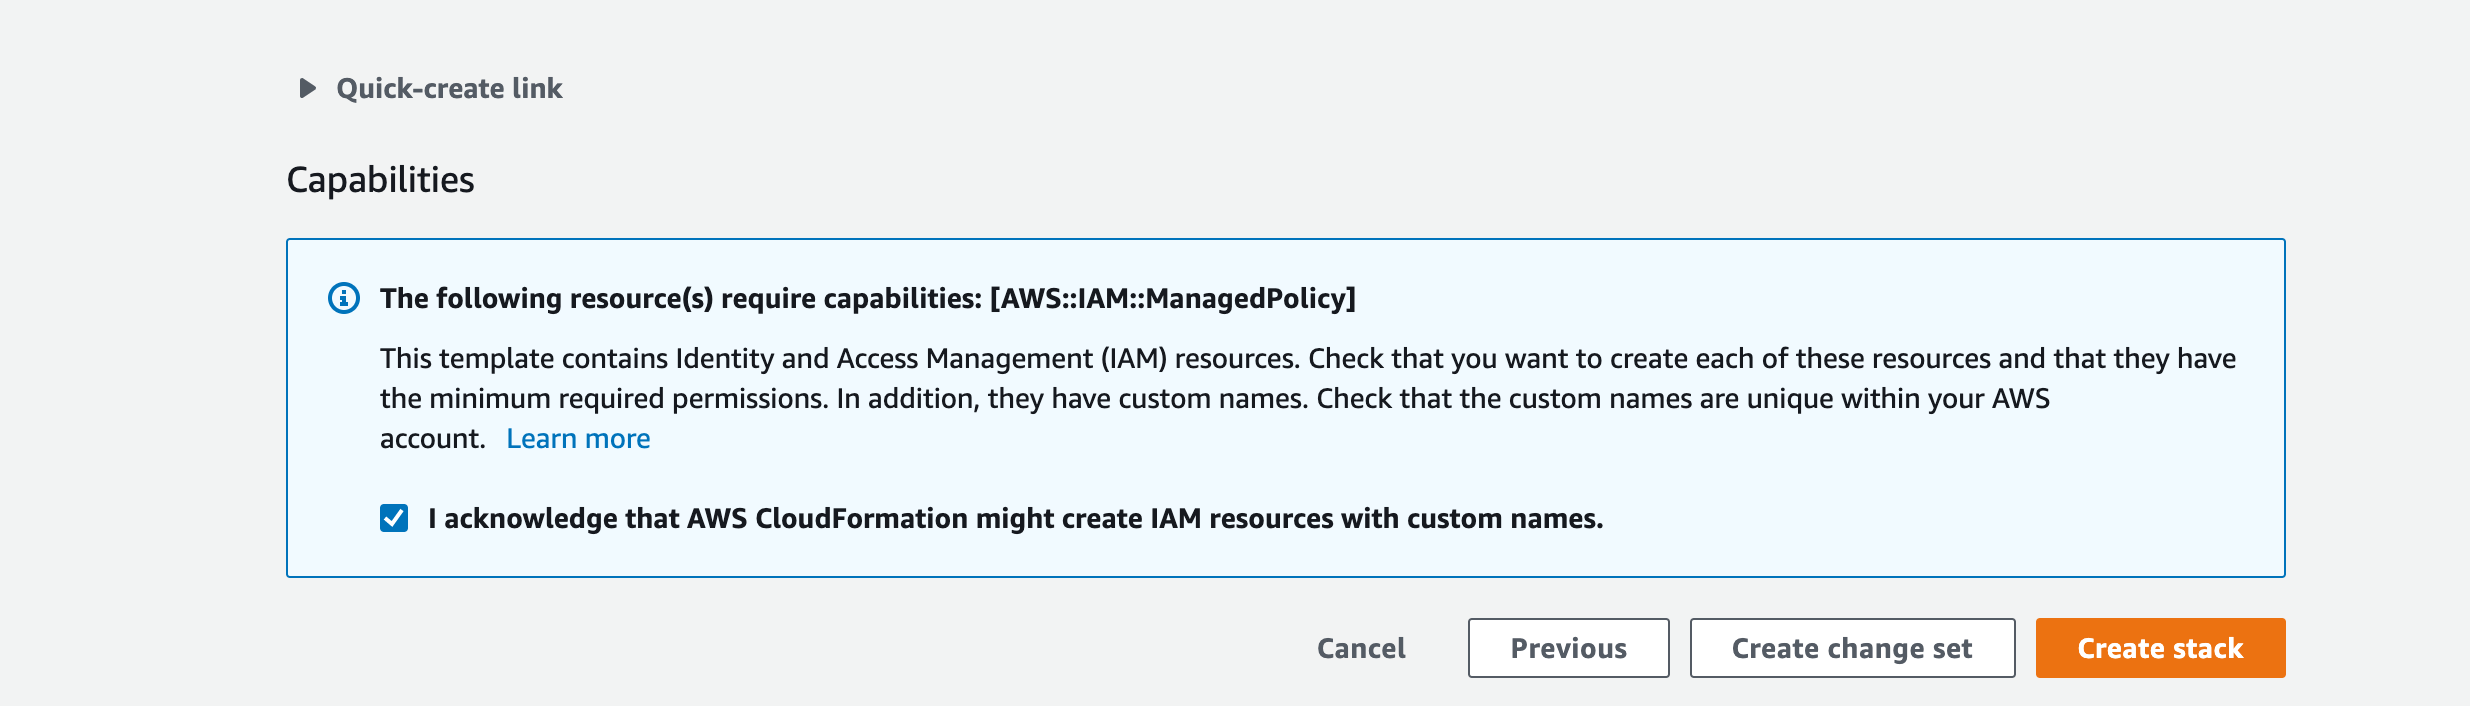
At the bottom of Review page, under capabilities, we need to click the checkbox next to I acknowledge that AWS CloudFormation might create IAM resources with custom names, as that is exactly what we will be doing.

-
Click Create stack
-
-
One last thing, in the AWS Console, we'll want to create an SSH Key in the region of your choice. If there is already an SSH key in your preferred region you'd like to use, you can skip these steps.
- In AWS Services, search for EC2
- Doublecheck that you are in your preferred region in the top-right corner.
- On the left-side navigation bar, choose Key Pairs
- On the top right, choose Create Key Pair
- Provide Name and choose pem format. The name can be any valid name.
-
Back in the CDP Management Console
-
Navigate to Environments
-
Click Register Environment
-
Provide an environment name and description. The name can be any valid name.
-
Choose amazon as the Cloud Provider
-
Under Amazon Web Services Credential, chose the credential we created earlier.
-
Click Next
-
Under Data Lake Settings, give your new Data Lake a name. The name can be any valid name. Choose the latest Data Lake Version
-
Under Data Access, choose the prefix-data-access-instance-profile, for Storage Location Base choose the same StorageLocationBase from the cloud formation template.

-
Choose Light Duty for Data Lake scale.
-
Click Next
-
Choose your desired region, this should be the same region you created an SSH Key in above.
-
Under select network choose Create New Network
-
Under Security Access Settings choose Create New Security Groups

-
Under SSH Settings, choose the SSH key created earlier.
-
Under Enable S3 Guard, enter prefix-dynamodb-table

-
(optional) Provide any tags you'd like these resources to be tagged with.
-
Under Logs - Storage and Audit, choose the Instance Profile we mentioned to save earlier, titled prefix-log-access-instance-profile, for logs location base choose the same LogsLocationBase from the cloud formation template, and for Ranger Audit Role choose prefix-ranger-audit-role

-
Click Register Environment
-