IntelliSense, linting, build shortcuts, and more for Tailwind CSS to enhance the development experience in Visual Studio 2022.
NOTE: this extension is designed to be used with the latest version of Tailwind; there may be unintended effects when using earlier versions.
Download from the Visual Studio Marketplace.
To get started, view the Getting Started guide.
For information on recent updates, see the changelog.
This is not an official Tailwind CSS extension and is not affiliated with Tailwind Labs Inc.
This extension uses npm and node under the hood, so you should have them installed to avoid errors.
To check if you have npm installed, run npm -v in the terminal.
If you do not have npm installed, follow this tutorial from the official npm docs.
The extension will start in any solution with a tailwind.config.js file in any project.
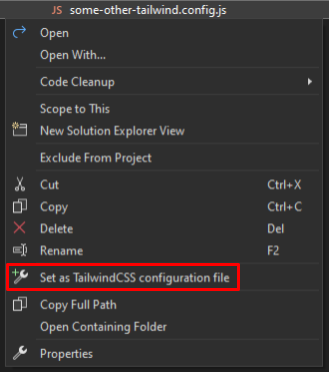
If your configuration file is named differently/not found by the extension, you can set the file by right-clicking on it (must be a .js or .ts file).
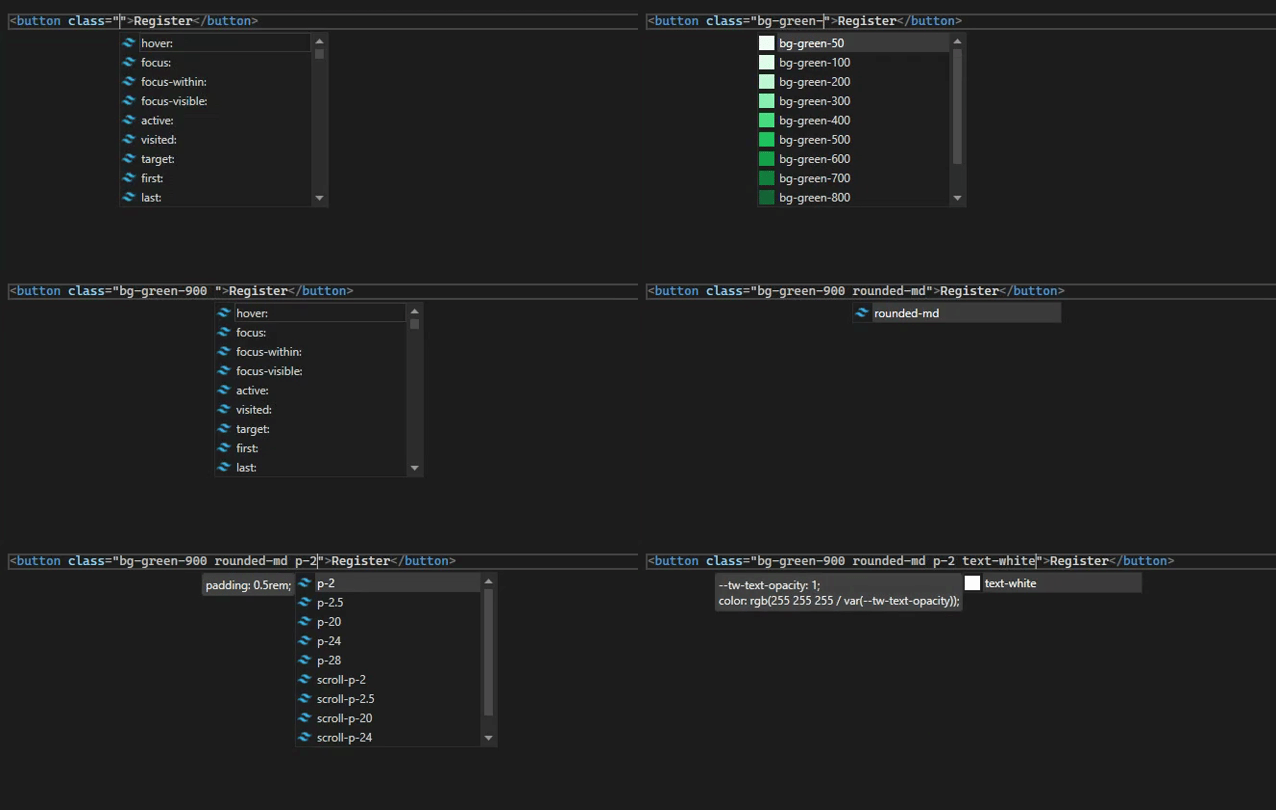
Tailwind CSS classes show up in the IntelliSense completion menus in Razor, HTML, and CSS files:
The linter will mark all class conflicts as well as invalid theme(), screen(), and @tailwind values:
Linter options can be found in Tools > Options > Tailwind CSS IntelliSense > Linter.
Extensions do not have the ability to override existing error tags, so @tailwind, @apply, and other Tailwind-specific functions will be underlined by Visual Studio.
Classes can be sorted on a per-file basis on file save or by the whole solution on build:
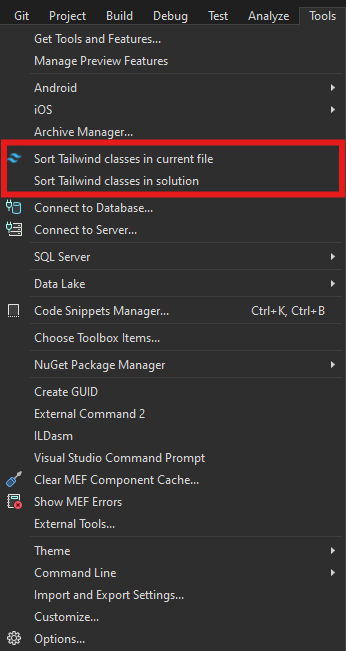
You can also manually sort by clicking the Tools menu at the top and selecting a sort option:
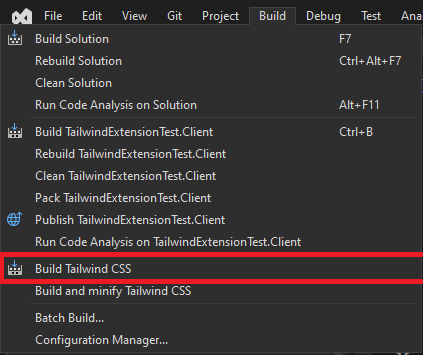
To build your Tailwind file, ensure that your input and output css files are defined. By default, a project build will trigger the Tailwind build process, but this can be manually triggered under the Build menu. Build details and errors will be logged to the Build output window:
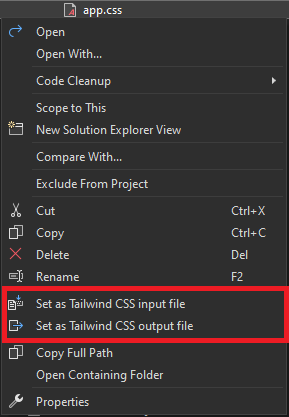
Set your configuration, build and output files by right-clicking on any .js, .ts, or .css file:
Your preferences will be stored in a tailwind.extension.json file in your project root.
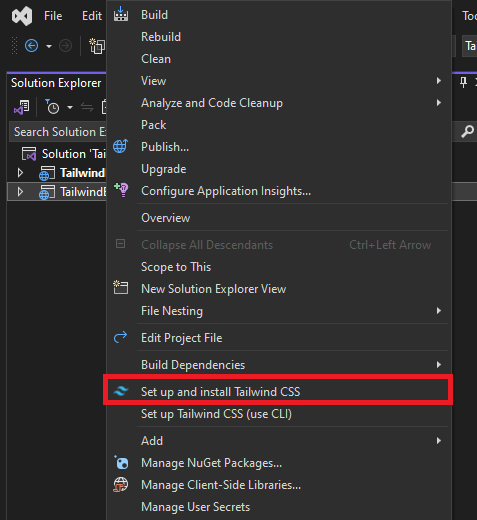
When getting started in a new project, you can import the necessary modules by right-clicking on the project node:
Using the standalone Tailwind CSS CLI:
- Specify the absolute path in Tools > Options > Tailwind CSS IntelliSense > Tailwind CLI path.
- Click 'Set up Tailwind CSS (use CLI)'
If you need to override the default build command, package.json scripts are also supported. The extension will run the build as npm run {your task}, where the task can be defined in the extension settings.
Extension settings are located in Tools > Options > Tailwind CSS IntelliSense.
If you notice that your build file is not being updated, check the Build output window to see if you have any syntax errors:
If something doesn't work as expected or you see an exception message, you can check the detailed log in the Extensions output window.
Please report any errors that you encounter!
To report issues or share feature suggestions, feel free to create an issue on GitHub.


