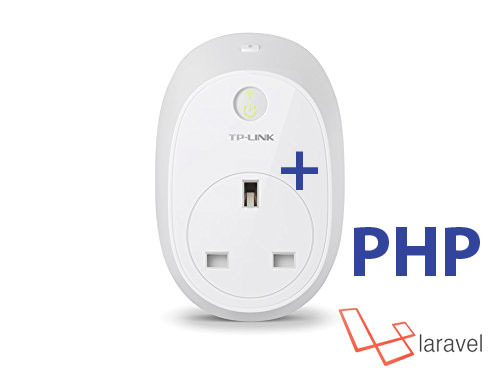
###(Bonus Laravel integration supported!!)
TPLink Smartplug is a small PHP library that allows anyone to control and access a TPLink Smartplug.
Current TPLINK models supported are
It is likely that other TPLink models will also work, but these have not been checked.
This package can be installed standalone in a regular PHP project, or can also be integrated into Laravel to make life even easier.
To install the latest version simply use composer to add it to your project using the following command:
composer require williamson/tplinksmartplug
Now Supports Laravel 5.5 auto package discovery (you do not need to do the below step if you have Laravel 5.5+)
Once the TPLink Smartplug library is installed, you need to register the library's service provider, in config/app.php:
'providers' => array(
    //...
    Williamson\TPLinkSmartplug\Laravel\TPLinkServiceProvider::class,
)By default, this library will automatically register a facade to be used in Laravel. The package checks first to ensure TPLink has not already be registered and if this is the case, will register TPLink as your quick access to the library. More examples to follow.
This package requires a config file so that you can provide the address/details of the TPLink devices you would like to control. To generate this file, run the following command:
$ php artisan vendor:publish --provider='Williamson\TPLinkSmartplug\Laravel\TPLinkServiceProvider'
This will create a TPLink.php file in your Laravel config folder. You should edit this to setup your devices.
The config file is a very simple array structured file. A config file is required for both standalone/Laravel projects. The content is similar to this:
//TPLink.php

<?php
return [
    'lamp' => [
        'ip'   => '192.168.1.100', //Or hostname eg: home.example.com
        'port' => '9999',
        'timeout' => 5, // Optional, timeout setting (how long we will try communicate with device before giving up)
        'timeout_stream' => 5, // Optional, timeout setting for stream (how long to wait for the response stream)
    ],
];
You may add as many devices as you wish, as long as you specify the IP address (or host address if required) and port number to access each one. Giving each device a name makes it easy to identify them when coding later. _(Please note that the name you give here does NOT have to match the actual name you might have assigned the device using an official app like Kasa. They do NOT have to match)
You can use the autoDiscoverTPLinkDevices method to automatically find networked devices.
You can access your device either through the TPLinkManager class (especially useful if you have multiple devices), or directly using the TPLinkDevice class.
Using the manager, allows you to specify WHICH device you would like to send your command to.
If you only have one device you may just want to use the TPDevice class by itself - but using the manager is recommended.
Depending on your style of coding you may use either the Facade or instantiate the object yourself.
The following are all similar:
//Non laravel
    $tpManager = new TPLinkManager($configArray);
    $tpDevice = $tpManager->device('lamp')

//Laravel
    //with facade
    TPLink::device('lamp')

    //without facade
    $tpDevice = app('tplink')->device('lamp');
    $tpDevice = app(TPLinkManager::class)->device('lamp');
Once you have your device ready, you can then send it a command.
All commands for the smartplug have been created in a separate class to ease use and allow for more to be added easily in the future.
To send a command, simply call the sendCommand method on the TPDevice object and pass in the command required as a parameter.
For example, to get the current status of the smartplug
//Non laravel

    $tpDevice->sendCommand(TPLinkCommand::systemInfo());


//Laravel
    //with facade
    TPLink::device('lamp')->sendCommand(TPLinkCommand::systemInfo());

    //without facade
    $tpDevice->sendCommand(TPLinkCommand::systemInfo());
If a command requires a parameter, provide that as well:
//Non laravel

    $tpDevice->sendCommand(TPLinkCommand::setLED(false));


//Laravel
    //with facade
    TPLink::device('lamp')->sendCommand(TPLinkCommand::setLED(false));

    //without facade
$tpDevice->sendCommand(TPLinkCommand::setLED(false));You can search your local network for devices using TPLinkManager, using the method autoDiscoverTPLinkDevices
all found devices will be added to the 'TPLinkManager' config automatically, exposed using deviceList().
You must provide the IP range you wish to scan, use it as follows:
//Non laravel
    $tpLinkManager->autoDiscoverTPLinkDevices('192.168.0.*');

//Laravel
    // with facade
    TPLink::autoDiscoverTPLinkDevices('192.168.0.*');

    // without facade
    app('tplink')->autoDiscoverTPLinkDevices('192.168.0.*');
    app(TPLinkManager::class)->autoDiscoverTPLinkDevices('192.168.0.*');
The auto discovery command will take a while to scan, once completed you can use deviceList() method to view the new configuration and any found devices.
//Non laravel
    $tpLinkManager->deviceList();

//Laravel
    // with facade
    $devices = TPLink::deviceList();

    // without facade
    $devices = app('tplink')->deviceList();
$devices = app(TPLinkManager::class)->deviceList();There is one command that is called directly on the TPLinkDevice and that is the togglePower() method.
If you only wish to toggle the current power state of the plug, use it as follows:
//Non laravel

    $tpDevice->togglePower();


//Laravel
    //with facade
    TPLink::device('lamp')->togglePower();

    //without facade
    $tpDevice->togglePower();
There are a large number of commands in the TPLinkCommand class. Please read the docblock comments for explanations and requirements for each one.
The current list of commands available to use are:
systemInfo
powerOn
powerOff
setLED
setDeviceAlias
setMacAddress
setDeviceId
setHardwareId
setLocation
checkUboot
getDeviceIcon
getDownloadState
checkConfig
flashFirmware
downloadFirmware
setTestMode
reboot
reset
cloudInfo
cloudFirmwareList
cloudSetServerUrl
cloudConnectWithAccount
cloudUnregisterDevice
wlanScan
wlanConnectTo
getTime
getTimezone
setTimeAndTimeZone
emeterRealtimeReading
emeterGainSettings
emeterSetGains
emeterStartCalibration
emeterStatsMonth
emeterStatsYear
emeterStatsWipeAll
scheduleNext
scheduleRuleList
scheduleRuleCreate
scheduleRuleEdit
scheduleRuleDelete
scheduleRuleWipeAll
scheduleRuntimeStatsWipeAll
countdownRuleList
countdownRuleCreate
countdownRuleEdit
countdownRuleDelete
countdownRuleWipeAll
antitheftRuleList
antitheftRuleCreate
antitheftRuleEdit
antitheftRuleDelete
antitheftRuleWipeAll
Any issues, feedback, suggestions or questions please use issue tracker here.
- softScheck (Who did the reverse engineering and provided the secrets on how to talk to the Smartplug.)
- Jonathan Williamson
- Syed Irfaq R. For the idea behind how to manage multiple devices.
- Shane Rutter Various features such as Auto-Discovery
This project and its author is neither associated, nor affiliated with TP-LINK in anyway. See License section for more details.
This project is released under the MIT License.
© 2017 Jonathan Williamson, All rights reserved.
