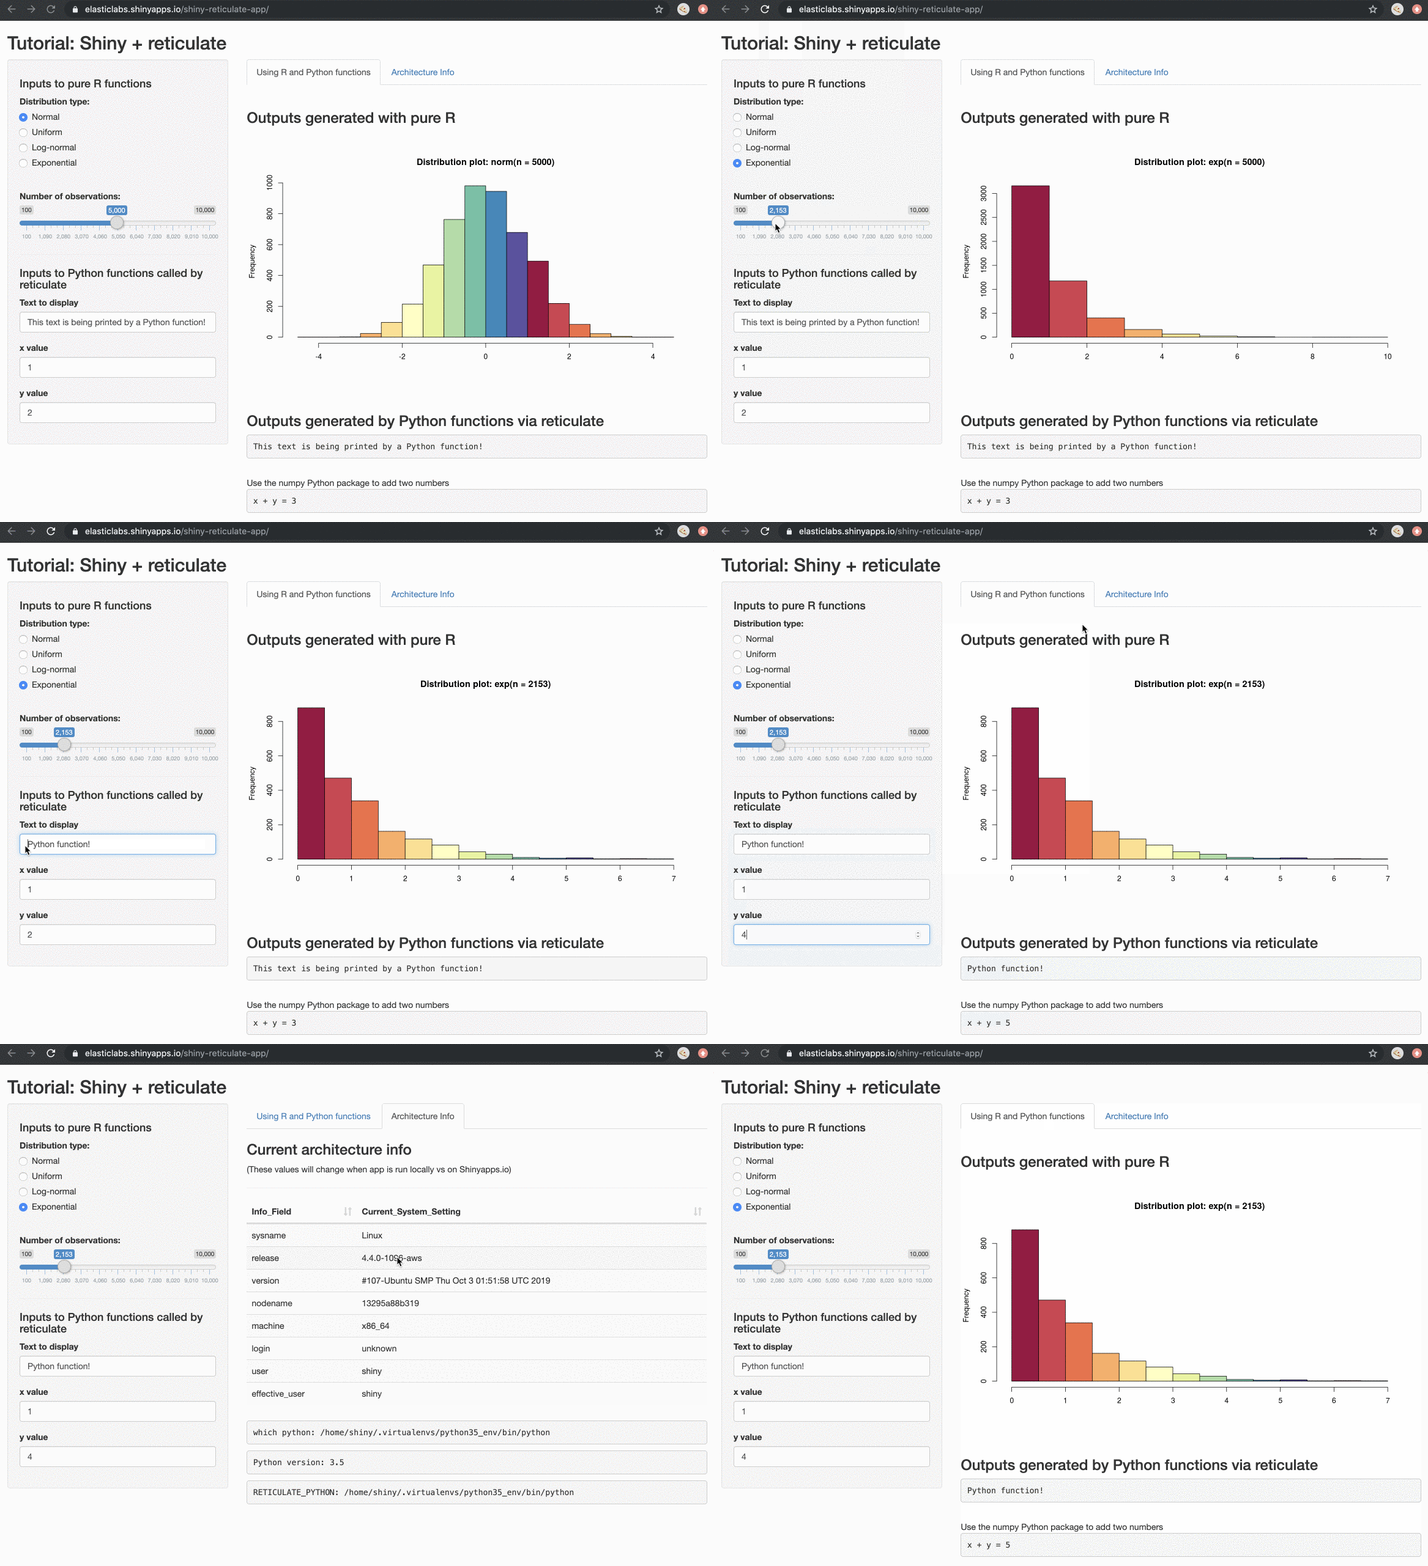
The reticulate package from RStudio allows you to incorporate Python functions and scripts into your R code. Inspired by the many questions online around writing and deploying Shiny apps that use the reticulate package, I created this app as an end-to-end example.
Note that this app does something a little unusual: it sets a few relevant environment variables in the .Rprofile file. The purpose of the is to make this demonstration fully self-contained, allowing this app to be run in 3 different environments (locally, on shinyapps.io, and on RStudio Connect) without any modification. Section 4 below describes managing env variables in RStudio Connect. However, please remember that an .Rprofile file should not be used for credentials, secrets, API keys, etc! And if you have creds in an .Rprofile or an .Renviron file, don't check them in to git as clear text.
-
How to configure reticulate virtual environments for use locally and on shinyapps.io. (This example uses Python 3 but can be modified for Python 2, if desired.)
-
How to deploy to shinyapps.io
-
How to confirm that your app deployed on shinyapps.io is using the desired version of Python
-
How to deploy to RStudio Connect
See it in action: A live version deployed to shinyapps.io and using Python 3 can be seen here!
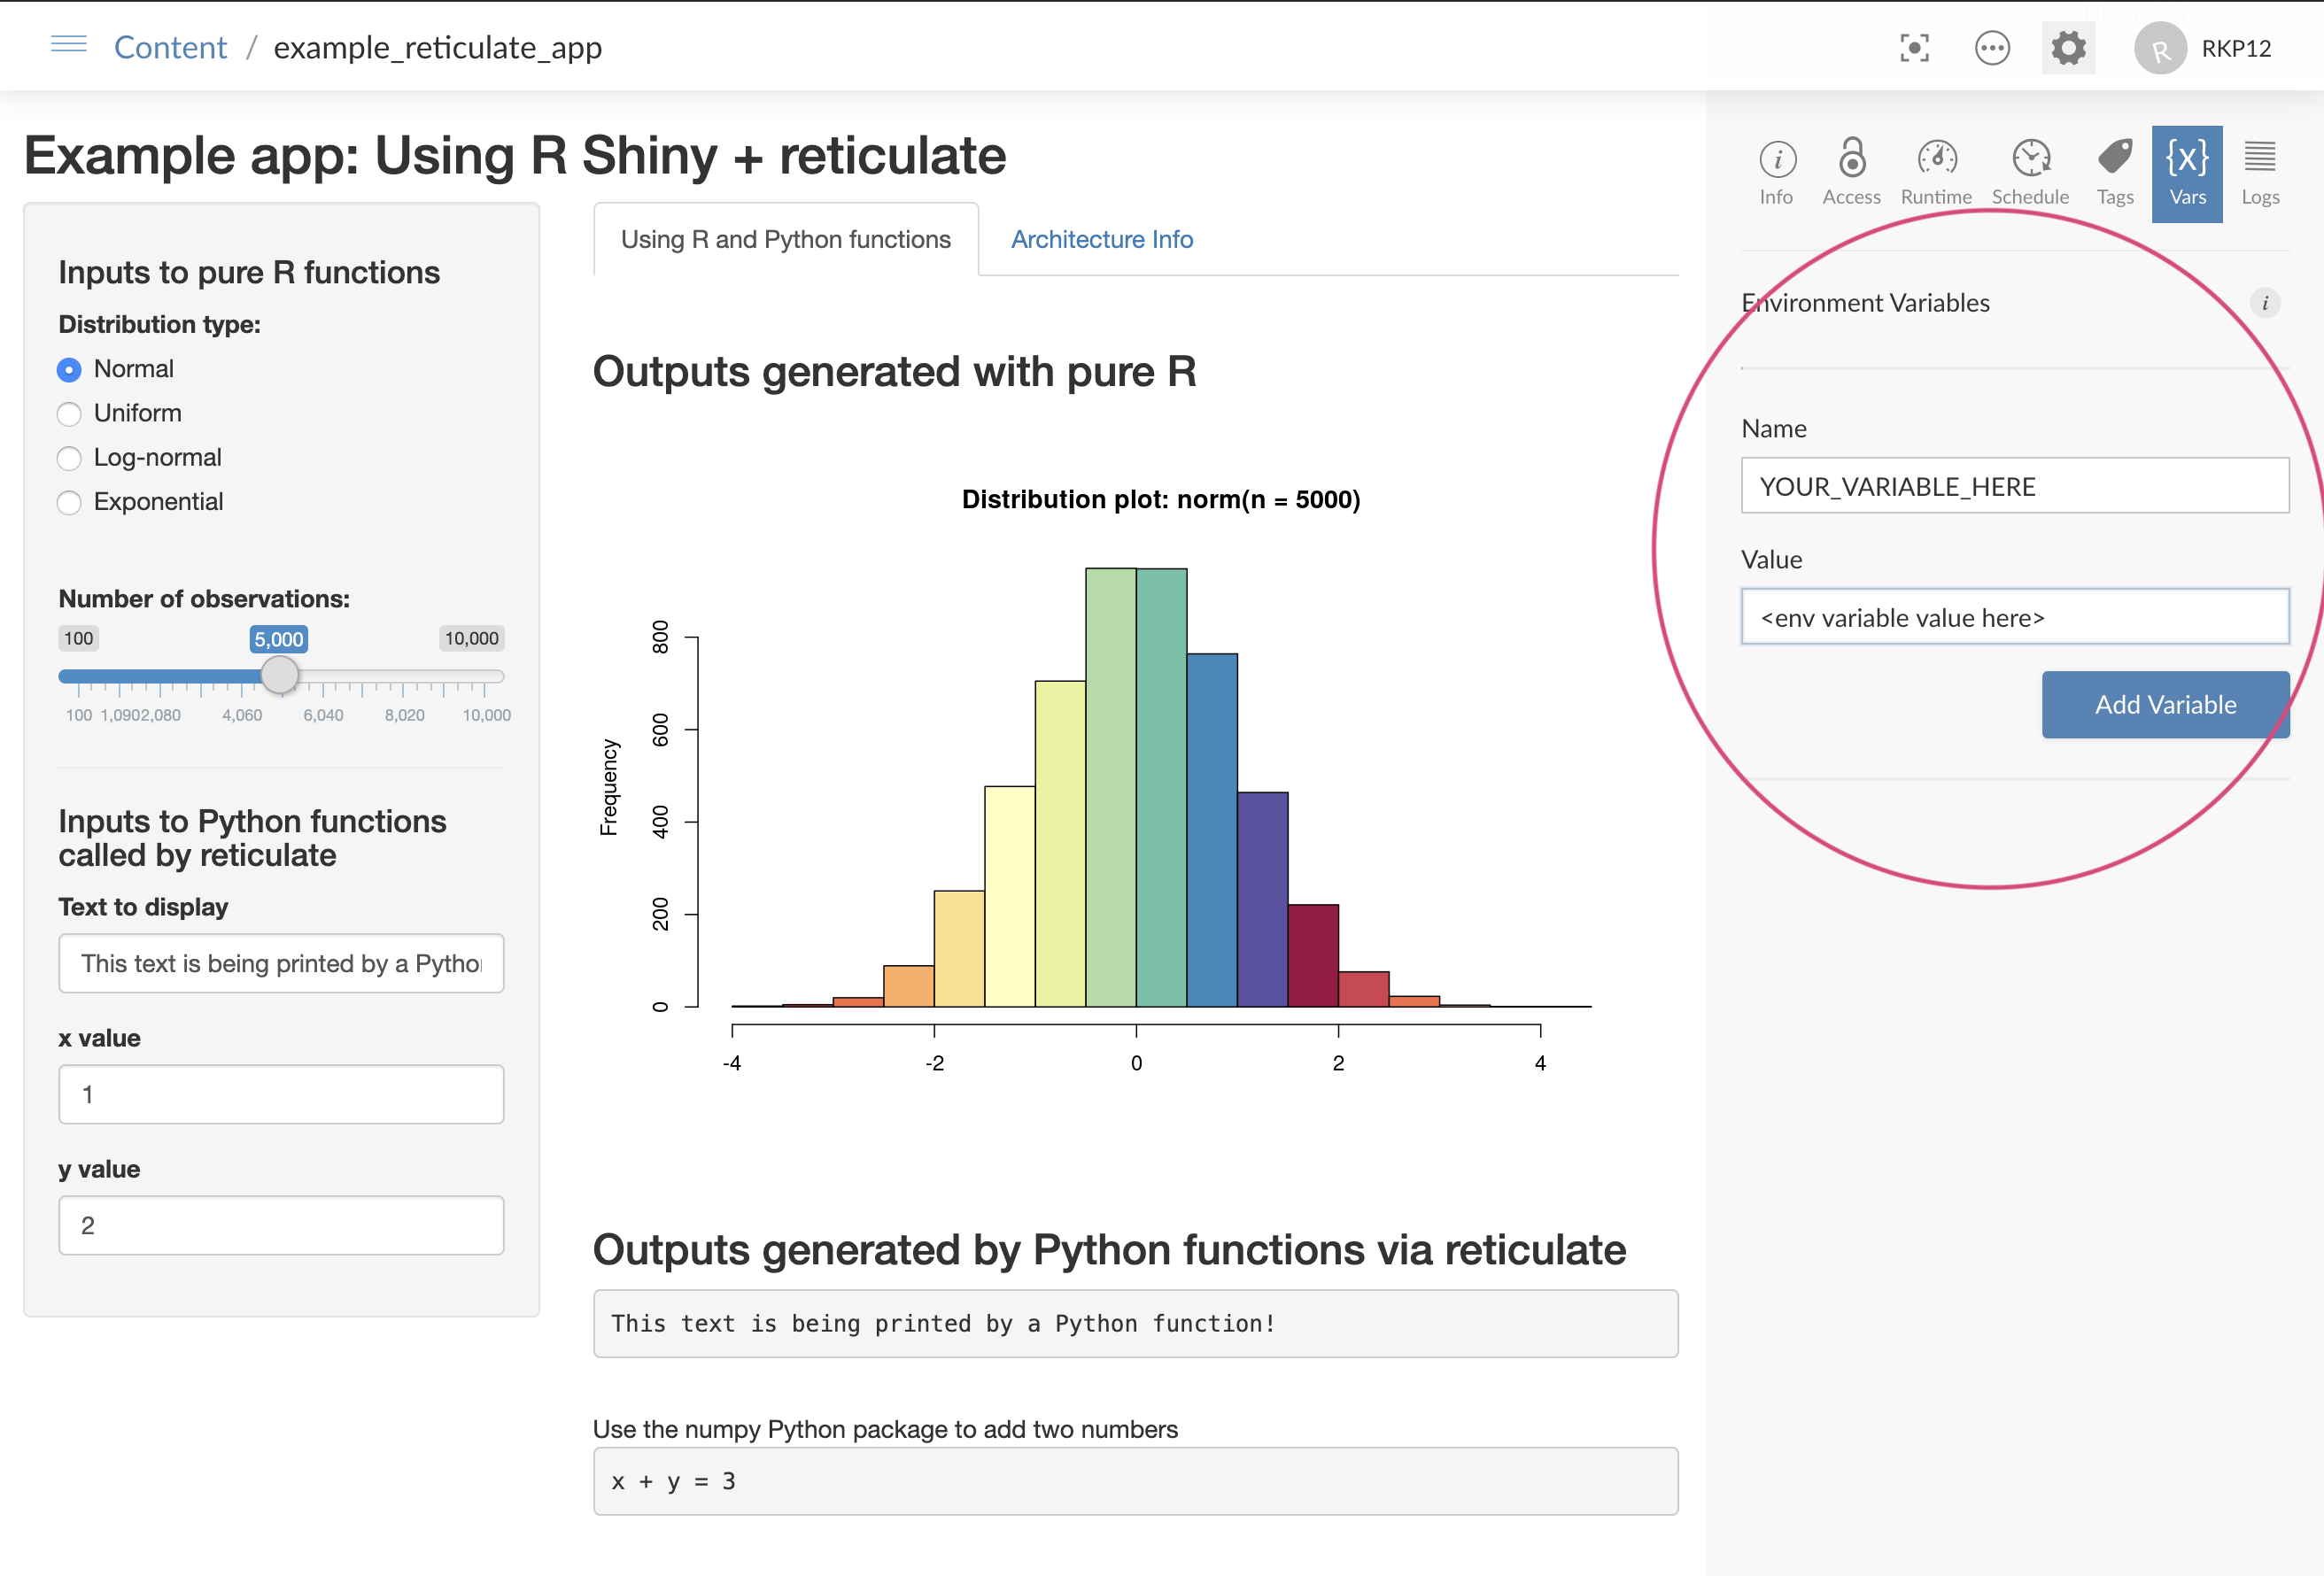
The demo app example contains two tabs. The first tab demonstrates some R and Python functions being used to make a plot and print some text. The second tab displays a table summarizing the architecture information for the machine running the app.
To clone this project, in a terminal, run:
git clone https://github.com/ranikay/shiny-reticulate-app.git
cd shiny-reticulate-app/
Install Python and the required packages:
-
Python >= 3.5
-
Python packages: virtualenv and numpy
To install Python packages, in a terminal, run:
pip install virtualenv
pip install numpy
Install R and the required packages:
-
R >= 3.6
-
R packages: shiny, DT, RColorBrewer, reticulate, shinycssloaders
To install the above packages, in the R console, run:
install.packages("shiny")
install.packages("DT")
install.packages("RColorBrewer")
install.packages("reticulate")
Notes on reticulate: the RStudio team has made some changes to
reticulaterecently, including changes that enable Python 3 virtual environments on shinyapps.io, so make sure to use reticulate>=1.14.
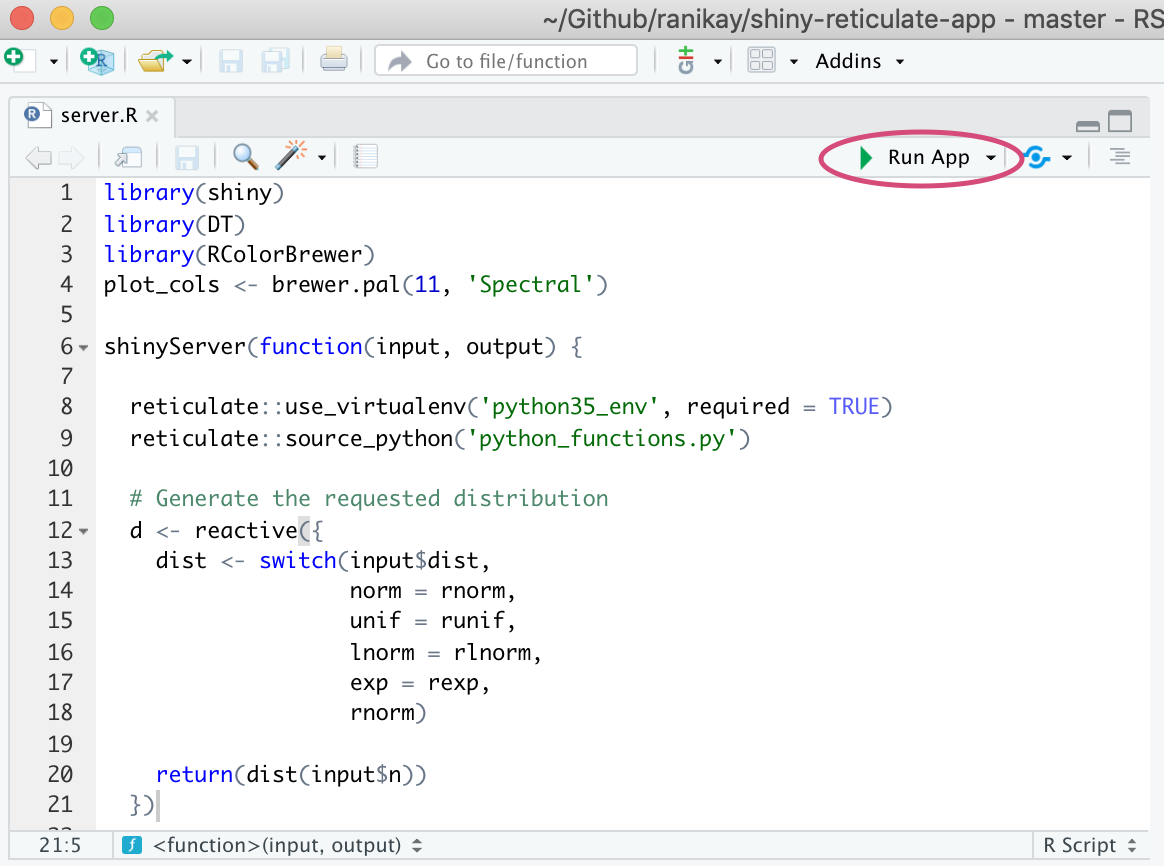
In RStudio, open the file server.R and click Run App to view your app.
For the Python functionality demonstrated on the first tab of the app, the app is using a Python 3 virtual environment named in the .Rprofile file. The app knows to use this virtual environment based on line 20 in server.R.
While running the app, we can click on the Architecture Info tab to confirm that the app is using the correct version of Python.
Deploying your app to shinyapps.io requires the rsconnect package and a shinyapps.io account. If you haven't deployed an app to shinyapps.io before, instructions for creating an account and configuring rsconnect can be found here.
Begin by running the app locally. In RStudio, open the file server.R and click Run App to view your app.
Click Publish in the upper right, confirm that the shinyapps.io account information is correct and name your app. Then click Publish in the pop-up window to send your app to the shinyapps.io cloud servers.
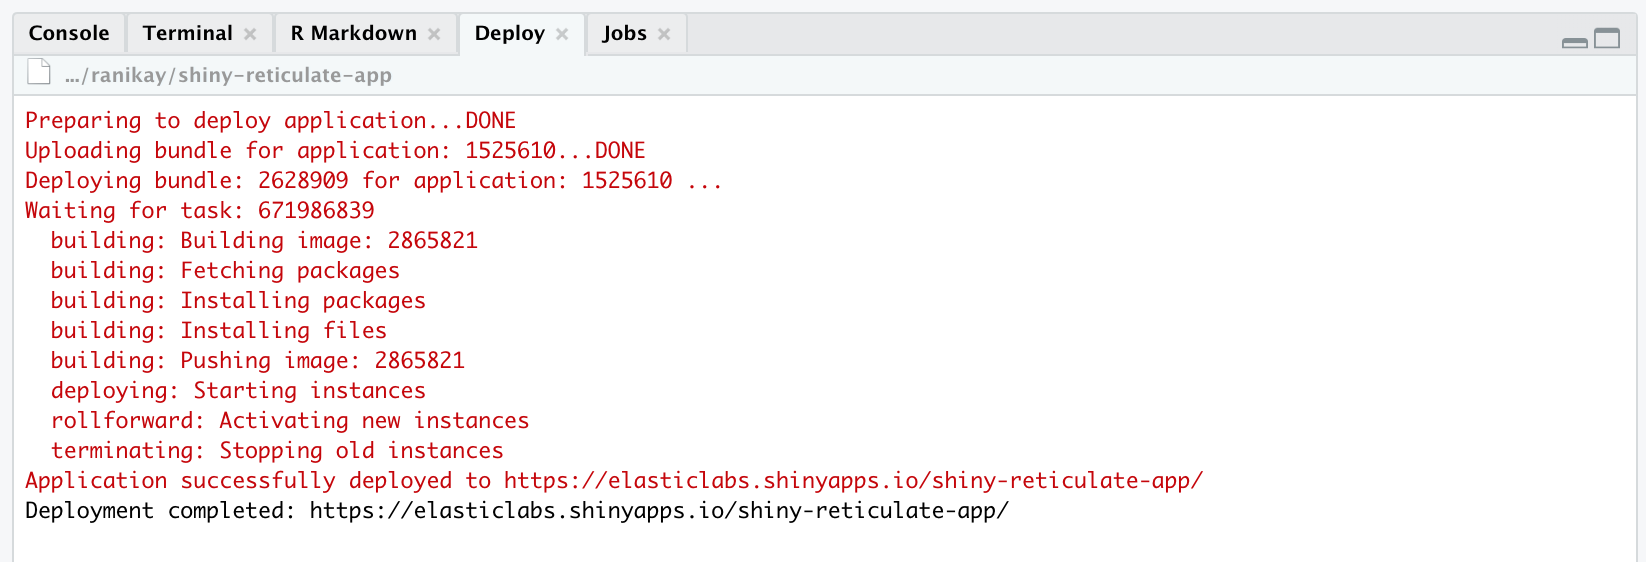
A successful deploy will produce a deployment log similar to this in the "Deploy" window in RStudio:
After deploying, visit the url shown in the deployment log in your browser to view the app running on shinyapps.io. Go to the Architecture Info tab to confirm that the desired version of Python is being used. For this tutorial app deployed to shinyapps.io, this is Python 3.5.
Similar to to shinyapps.io deployment, deploying to RStudio Connect requires the rsconnect package and an RStudio Connect account. Once again, you'll begin by running the app locally. In RStudio, open the file server.R and click Run App to view your app.
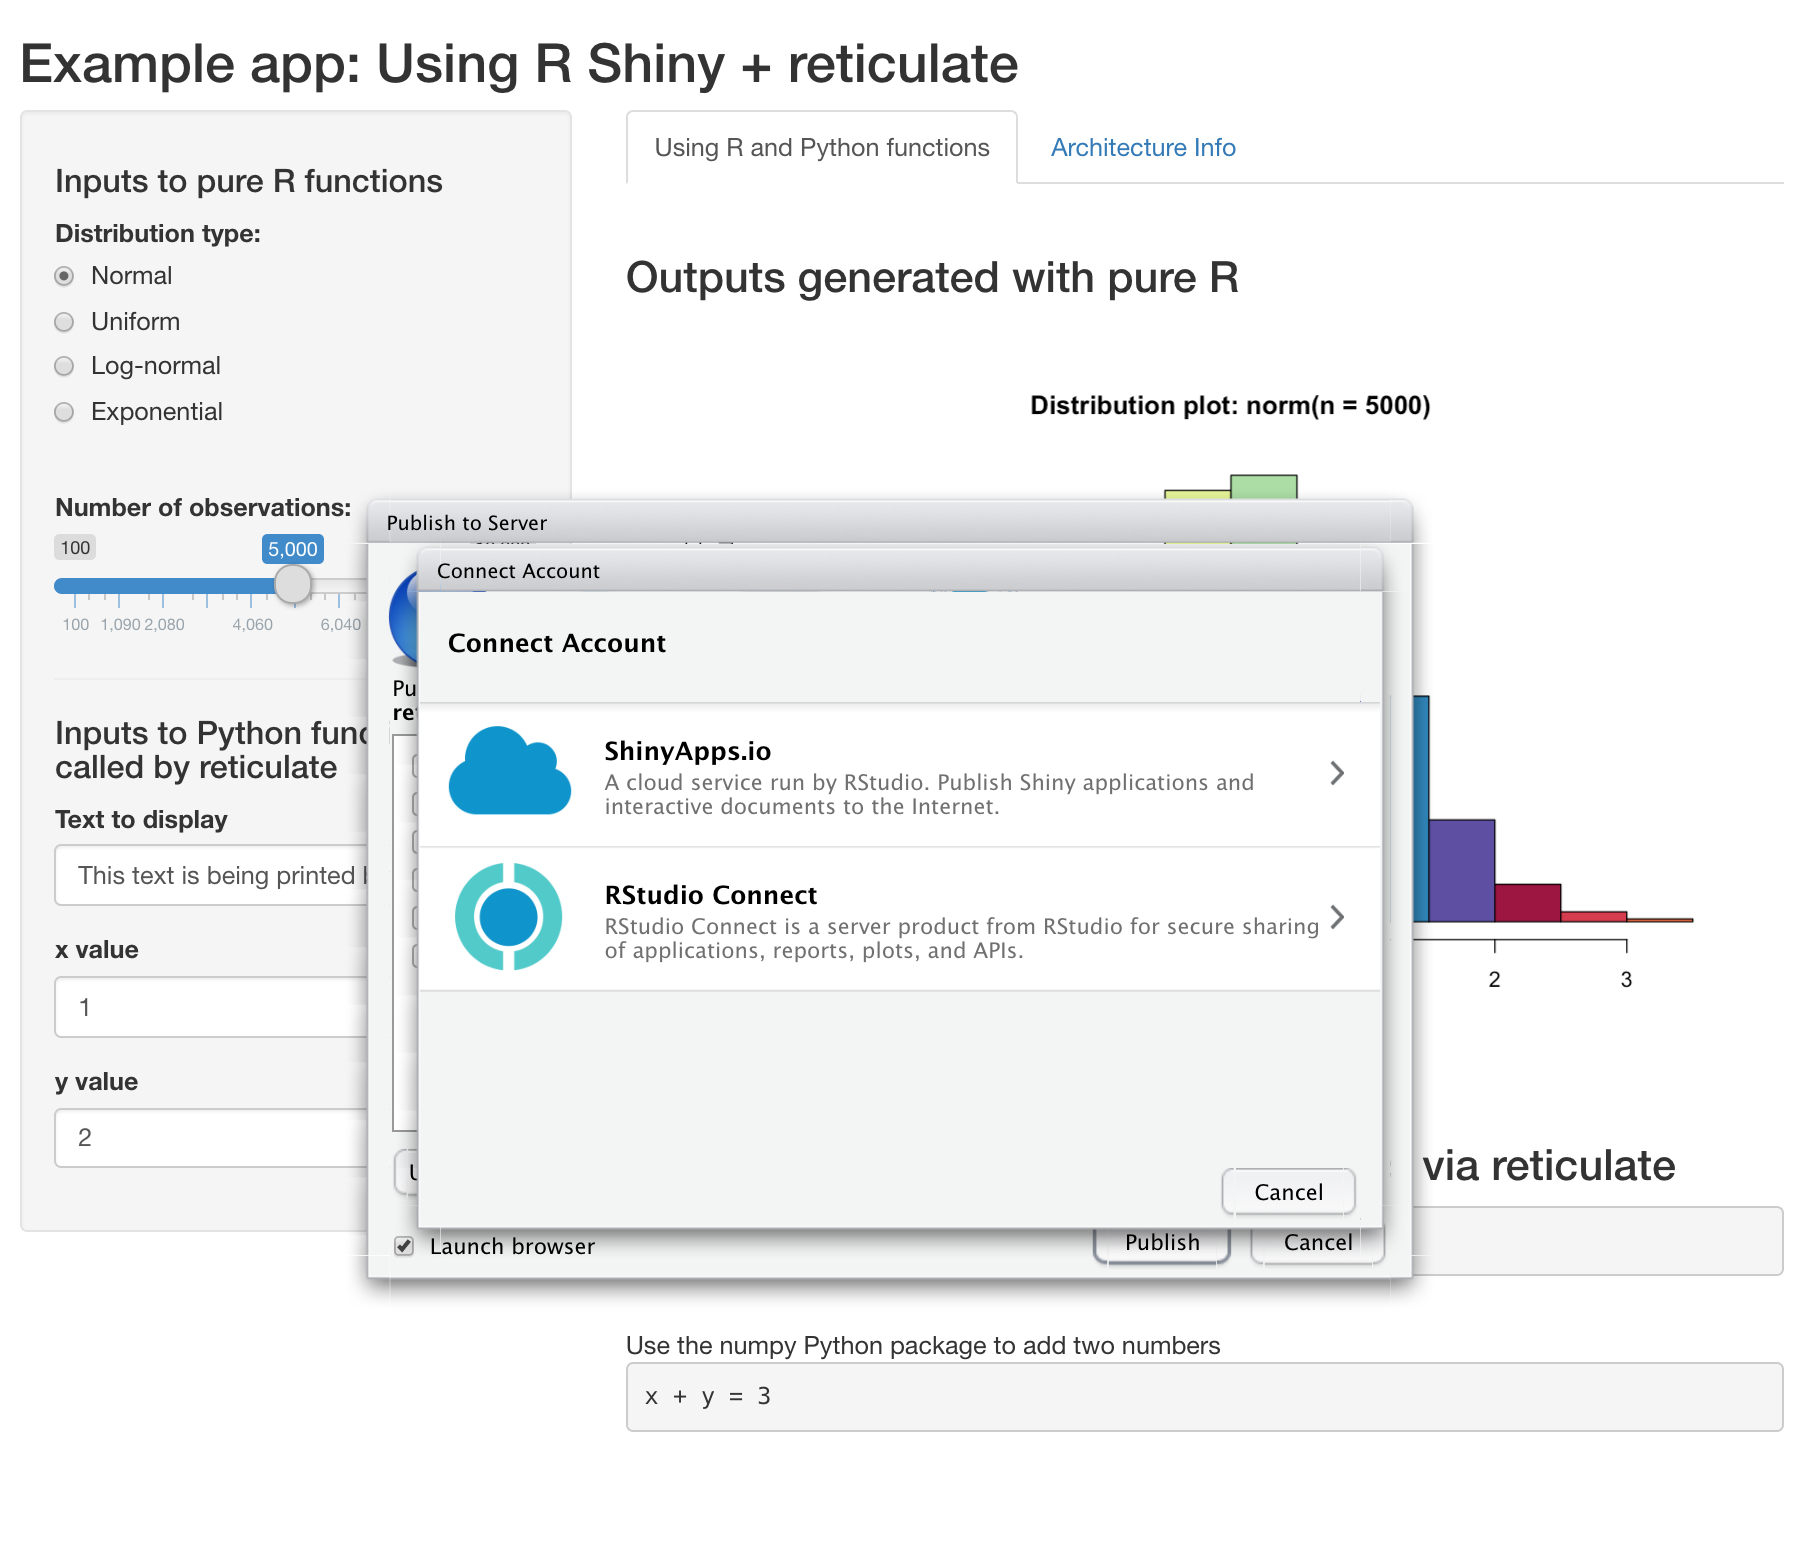
Click Publish in the upper right and select the RStudio Connect option:
Then, log in using the URL for your RStudio Connect server and click Publish in the pop-up window to deploy!
Unlike shinyapps.io, RStudio Connect allows you to set environment variables through the user interface:
This is a great option, especially for secrets, credentials, API keys, and other sensitive information.
If you are having issues deploying your app to shinyapps.io, double check that you have completed all steps in the first-time set-up. Confirm that the .Rprofile file is included in your project's directory. This file sets the RETICULATE_PYTHON environment variable, which tells reticulate where to locate the Python virtual environment on the shinyapps.io servers.
If you visit the app url on shinyapps.io and see "Disconnected", log in to shinyapps.io and view the application logs for errors.
Some common issues and how to solve them:
ERROR: The requested version of Python ('/usr/bin/python3') cannot be used, as another version of Python ('/usr/bin/python') has already been initialized.
When you run library(reticulate), the reticulate package will try to initialize a version of Python, which may not be the version that you intend to use. To avoid this, in a fresh session, run set-up commands without importing the reticulate library with the :: syntax like this, for example:
reticulate::virtualenv_create(envname = 'example_env_name',
                              python= '/usr/bin/python3')
Similarly, if you're setting the RETICULATE_PYTHON variable, you must do so before running library(reticulate).
My app is deployed to shinyapps.io but shows that it's using Python 2.7
Confirm that the .Rprofile file is included in your project's directory and double check the name of the virtualenv.
To confirm that the virtual environment created is indeed using Python 3.5, you can use the py_config() function in the reticulate package:
reticulate::py_config()

  python:         /Users/rani/.virtualenvs/example_env_name/bin/python
  libpython:      /Library/Frameworks/Python.framework/Versions/3.5/lib/python3.5/config-3.5m/libpython3.5.dylib
  pythonhome:     /Library/Frameworks/Python.framework/Versions/3.5:/Library/Frameworks/Python.framework/Versions/3.5
  virtualenv:     /Users/rani/.virtualenvs/example_env_name/bin/activate_this.py
  version:        3.5.0 (v3.5.0:374f501f4567, Sep 12 2015, 11:00:19)  [GCC 4.2.1 (Apple Inc. build 5666) (dot 3)]
  numpy:          /Users/rani/.virtualenvs/example_env_name/lib/python3.5/site-packages/numpy
  numpy_version:  1.17.4

  NOTE: Python version was forced by use_python function
On shinyapps.io, I see the warning: using reticulate but python was not specified; will use python at /usr/bin/python Did you forget to set the RETICULATE_PYTHON environment variable in your .Rprofile before publishing?
Confirm that the .Rprofile file is included in your project's directory and was deployed along with server.R and ui.R to shinyapps.io. This file sets the RETICULATE_PYTHON environment variable, which tells reticulate where to locate the Python virtual environment on the shinyapps.io servers.
For additional information about reticulate, check out these resources:
-
The
reticulateofficial documentation -
The
reticulaterepository on Github
If you're running into trouble using this demo app, feel free to open an issue and I'll do my best to help! I'll keep adding to the Troubleshooting section as I'm compiling other common issues.
Big thank you to the RStudio team who developed the reticulate package. It's a powerful tool and I've really enjoyed using it :)
And a warm thank you to @jjallaire and @kevinushey who made the recent fixes to reticulate that made it possible to use Python 3 virtual environments on shinyapps.io.
