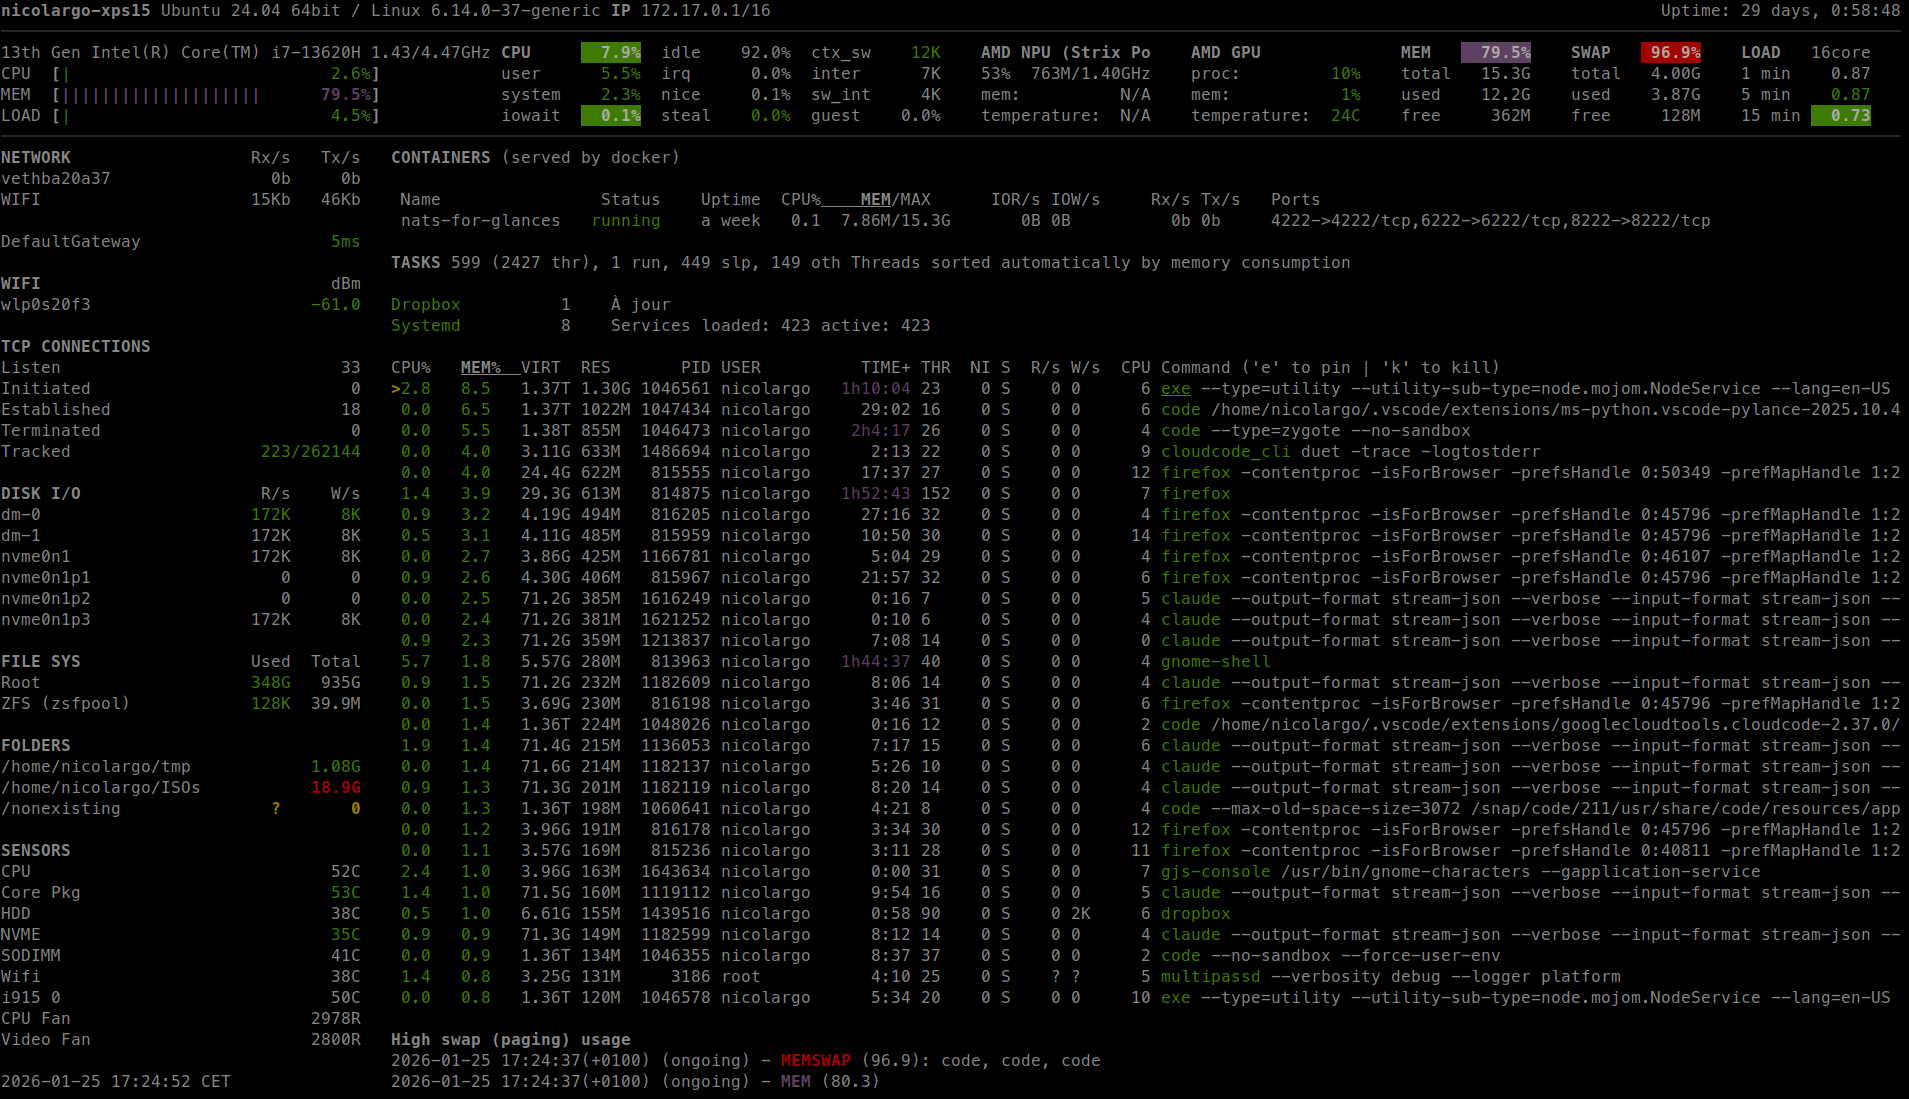
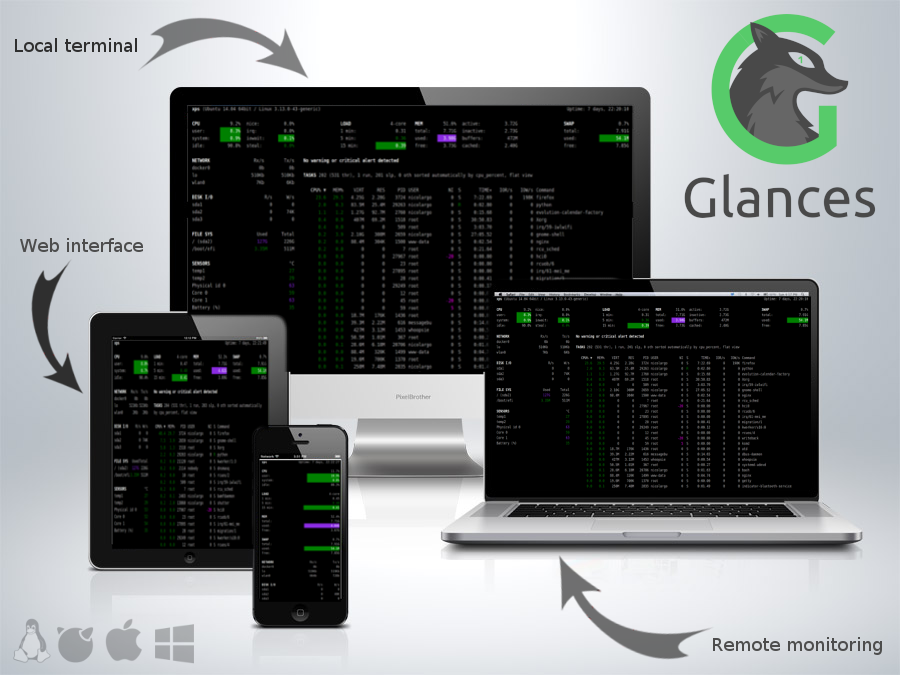
Glances is an open-source system cross-platform monitoring tool. It allows real-time monitoring of various aspects of your system such as CPU, memory, disk, network usage etc. It also allows monitoring of running processes, logged in users, temperatures, voltages, fan speeds etc. It also supports container monitoring, it supports different container management systems such as Docker, LXC. The information is presented in an easy to read dashboard and can also be used for remote monitoring of systems via a web interface or command line interface. It is easy to install and use and can be customized to show only the information that you are interested in.
In client/server mode, remote monitoring could be done via terminal, Web interface or API (XML-RPC and RESTful). Stats can also be exported to files or external time/value databases, CSV or direct output to STDOUT.
Glances is written in Python and uses libraries to grab information from your system. It is based on an open architecture where developers can add new plugins or exports modules.
You can help me to achieve my goals of improving this open-source project or just say "thank you" by:
- sponsor me using one-time or monthly tier Github sponsors page
- send me some pieces of bitcoin: 185KN9FCix3svJYp7JQM7hRMfSKyeaJR4X
- buy me a gift on my wishlist page
Any and all contributions are greatly appreciated.
Glances is developed in Python. A minimal Python version 3.9 or higher should be installed on your system.
Note for Python 2 users
Glances version 4 or higher do not support Python 2 (and Python 3 < 3.9). Please uses Glances version 3.4.x if you need Python 2 support.
Dependencies:
psutil(better with latest version)defusedxml(in order to monkey patch xmlrpc)packaging(for the version comparison)windows-curses(Windows Curses implementation) [Windows-only]
Optional dependencies:
batinfo(for battery monitoring)bernhard(for the Riemann export module)cassandra-driver(for the Cassandra export module)chevron(for the action script feature)docker(for the Containers Docker monitoring support)elasticsearch(for the Elastic Search export module)FastAPIandUvicorn(for Web server mode)graphitesender(For the Graphite export module)hddtemp(for HDD temperature monitoring support) [Linux-only]influxdb(for the InfluxDB version 1 export module)influxdb-client(for the InfluxDB version 2 export module)jinja2(for templating, used under the hood by FastAPI)kafka-python(for the Kafka export module)netifaces2(for the IP plugin)nvidia-ml-py(for the GPU plugin)pycouchdb(for the CouchDB export module)pika(for the RabbitMQ/ActiveMQ export module)podman(for the Containers Podman monitoring support)potsdb(for the OpenTSDB export module)prometheus_client(for the Prometheus export module)pygal(for the graph export module)pymdstat(for RAID support) [Linux-only]pymongo(for the MongoDB export module)pysnmp-lextudio(for SNMP support)pySMART.smartx(for HDD Smart support) [Linux-only]pyzmq(for the ZeroMQ export module)requests(for the Ports, Cloud plugins and RESTful export module)sparklines(for the Quick Plugin sparklines option)statsd(for the StatsD export module)wifi(for the wifi plugin) [Linux-only]zeroconf(for the autodiscover mode)
There are several methods to test/install Glances on your system. Choose your weapon!
Glances is on PyPI. By using PyPI, you will be using the latest
stable version.
To install Glances, simply use the pip command line.
Warning: on modern Linux operating systems, you may have an externally-managed-environment
error message when you try to use pip. In this case, go to the the PipX section below.
pip install --user glancesNote: Python headers are required to install psutil, a Glances
dependency. For example, on Debian/Ubuntu the simplest is
apt install python3-psutil or alternatively need to install first
the python-dev package and gcc (python-devel on Fedora/CentOS/RHEL).
For Windows, just install psutil from the binary installation file.
By default, Glances is installed without the Web interface dependencies. To install it, use the following command:
pip install --user 'glances[web]'For a full installation (with all features, see features list bellow):
pip install --user 'glances[all]'Features list:
- all: install dependencies for all features
- action: install dependencies for action feature
- browser: install dependencies for Glances centram browser
- cloud: install dependencies for cloud plugin
- containers: install dependencies for container plugin
- export: install dependencies for all exports modules
- gpu: install dependencies for GPU plugin
- graph: install dependencies for graph export
- ip: install dependencies for IP public option
- raid: install dependencies for RAID plugin
- sensors: install dependencies for sensors plugin
- smart: install dependencies for smart plugin
- snmp: install dependencies for SNMP
- sparklines: install dependencies for sparklines option
- web: install dependencies for Webserver (WebUI) and Web API
- wifi: install dependencies for Wifi plugin
To upgrade Glances to the latest version:
pip install --user --upgrade glancesThe current develop branch is published to the test.pypi.org package index. If you want to test the develop version (could be instable), enter:
pip install --user -i https://test.pypi.org/simple/ GlancesInstall PipX on your system (apt install pipx on Ubuntu).
Install Glances (with all features):
pipx install 'glances[all]'The glances script will be installed in the ~/.local/bin folder.
Glances Docker images are available. You can use it to monitor your server and all your containers !
Get the Glances container:
docker pull nicolargo/glances:latest-fullThe following tags are available:
- latest-full for a full Alpine Glances image (latest release) with all dependencies
- latest for a basic Alpine Glances (latest release) version with minimal dependencies (FastAPI and Docker)
- dev for a basic Alpine Glances image (based on development branch) with all dependencies (Warning: may be instable)
- ubuntu-latest-full for a full Ubuntu Glances image (latest release) with all dependencies
- ubuntu-latest for a basic Ubuntu Glances (latest release) version with minimal dependencies (FastAPI and Docker)
- ubuntu-dev for a basic Ubuntu Glances image (based on development branch) with all dependencies (Warning: may be instable)
Run last version of Glances container in console mode:
docker run --rm -e TZ="${TZ}" -v /var/run/docker.sock:/var/run/docker.sock:ro -v /run/user/1000/podman/podman.sock:/run/user/1000/podman/podman.sock:ro --pid host --network host -it nicolargo/glances:latest-fullBy default, the /etc/glances/glances.conf file is used (based on docker-compose/glances.conf).
Additionally, if you want to use your own glances.conf file, you can create your own Dockerfile:
FROM nicolargo/glances:latest
COPY glances.conf /root/.config/glances/glances.conf
CMD python -m glances -C /root/.config/glances/glances.conf $GLANCES_OPT
Alternatively, you can specify something along the same lines with docker run options (notice the GLANCES_OPT environment variable setting parameters for the glances startup command):
docker run -e TZ="${TZ}" -v $HOME/.config/glances/glances.conf:/glances.conf:ro -v /var/run/docker.sock:/var/run/docker.sock:ro -v /run/user/1000/podman/podman.sock:/run/user/1000/podman/podman.sock:ro --pid host -e GLANCES_OPT="-C /glances.conf" -it nicolargo/glances:latest-fullWhere $HOME/.config/glances/glances.conf is a local directory containing your glances.conf file.
Run the container in Web server mode:
docker run -d --restart="always" -p 61208-61209:61208-61209 -e TZ="${TZ}" -e GLANCES_OPT="-w" -v /var/run/docker.sock:/var/run/docker.sock:ro -v /run/user/1000/podman/podman.sock:/run/user/1000/podman/podman.sock:ro --pid host nicolargo/glances:latest-fullFor a full list of options, see the Glances Docker documentation page.
Glances is available on many Linux distributions, so you should be able to install it using your favorite package manager. Be aware that when you use this method the operating system package for Glances may not be the latest version and only basics plugins are enabled.
Note: The Debian package (and all other Debian-based distributions) do
not include anymore the JS statics files used by the Web interface
(see issue2021). If you want to add it to your Glances installation,
follow the instructions: issue2021comment. In Glances version 4 and
higher, the path to the statics file is configurable (see issue2612).
To install the binary package:
# pkg install py39-glancesTo install Glances from ports:
# cd /usr/ports/sysutils/py-glances/
# make install cleanIf you do not want to use the glancesautoinstall script, follow this procedure.
macOS users can install Glances using Homebrew or MacPorts.
$ brew install glances$ sudo port install glancesInstall Python for Windows (Python 3.4+ ship with pip) and then run the following command:
$ pip install glancesYou need a rooted device and the Termux application (available on the Google Play Store).
Start Termux on your device and enter:
$ apt update
$ apt upgrade
$ apt install clang python
$ pip install fastapi uvicorn jinja2
$ pip install glances
And start Glances:
$ glancesYou can also run Glances in server mode (-s or -w) in order to remotely monitor your Android device.
To install Glances from source:
$ pip install https://github.com/nicolargo/glances/archive/vX.Y.tar.gzNote: Python headers are required to install psutil.
An awesome Chef cookbook is available to monitor your infrastructure:
https://supermarket.chef.io/cookbooks/glances (thanks to Antoine Rouyer)
You can install Glances using Puppet: https://github.com/rverchere/puppet-glances
A Glances Ansible role is available: https://galaxy.ansible.com/zaxos/glances-ansible-role/
For the standalone mode, just run:
$ glancesFor the Web server mode, run:
$ glances -wand enter the URL http://<ip>:61208 in your favorite web browser.
For the client/server mode, run:
$ glances -son the server side and run:
$ glances -c <ip>on the client one.
You can also detect and display all Glances servers available on your network or defined in the configuration file:
$ glances --browserYou can also display raw stats on stdout:
$ glances --stdout cpu.user,mem.used,load
cpu.user: 30.7
mem.used: 3278204928
load: {'cpucore': 4, 'min1': 0.21, 'min5': 0.4, 'min15': 0.27}
cpu.user: 3.4
mem.used: 3275251712
load: {'cpucore': 4, 'min1': 0.19, 'min5': 0.39, 'min15': 0.27}
...
or in a CSV format thanks to the stdout-csv option:
$ glances --stdout-csv now,cpu.user,mem.used,load
now,cpu.user,mem.used,load.cpucore,load.min1,load.min5,load.min15
2018-12-08 22:04:20 CEST,7.3,5948149760,4,1.04,0.99,1.04
2018-12-08 22:04:23 CEST,5.4,5949136896,4,1.04,0.99,1.04
...
or in a JSON format thanks to the stdout-json option (attribute not supported in this mode in order to have a real JSON object in output):
$ glances --stdout-json cpu,mem
cpu: {"total": 29.0, "user": 24.7, "nice": 0.0, "system": 3.8, "idle": 71.4, "iowait": 0.0, "irq": 0.0, "softirq": 0.0, "steal": 0.0, "guest": 0.0, "guest_nice": 0.0, "time_since_update": 1, "cpucore": 4, "ctx_switches": 0, "interrupts": 0, "soft_interrupts": 0, "syscalls": 0}
mem: {"total": 7837949952, "available": 2919079936, "percent": 62.8, "used": 4918870016, "free": 2919079936, "active": 2841214976, "inactive": 3340550144, "buffers": 546799616, "cached": 3068141568, "shared": 788156416}
...
and RTFM, always.
For complete documentation have a look at the readthedocs website.
If you have any question (after RTFM!), please post it on the official Q&A forum.
Glances can export stats to: CSV file, JSON file, InfluxDB, Cassandra, CouchDB,
OpenTSDB, Prometheus, StatsD, ElasticSearch, RabbitMQ/ActiveMQ,
ZeroMQ, Kafka, Riemann, Graphite and RESTful server.
If you want to contribute to the Glances project, read this wiki page.
There is also a chat dedicated to the Glances developers:
Nicolas Hennion (@nicolargo) <[email protected]>

Glances is distributed under the LGPL version 3 license. See COPYING for more details.


