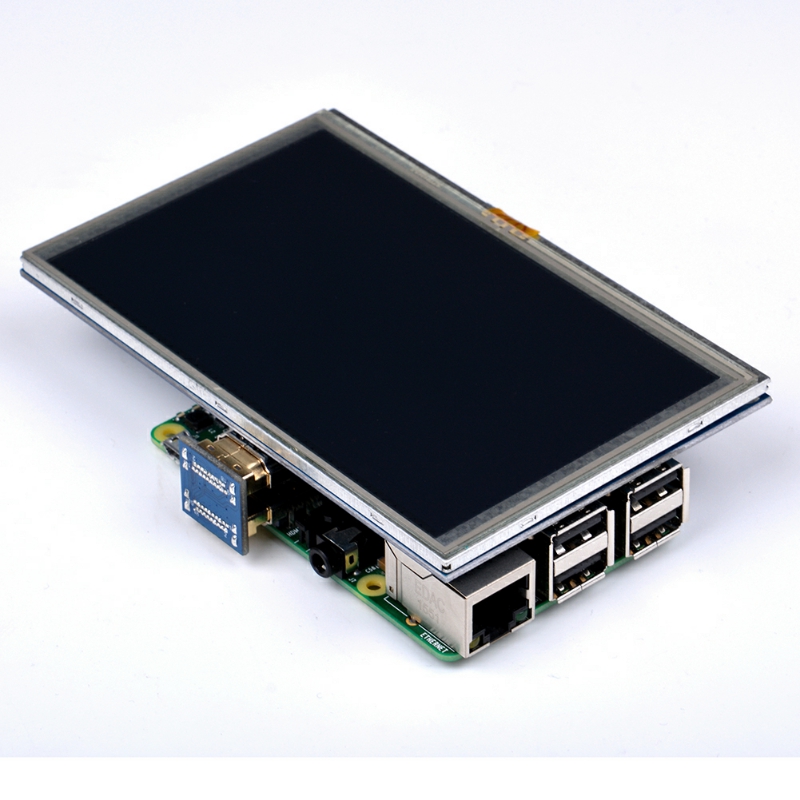
RaspZone é um projeto de configuração para Raspberry Pi 3b que cria um access point de internet específico para seu negócio, bloqueando qualquer acesso a outros aplicativos e sites (inclusive o Whatsapp - que possui várias técnicas para burlar firewalls). É especialmente útil para colocar em estabelecimentos comerciais ou locais de trabalho em que é permitido a utilização da internet para uso de somente um aplicativo. RaspZone também pode ser configurada para exibir uma página web logo na inicialização, muito útil, por exemplo, para exibição das informações de acesso e/ou propaganda ou funcionar como um totem de autoatendimento.
Execute raspi-config
- 1 - Change User Password for the default user (pi)
- 2 - Hostname (raspzone)
- 3 - Boot Options
- B3 Splash Screen
- 4 - Localisation Options (pt-BR)
- 5 - Interfacing Options
- P2 SSH (Enable)
- 7 - Advanced Options
- A1 Expand Filesystem
Finish / Reboot
apt-get update
apt-get upgrade
reboot
apt-get install --no-install-recommends xserver-xorg
apt-get install --no-install-recommends xinit
apt-get install raspberrypi-ui-mods
apt-get install lightdm
apt-get clean
reboot
Se você for utilizar em um monitor ou TV HDMI, pode pular essa parte, mas se você for usar um display LCD touchscreen, como o da imagem, configure-o no arquivo /boot/config.txt de acordo com as especificações do fabricante. O exemplo abaixo é para o Display LCD TFT Touch 5.
framebuffer_width=800
framebuffer_height=480
hdmi_force_hotplug=1
hdmi_group=2
hdmi_mode=87
hdmi_edid_file=1
hdmi_cvt  800  480  60  6  0  0  0
device_tree=bcm2710-rpi-3-b.dtb
dtoverlay=ads7846,penirq=22,speed=100000,xohms=150
dtparam=spi=on
Troque a imagem contida em
/usr/share/plymouth/themes/pix/splash.png
para a imagem que desejar (a logomarca do seu negócio, por exemplo).
O wallpaper pode ser trocado usando a interface gráfica de forma normal, após o sistema ter iniciado.
Instale create_ap
apt-get install git util-linux procps hostapd iproute2 iw haveged dnsmasq
cd /opt
git clone https://github.com/oblique/create_ap
cd create_ap
make install
systemctl enable create_ap
Edite /usr/lib/systemd/system/create_ap.service
ExecStart=/usr/bin/create_ap --isolate-clients --no-virt --country BR -c 6 wlan0 eth0 NomeDaSuaRedeWifi
E então atualize o daemon
systemctl daemon-reload
Instale iptables-ext-dns
apt-get install gcc make automake libtool dnsutils ldnsutils iptables-dev raspberrypi-kernel-headers
cd /opt
git clone https://github.com/mimuret/iptables-ext-dns.git
cd iptables-ext-dns
./autogen.sh
./configure
make
make install
Dê uma olhada no script firewall_start e modifique-o com as regras de firewall que melhor funcionar para você.
Copie os scripts firewall_start, firewall_stop, firewall_whatsapp.py e o arquivo softlayer_cidrs.txt para /root
Edite /usr/bin/create_ap e adicione a linha bash /root/firewall_start exatamente como abaixo
...
1836. # start hostapd (use stdbuf for no delayed output in programs that redirect stdout)
1837. stdbuf -oL $HOSTAPD $HOSTAPD_DEBUG_ARGS $CONFDIR/hostapd.conf &
1838. HOSTAPD_PID=$!
1839. echo $HOSTAPD_PID > $CONFDIR/hostapd.pid
1840.
1841. bash /root/firewall_start
1841.
1842. if ! wait $HOSTAPD_PID; then
...
Ainda em /usr/bin/create_ap adicione a linha bash /root/firewall_stop na definição da função cleanup()
...
794. cleanup() {
795.     echo
796.     echo -n "Doing cleanup.. "
797.     _cleanup > /dev/null 2>&1
798.
799.     bash /root/firewall_stop
800.
801.     echo "done"
802. }
...
Instale as dependências para o Firewall anti-Whatsapp
apt-get install python3 python3-pip tshark
apt-get install libxml2-dev libxslt1-dev
pip3 install lxml
pip3 install pyshark
Faremos o raspberry iniciar a aplicação web do painel digital assim que o sistema iniciar
apt-get install chromium-browser
# ATENÇÃO! ESSE BLOCO DE COMANDOS DEVE SER EXECUTADO PELO USUÁRIO pi E NÃO PELO root
mkdir ~/.config/autostart
nano ~/.config/autostart/autoChromium.desktop
[Desktop Entry]
Type=Application
Exec=/usr/bin/chromium-browser --noerrdialogs --disable-session-crashed-bubble --disable-infobars --kiosk https://seu.dominio.com/
Hidden=false
X-GNOME-Autostart-enabled=true
Name[en_US]=AutoChromium
Name=AutoChromium
Comment=Start Chromium when GNOME starts
Se você estiver usando o display LCD, vamos esconder o cursor do mouse, afinal tela touch não tem cursor. Edite /etc/lightdm/lightdm.conf
...
[SeatDefaults]
xserver-command=X -nocursor
...
É isso! Fim.
