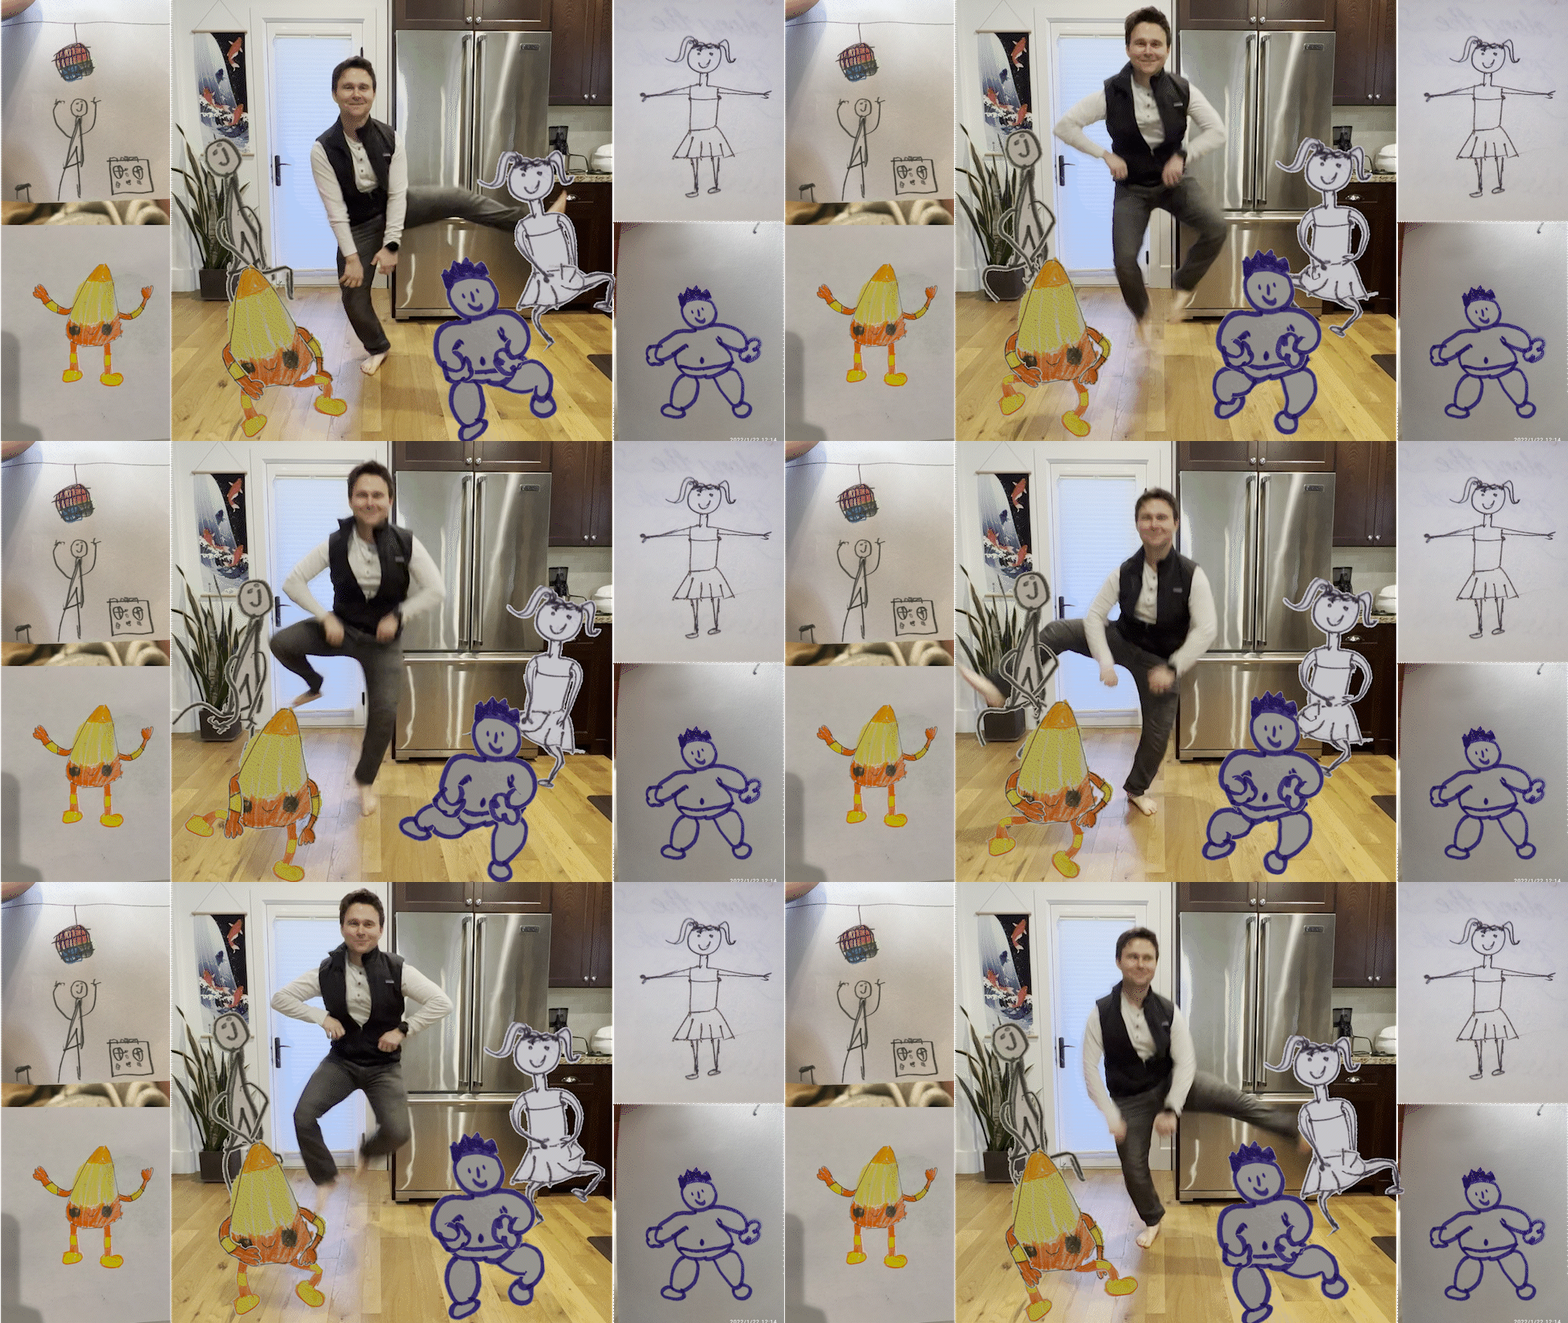
This repo contains an implementation of the algorithm described in the paper, `A Method for Animating Children's Drawings of the Human Figure' (to appear in Transactions on Graphics and to be presented at SIGGRAPH 2023).
In addition, this repo aims to be a useful creative tool in its own right, allowing you to flexibly create animations starring your own drawn characters. If you do create something fun with this, let us know! Use hashtag #FAIRAnimatedDrawings, or tag me on twitter: @hjessmith.
Project website: http://www.fairanimateddrawings.com
Video overview of Animated Drawings OS Project
This project has been tested with macOS Ventura 13.2.1 and Ubuntu 18.04. If you're installing on another operating sytem, you may encounter issues.
We strongly recommend activating a Python virtual environment prior to installing Animated Drawings. Conda's Miniconda is a great choice. Follow these steps to download and install it. Then run the following commands:
    # create and activate the virtual environment
    conda create --name animated_drawings python=3.8.13
    conda activate animated_drawings

    # clone AnimatedDrawings and use pip to install
    git clone https://github.com/facebookresearch/AnimatedDrawings.git
    cd AnimatedDrawings
    pip install -e .
Mac M1/M2 users: if you get architecture errors, make sure your ~/.condarc does not have osx-64, but only osx-arm64 and noarch in its subdirs listing. You can see that it's going to go sideways as early as conda create because it will show osx-64 instead of osx-arm64 versions of libraries under "The following NEW packages will be INSTALLED".
Now that everything's set up, let's animate some drawings! To get started, follow these steps:
- Open a terminal and activate the animated_drawings conda environment:
~ % conda activate animated_drawings- Ensure you're in the root directory of AnimatedDrawings:
(animated_drawings) ~ % cd {location of AnimatedDrawings on your computer}- Start up a Python interpreter:
(animated_drawings) AnimatedDrawings % python- Copy and paste the follow two lines into the interpreter:
from animated_drawings import render
render.start('./examples/config/mvc/interactive_window_example.yaml')
If everything is installed correctly, an interactive window should appear on your screen. (Use spacebar to pause/unpause the scene, arrow keys to move back and forth in time, and q to close the screen.)
There's a lot happening behind the scenes here. Characters, motions, scenes, and more are all controlled by configuration files, such as interactive_window_example.yaml. Below, we show how different effects can be achieved by varying the config files. You can learn more about the config files here.
Suppose you'd like to save the animation as a video file instead of viewing it directly in a window. Specify a different example config by copying these lines into the Python interpreter:
from animated_drawings import render
render.start('./examples/config/mvc/export_mp4_example.yaml')
Instead of an interactive window, the animation was saved to a file, video.mp4, located in the same directory as your script.
Perhaps you'd like a transparent .gif instead of an .mp4? Copy these lines in the Python interpreter intead:
from animated_drawings import render
render.start('./examples/config/mvc/export_gif_example.yaml')
Instead of an interactive window, the animation was saved to a file, video.gif, located in the same directory as your script.
If you'd like to generate a video headlessly (e.g. on a remote server accessed via ssh), you'll need to specify USE_MESA: True within the view section of the config file.
    view:
USE_MESA: TrueAll of the examples above use drawings with pre-existing annotations. To understand what we mean by annotations here, look at one of the 'pre-rigged' character's annotation files. You can use whatever process you'd like to create those annotations files and, as long as they are valid, AnimatedDrawings will give you an animation.
So you'd like to animate your own drawn character. I wouldn't want to you to create those annotation files manually. That would be tedious. To make it fast and easy, we've trained a drawn humanoid figure detector and pose estimator and provided scripts to automatically generate annotation files from the model predictions.
To get it working, you'll need to set up a Docker container that runs TorchServe. This allows us to quickly show your image to our machine learning models and receive their predictions.
To set up the container, follow these steps:
- Install Docker Desktop
- Ensure Docker Desktop is running.
- Run the following commands, starting from the Animated Drawings root directory:
    (animated_drawings) AnimatedDrawings % cd torchserve

    # build the docker image... this takes a while (~5-7 minutes on Macbook Pro 2021)
    (animated_drawings) torchserve % docker build -t docker_torchserve .

    # start the docker container and expose the necessary ports
    (animated_drawings) torchserve % docker run -d --name docker_torchserve -p 8080:8080 -p 8081:8081 docker_torchserve
Wait ~10 seconds, then ensure Docker and TorchServe are working by pinging the server:
    (animated_drawings) torchserve % curl http://localhost:8080/ping

    # should return:
    # {
    #   "status": "Healthy"
    # }
If, after waiting, the response is curl: (52) Empty reply from server, one of two things is likely happening.
- Torchserve hasn't finished initializing yet, so wait another 10 seconds and try again.
- Torchserve is failing because it doesn't have enough RAM. Try increasing the amount of memory available to your Docker containers to 16GB by modifying Docker Desktop's settings.
With that set up, you can now go directly from image -> animation with a single command:
    (animated_drawings) torchserve % cd ../examples
    (animated_drawings) examples % python image_to_animation.py drawings/garlic.png garlic_out
As you waited, the image located at drawings/garlic.png was analyzed, the character detected, segmented, and rigged, and it was animated using BVH motion data from a human actor.
The resulting animation was saved as ./garlic_out/video.gif.
You may notice that, when you ran python image_to_animation.py drawings/garlic.png garlic_out, there were additional non-video files within garlic_out.
mask.png, texture.png, and char_cfg.yaml contain annotation results of the image character analysis step. These annotations were created from our model predictions.
If the mask predictions are incorrect, you can edit the mask with an image editing program like Paint or Photoshop.
If the joint predictions are incorrect, you can run python fix_annotations.py to launch a web interface to visualize, correct, and update the annotations. Pass it the location of the folder containing incorrect joint predictions (here we use garlic_out/ as an example):
    (animated_drawings) examples % python fix_annotations.py garlic_out/
    ...
     * Running on http://127.0.0.1:5050
    Press CTRL+C to quit
Navigate to http://127.0.0.1:5050 in your browser to access the web interface. Drag the joints into the appropriate positions, and hit Submit to save your edits.
Once you've modified the annotations, you can render an animation using them like so:
    # specify the folder where the fixed annoations are located
(animated_drawings) examples % python annotations_to_animation.py garlic_outMultiple characters can be added to a video by specifying multiple entries within the config scene's 'ANIMATED_CHARACTERS' list. To see for yourself, run the following commands from a Python interpreter within the AnimatedDrawings root directory:
from animated_drawings import render
render.start('./examples/config/mvc/multiple_characters_example.yaml')Suppose you'd like to add a background to the animation. You can do so by specifying the image path within the config. Run the following commands from a Python interpreter within the AnimatedDrawings root directory:
from animated_drawings import render
render.start('./examples/config/mvc/background_example.yaml')You can use any motion clip you'd like, as long as it is in BVH format.
If the BVH's skeleton differs from the examples used in this project, you'll need to create a new motion config file and retarget config file. Once you've done that, you should be good to go. The following code and resulting clip uses a BVH with completely different skeleton. Run the following commands from a Python interpreter within the AnimatedDrawings root directory:
from animated_drawings import render
render.start('./examples/config/mvc/different_bvh_skeleton_example.yaml')You may be wondering how you can create BVH files of your own. You used to need a motion capture studio. But now, thankfully, there are simple and accessible options for getting 3D motion data from a single RGB video. For example, I created this Readme's banner animation by:
- Recording myself doing a silly dance with my phone's camera.
- Using Rokoko to export a BVH from my video.
- Creating a new motion config file and retarget config file to fit the skeleton exported by Rokoko.
- Using AnimatedDrawings to animate the characters and export a transparent animated gif.
- Combining the animated gif, original video, and original drawings in Adobe Premiere.
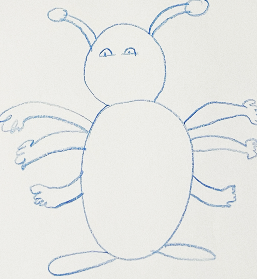
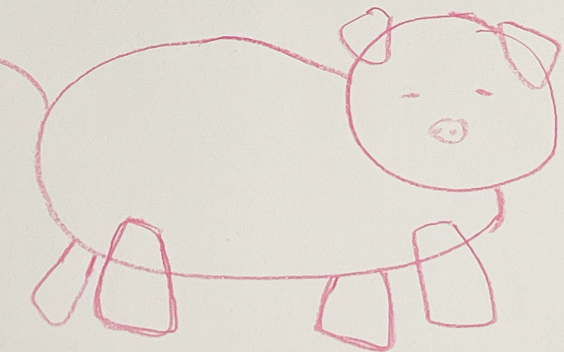
All of the example animations above depict "human-like" characters; they have two arms and two legs.
Our method is primarily designed with these human-like characters is mind, and the provided pose estimation model assumes a human-like skeleton is present.
But you can manually specify a different skeletons within the character config and modify the specified retarget config to support it.
If you're interested, look at the configuration files specified in the two examples below.
from animated_drawings import render
render.start('./examples/config/mvc/six_arms_example.yaml')
from animated_drawings import render
render.start('./examples/config/mvc/four_legs_example.yaml')If you want to create your own config files, see the configuration file documentation.
If you'd like to animate a drawing of your own, but don't want to deal with downloading code and using the command line, check out our browser-based demo:
Animated Drawings is released under the MIT license.
The accompanying paper has been accepted to Transactions on Graphics and will be presented at SIGGRAPH 2023. Official citation will be added later, but for now you can access the paper on arxiv: A Method for Animating Children's Drawings of The Human Figure
If you find this repo helpful in your own work, please consider citing the accompanying paper:
(citation information to be added later)
To obtain the Amateur Drawings Dataset, run the following two commands from the command line:
# download annotations (~275Mb)
wget https://dl.fbaipublicfiles.com/amateur_drawings/amateur_drawings_annotations.json

# download images (~50Gb)
wget https://dl.fbaipublicfiles.com/amateur_drawings/amateur_drawings.tar
If you have feedback about the dataset, please fill out this form.
These characters are deformed using As-Rigid-As-Possible (ARAP) shape manipulation. We have a Python implementation of the algorithm, located here, that might be of use to other developers.


