An internal website for documenting the projects and prototypes of the Science Visualization Group (SVG) at the American Museum of Natural History.
First, you will need a Github account. Once you sign up, ask an admin to be added to the SVG Github organization.
The website structure is very "flat." There is the homepage and then a single page for each of our projects. A project page consists of any amount of text and multimedia (images, audio, video.) The homepage automatically lists all the project pages ordered in reverse chronological order.
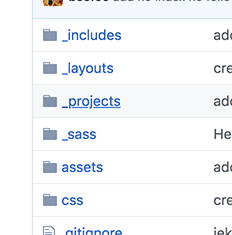
All the project pages are contained in the _projects folder.
For simple edits, you can do this directly on the Github website if you are logged into your account.
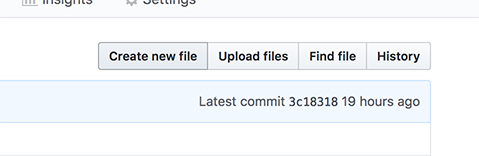
On the main github page, click on _projects:
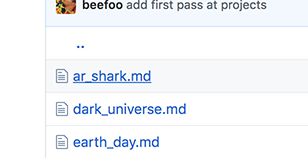
Then click on the page that you want to edit.
On this page, click the edit icon on the top right.
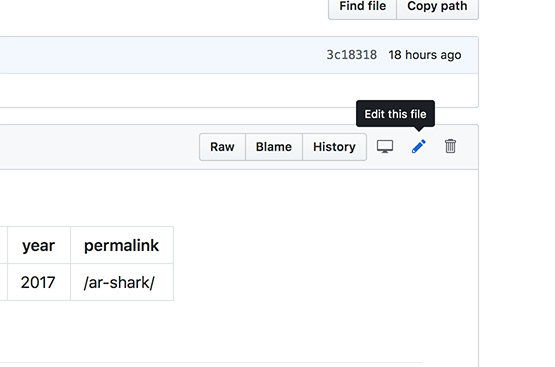
Here you will see the "source" of the page like this:
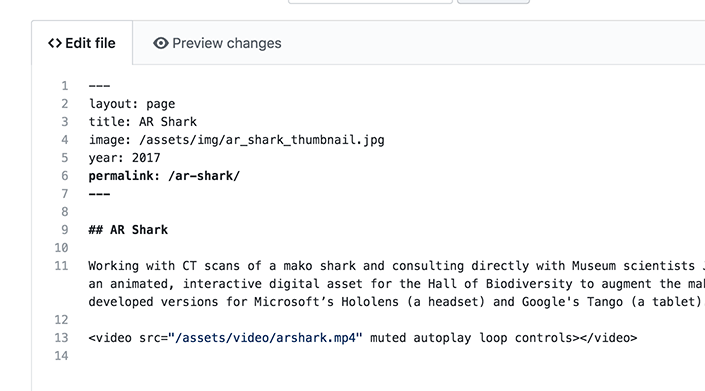
There's an important section at the top of the page that is in this format:
---
layout: page
title: AR Shark
image: /assets/img/ar_shark_thumbnail.jpg
year: 2017
permalink: /ar-shark/
---
All pages must have these here, so don't delete them! The title: and image: values are used to populate the homepage. The year: is used for ordering the projects on the homepage, which is reverse chronological order. You can further sort within years by adding a month, like 2018.04.
The permalink: determines what the URL for this page looks like. For the example above, the URL would be https://amnh-sciviz.github.io/ar-shark/. Note that the / at the end is necessary and would not work without it. If this line was omitted, the default URL would be https://amnh-sciviz.github.io/projects/ar_shark.html (not as pretty.)
When in doubt, don't edit anything in the section before the 2nd ---. The rest of the page is in a format called "Markdown" which is a simplified syntax for writing HTML. You can view a Markdown guide here and a cheatsheet here.
In most cases we will be dealing with just headings, paragraphs, and embedded media. A structure might look something like this
## Cool project name
Some text introducing this project
### Technology used
- Microsoft's Hololens
- Google's Tango
- Unity
### Documentation
Here's an embedded image:

Here's an embedded video:

<video src="/assets/video/arshark.mp4" muted autoplay loop controls></video>
Here's an embedded Youtube video
<iframe width="560" height="315" src="https://www.youtube.com/embed/pOxG4aSQOO8" frameborder="0" allow="accelerometer; autoplay; encrypted-media; gyroscope; picture-in-picture" allowfullscreen></iframe>
Markdown also accepts arbitrary HTML, so you can add tags that are not supported by Markdown, like videos and iframes.
Once you are finished with your edits, you can click "Preview changes", then scroll to the bottom, optionally add a comment about your change, then click Commit changes. Your changes should be visible in the website in a few moments.
Four main types of media tags are supported on this website: images, videos, audio, and iframes (media embedded from other websites such as Youtube or Vimeo)
Before you upload your media, you may need to resize/re-encode them so they don't make this repository too big.
Images on the homepage are 640 x 360
Videos should be compressed as much as possible (ideally under 10mb.) If you are using Handbrake, try using the Web -> Gmail Medium 480p30 setting or 720p if 480p is too low resolution. If you require higher resolution, consider uploading to Youtube or Vimeo, and embedding that video player instead.
Once your files are ready, go to the assets folder, then click img or video.
On the top right, you should see a Upload files button. Click that, then you can drag-and-drop or choose your files to upload.
After you uploaded your images, you can link to the like this:
Here's an embedded image:

The Text describing this image is the image's alt text which is used for screen readers. You can embed a video like this:
Here's an embedded video:
<video src="/assets/video/arshark.mp4" muted autoplay loop controls></video>
Note that there are options muted, autoplay, loop, and controls. If you autoplay the video, it must also be muted (browsers don't allow autoplay of sounds). It's generally a good idea to include controls, giving the user the option to play/pause/unmute/etc.
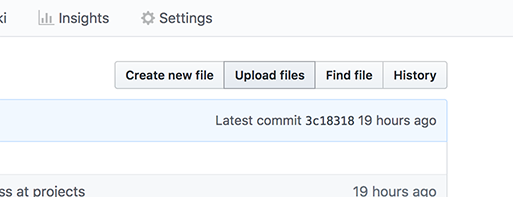
On the main github page, click on _projects:
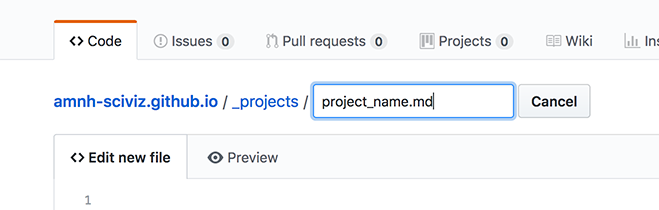
On this page, click the Create new file button on the top right.
Enter a filename for your new project, e.g. project_name.md:
Copy and paste the following into the editor, and replace project name with your new project's name:
---
layout: page
title: Project Name
image: /assets/img/project_name_thumbnail.jpg
year: 2019
permalink: /project-name/
---

## Project Name

Project description here.
Note that you must create and upload a new representative project image as described in the previous section.
And a reminder that the year determines the order that it will show up on the homepage.
Once you've added the content that you wanted to, you can click "Preview changes", then scroll to the bottom, optionally add a comment about your change, then click Commit changes. Your changes should be visible in the website in a few moments.
Important! Any new project page created will automatically added to the homepage.
This section is for "power users" and/or if you need to make substantial changes that require you to making a number of changes across the website at once.
First you must have Ruby and bundler installed. For Macs, RVM for Ruby is recommended.
You can then clone the repository and install/launch Jekyll:
git clone https://github.com/amnh-sciviz/amnh-sciviz.github.io.git
cd amnh-sciviz.github.io
bundle install
bundle exec jekyll serve
By default, this will launch the website at localhost:4000. Any changes you make should be immediately reflected. You can manually view the static file output by looking in the _site folder.
Any changes to _config.yml requires you to restart Jekyll