How to use kerberos authentication in streamsx.hbase toolkit
The streamsx.hbase toolkit supports from version 1.3.1 kerberos authentication.
This document describes a step by step procedure to:
-
Installation and configuration of Ambari
-
Installation of HDFS and HBASE and start the services
-
Enabling kerberos
-
Using of principal and keys in stremasx.hbase toolkit.
Here is a short installation and configuration guide for Ambari. For detail information about the installation of Ambari check this link: https://docs.hortonworks.com/HDPDocuments/Ambari-2.6.2.2/bk_ambari-installation/content/install-ambari-server.html
login as root:
cd /etc/yum.repos.d/
wget  http://public-repo-1.hortonworks.com/ambari/centos7/2.x/updates/2.6.1.5/ambari.repo
for redhat 6
wget http://public-repo-1.hortonworks.com/ambari/centos6/2.x/updates/2.6.1.5/ambari.repo
Now install ambari-server and ambari-agent
yum install ambari-server
yum install ambari-agent
ambari-server setup -s -v
# accept all defaults and go to the next:
ambari-server start
ambari-server status
edit /etc/ambari-agent/conf/ambari-agent.ini file and adding the following configuration property to the security section:
[security]
force_https_protocol=PROTOCOL_TLSv1_2
Install and start ambari-agent in every hosts of your HBASE cluster.
ambari-agent start
ambari-agent status
If everything goes well you can see the following status:
Found ambari-agent PID: 1429
ambari-agent running.
Agent PID at: /run/ambari-agent/ambari-agent.pid
Agent out at: /var/log/ambari-agent/ambari-agent.out
Agent log at: /var/log/ambari-agent/ambari-agent.log
Now check the status of ambari-server
ambari-server status
Using python  /usr/bin/python
Ambari-server status
Ambari Server running
Found Ambari Server PID: 16227 at: /var/run/ambari-server/ambari-server.pid
Start the ambari web configuration GUI. open this link in your browse.
http:/<your-hdp-server>:8080
default port is 8080 default user: admin default password: admin It is possible to change all these defaults. More details in:
https://ambari.apache.org/1.2.3/installing-hadoop-using-ambari/content/ambari-chap2-2a.html
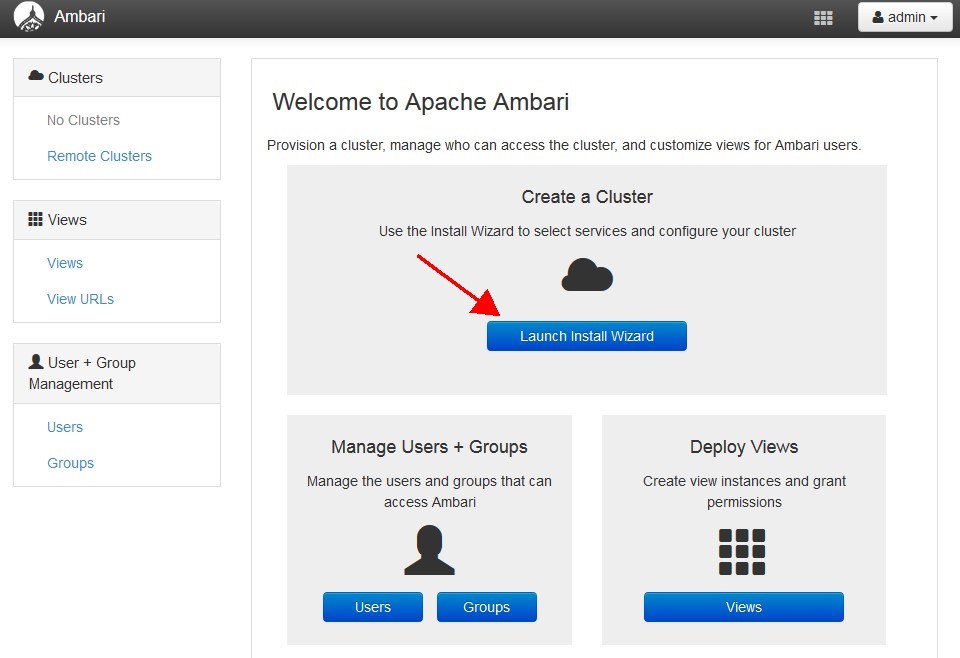
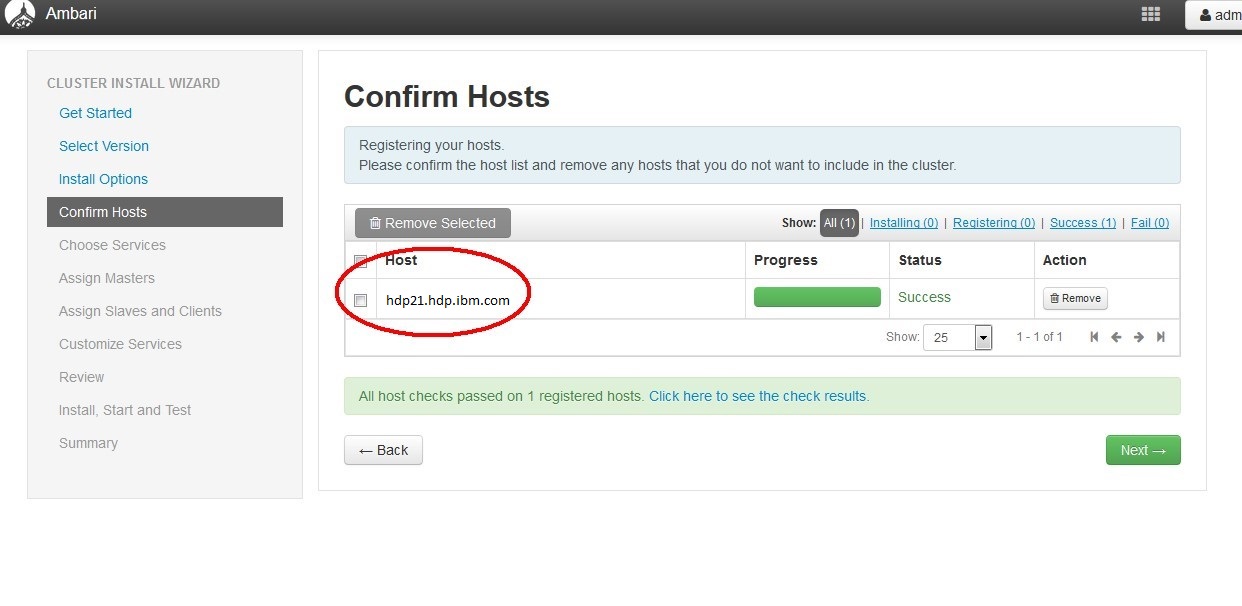
Launch the Ambari Install Wizard and follow the installation and configuration. Registration of hosts.
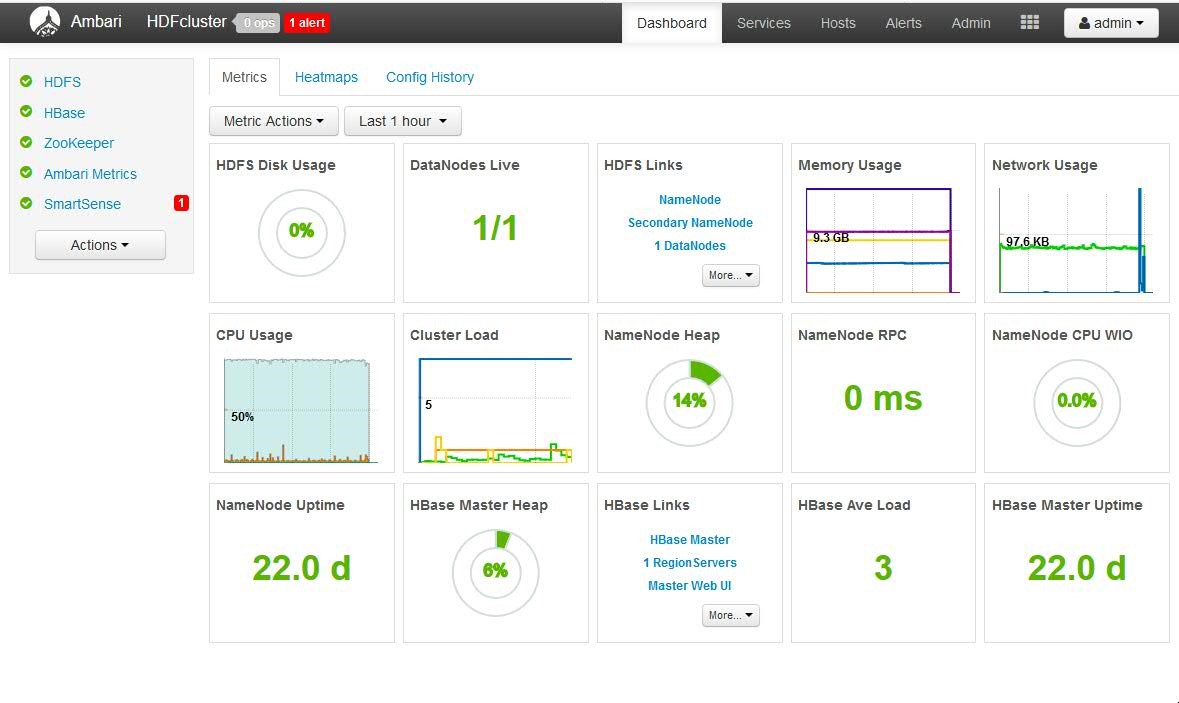
Customizing of services: For HBASE and HBASE test it is recommended to install only the following services: HBASE, MapReduce2, HBase, ZooKepper.
Install and start the services:
It takes about 30 minutes (or more dependence to the number of your services) to install and start the services . Started Services
Now you can login as root on your HDP server and copy the configuration files to your client: HBASE configuration file: /usr/hdp/current/hbase-client/conf/hbase-seite.xml
HBASE configuration file: /usr/hdp/current/hbase-client/conf/hbase-site.xml
Login as root in your hadoop server and install kerberos.
yum install krb5* -y
In the following example the realm name is HDP2 and the server is hdp21.hdp.ibm.com.
You can change it with your realm name and your server name.
Edit Kerberos configuration file
vi /etc/krb5.conf
[libdefaults]
default_realm = HDP2.COM
dns_lookup_realm = false
dns_lookup_kdc = false
ticket_lifetime = 24h
forwardable = true
udp_preference_limit = 1000000
default_tkt_enctypes = des-cbc-md5 des-cbc-crc des3-cbc-sha1
default_tgs_enctypes = des-cbc-md5 des-cbc-crc des3-cbc-sha1
permitted_enctypes = des-cbc-md5 des-cbc-crc des3-cbc-sha1

[realms]
HDP2.COM = {
    kdc = hdp21.hdp.ibm.com:88
    admin_server = hdp21.hdp.ibm.com:749
    default_domain = hdp.ibm.com
}

[domain_realm]
.hdp.ibm.com = HDP2.COM
 hdp.ibm.com = HDP2.COM

[logging]
kdc = FILE:/var/log/krb5kdc.log
admin_server = FILE:/var/log/kadmin.log
default = FILE:/var/log/krb5lib.log
edit /var/kerberos/krb5kdc/kdc.conf
default_realm = HDP2.COM

[kdcdefaults]
v4_mode = nopreauth
kdc_ports = 0

[realms]
HDP2.COM = {
    kdc_ports = 88
    admin_keytab = /etc/kadm5.keytab
    database_name = /var/kerberos/krb5kdc/principal
    acl_file = /var/kerberos/krb5kdc/kadm5.acl
    key_stash_file = /var/kerberos/krb5kdc/stash
    max_life = 10h 0m 0s
    max_renewable_life = 7d 0h 0m 0s
    master_key_type = des3-hmac-sha1
    supported_enctypes = arcfour-hmac:normal des3-hmac-sha1:normal des-cbc-crc:normal des:normal des:v4 des:norealm des:onlyrealm des:afs3
    default_principal_flags = +preauth
}
Edit /var/kerberos/krb5kdc/kadm5.acl
3- Creating KDC database
kdb5_util create -r HDP2.COM -s
4- add a principal for root user
/usr/sbin/kadmin.local -q "addprinc root/admin"
5- restart krb services
/sbin/service krb5kdc stop
/sbin/service kadmin stop

/sbin/service krb5kdc start
/sbin/service kadmin start
Check the status of servers: if everything goes well you can see like this status:
/sbin/service krb5kdc status
Redirecting to /bin/systemctl status krb5kdc.service
krb5kdc.service - Kerberos 5 KDC
Loaded: loaded (/usr/lib/systemd/system/krb5kdc.service; disabled; vendor preset: disabled)
Active: active (running) since Mon 2018-07-30 08:13:40 PDT; 20h ago
Main PID: 2030 (krb5kdc)
CGroup: /system.slice/krb5kdc.service
       └─2030 /usr/sbin/krb5kdc -P /var/run/krb5kdc.pid

Jul 30 08:13:40 hdp21.hdp.ibm.com systemd[1]: Starting Kerberos 5 KDC...
Jul 30 08:13:40 hdp21.hdp.ibm.com systemd[1]: Started Kerberos 5 KDC.


/sbin/service kadmin status
Redirecting to /bin/systemctl status kadmin.service
kadmin.service - Kerberos 5 Password-changing and Administration
Loaded: loaded (/usr/lib/systemd/system/kadmin.service; disabled; vendor preset: disabled)
Active: active (running) since Mon 2018-07-30 08:13:48 PDT; 20h ago
Main PID: 2045 (kadmind)
CGroup: /system.slice/kadmin.service
       └─2045 /usr/sbin/kadmind -P /var/run/kadmind.pid
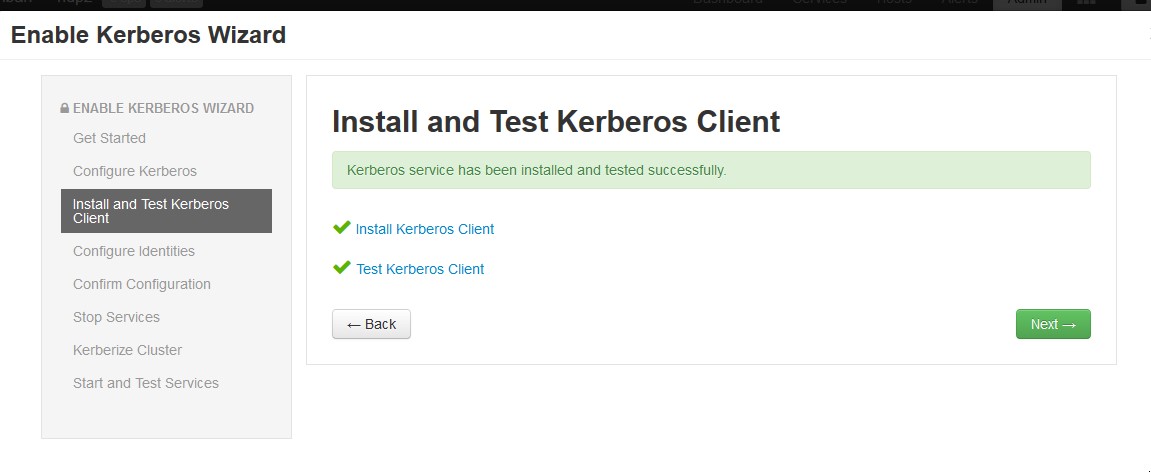
Now you can open your ambari GUI and enable Kerberos.
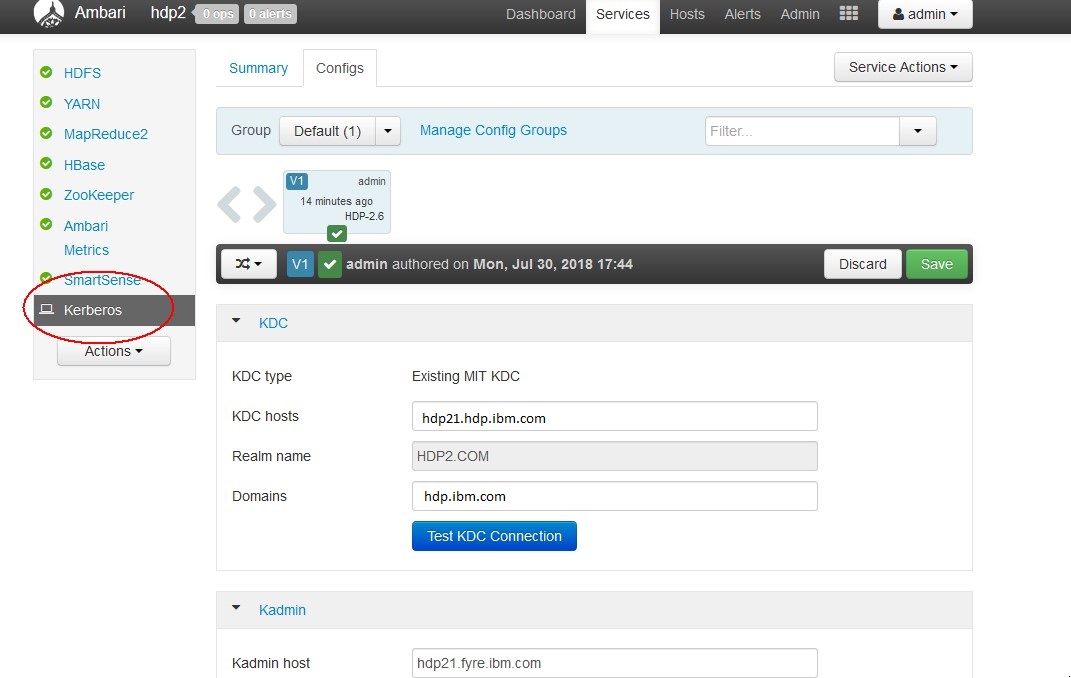
It restarts all service and create principals and keytab files for every user.
It is also possible to create your principals and keytab manually via kadmin tool.
kadmin -p root/[email protected]
Authenticating as principal root/[email protected] with password.
Password for root/[email protected]:
kadmin:  listprincs
HTTP/[email protected]
K/[email protected]
activity_analyzer/[email protected]
activity_explorer/[email protected]
[email protected]
[email protected]
amshbase/[email protected]
amszk/[email protected]
dn/[email protected]
[email protected]
hbase/[email protected]
[email protected]
hbase/[email protected]
jhs/[email protected]
kadmin/[email protected]
kadmin/[email protected]
kadmin/[email protected]
kiprop/[email protected]
krbtgt/[email protected]
nfs/[email protected]
nm/[email protected]
nn/[email protected]
rm/[email protected]
root/[email protected]
yarn/[email protected]
zookeeper/[email protected]
It creates keytab files and saves them in /etc directory
/etc/security/keytabs
ls   /etc/security/keytabs/
activity-analyzer.headless.keytab
activity-explorer.headless.keytab
ambari.server.keytab
ams.collector.keytab
ams-hbase.master.keytab
ams-hbase.regionserver.keytab
ams-zk.service.keytab
dn.service.keytab
hbase.headless.keytab
hbase.service.keytab
hbase.headless.keytab
jhs.service.keytab
nfs.service.keytab
nm.service.keytab
nn.service.keytab
rm.service.keytab
smokeuser.headless.keytab
spnego.service.keytab
yarn.service.keytab
zk.service.keytab
The csv file with list of principals configured can be download using following Ambari URL
https://<ambari_hostname:port>/api/v1/clusters/<Cluster_name>/kerberos_identities?fields=*&format=csv
Where the placeholders <ambari_hostname:port> , and <Cluster_name> has to be replaced with your server corresponding values.
If you have another hadoop server, you can enable Kerberos authentication on your Hadoop cluster.
The following links shows "how to enable the kerberos authentication in Hortenworks, Cloudera and IOP".
https://www.cloudera.com/documentation/enterprise/latest/topics/cm_sg_s4_kerb_wizard.html
Login as root in your hadoop server
useradd streamsadmin
su - hdfs
hdfs> hadoop fs -mkdir /user/streamsadmin
In the above sample the name of streamsuser is streamsadmin.
If your streamsuser has another username, you can create a HBASE user with your user name.
Kerberos authentication is a network protocol to provide strong authentication for client/server applications.
The streamsx.hbase toolkit support kerberos authentication. All operators have 2 additional parameters for kerberos authentication:
The authKeytab parameter specifies the kerberos keytab file that is created for the principal. The authPrincipal parameter specifies the Kerberos principal, which is typically the principal that is created for the HBase server.
1- Add the IP Address and host name of your HDP server in /etc/hosts file of your streams server
2- Copy hbase-seite.xml file from Hadoop server on your Streams server in etc directory of your SPL application.
3- Copy the keytab file hbase.service.keytab from Hadoop server on your Streams server in etc directory of your SPL application.
4- Create a test table in you hbase server.
. Login as root in your hadoop server.
  su - hbase
  kinit -k -t /etc/security/keytabs/hbase.service.keytab hbase/[email protected]
  hbase shell
  hbase(main):003:0> create 'streamsSample_lotr','appearance','location'
The following SPL application (HBaseKerbersoTest.spl) demonstrates how to connect to an HBASE via kerberos authentication.
/* Copyright (C) 2013-2018, International Business Machines Corporation  */
/* All Rights Reserved                                	                 */

namespace application;

use com.ibm.streamsx.hbase::HBASEPut ;
use com.ibm.streamsx.hbase::HBASEScan ;
use com.ibm.streamsx.hbase::HBASEGet ;

/** Show three operators of HBASE toolkit.
 * This SPL application demonstrates how to connect to HBASE database via kerberos authentification
 * It puts data into a HBASE table and gets data fro a table.
 * At end it shows how to scan a table from HBASE.
 *
 * In HBASE, the column is divided up into two parts, the columnFamily
 * and the columnQualifier.  All columns in a columnFamily are grouped
 * together on disk, so that  which affects the efficience of access.
 * The table has a fixed set of column families, and you may not add a
 * tuple to any other family.  ColumnQualifiers, on the other hand, may be added
 * at runtime.
 * At first create a test HBASE table:
 * echo "create 'streamsSample_lotr','appearance','location'" | hbase shell
 * And copy the the HBASE configuration file hbase-site.xml and hbase.service.keytab files
 * into etc directory of your SPL appliactaion.
 *  HBaseKerbersoTest/etc/hbase-site.xml
 *  HBaseKerbersoTest/etc/hbase.service.keytab
 */

composite HBaseKerbersoTest {
param
	expression<rstring> $hbaseSite : getSubmissionTimeValue("hbaseSite", "etc/hbase-site.xml") ;
	expression<rstring> $tableName : getSubmissionTimeValue("tableName", "streamsSample_lotr") ;
	expression<rstring> $authKeytab : getSubmissionTimeValue("authKeytab", "etc/hbase.service.keytab") ;
	expression<rstring> $authPrincipal : getSubmissionTimeValue("authPrincipal", "hbase/[email protected]") ;


type
	LordType = rstring character, rstring author_fname,rstring year, rstring rating, rstring title;

graph

          stream<rstring character, rstring colF, rstring colQ, rstring value> DataGen = Custom()
      {
		logic
		onProcess: {
			for (int32 i in range(20)) {
				submit({ character = "character" + (rstring) i , colF = "location" , colQ	= "colQ" + (rstring) i, value	= "value" + (rstring) i}, DataGen) ;
			}
		}
	}

	() as PrintDataGen = Custom(DataGen)
	{
			logic
			onTuple DataGen : printStringLn("DataGen " + character + " " + colF   + " " + colQ  + " " + value );

	}


	() as HbasePut = HBASEPut(DataGen)
	{
		param
			hbaseSite :  $hbaseSite;
			tableName : $tableName ;
		        authPrincipal : $authPrincipal ;
			authKeytab : $authKeytab ;
		        rowAttrName : "character" ;
			columnFamilyAttrName : "colF" ;
			columnQualifierAttrName : "colQ" ;
			valueAttrName : "value" ;
	}

          stream<rstring character, rstring colF, rstring colQ> QueryGen = Custom()
      {
		logic
		onProcess: {
			for (int32 i in range(5)) {
				submit({ character = "character" + (rstring) i , colF = "location" , colQ	= "colQ" + (rstring) i }, QueryGen) ;
			}
		}
	}

	() as PrintQueryGen = Custom(QueryGen)
	{
			logic
			onTuple QueryGen : printStringLn("QueryGen " + character + " " + colF   + " " + colQ  );

	}

	stream<rstring character, rstring colF, rstring requestedDetail, rstring value, int32 numResults> HBaseGet = HBASEGet(QueryGen)
	{
		param
			hbaseSite :  $hbaseSite;
			tableName : $tableName ;
		        authPrincipal : $authPrincipal ;
			authKeytab : $authKeytab ;
			rowAttrName : "character" ;
			columnFamilyAttrName : "colF" ;
			columnQualifierAttrName : "colQ" ;
			outAttrName : "value" ;
			outputCountAttr : "numResults" ;
	}

	() as PrintHBaseGet = Custom(HBaseGet)
	{
			logic
			onTuple HBaseGet : printStringLn("HBaseGet " + character + " " + colF   + " " + requestedDetail + " " + value + " " + (rstring) numResults);

	}


	stream<rstring row, rstring value> HBaseScan = HBASEScan() {

		param
			hbaseSite :  $hbaseSite;
			tableName : $tableName ;
		        authPrincipal : $authPrincipal ;
			authKeytab : $authKeytab ;
			initDelay: 10.0;
			outAttrName: "value";
			staticColumnFamily: "location";
	}


	() as PrintHBaseScan = Custom(HBaseScan)
	{
			logic
			onTuple HBaseScan : printStringLn("HBaseScan " + row + " " + value );

	}

}
Run the application and check the results:
Login as root in your hbase server.
su - hbase
kinit -k -t /etc/security/keytabs/hbase.service.keytab hbase/[email protected]
hbase shell
hbase(main):003:0> scan'streamsSample_lotr'
character0                     column=location:colQ0, timestamp=1542036285421, value=value0
character1                     column=location:colQ1, timestamp=1542036285609, value=value1
character10                    column=location:colQ10, timestamp=1542036287137, value=value10
character11                    column=location:colQ11, timestamp=1542036287306, value=value11
character12                    column=location:colQ12, timestamp=1542036287475, value=value12
character13                    column=location:colQ13, timestamp=1542036287644, value=value13
....