A recreation of the iOS Calendar app's widget, that shows today's remaining events using EventKit. Includes widget configuration to limit the events only to selected calendars.

In this tutorial you will learn how to allow your users to configure their widgets. I will show you how to add configuration to an already existing widget in your app.
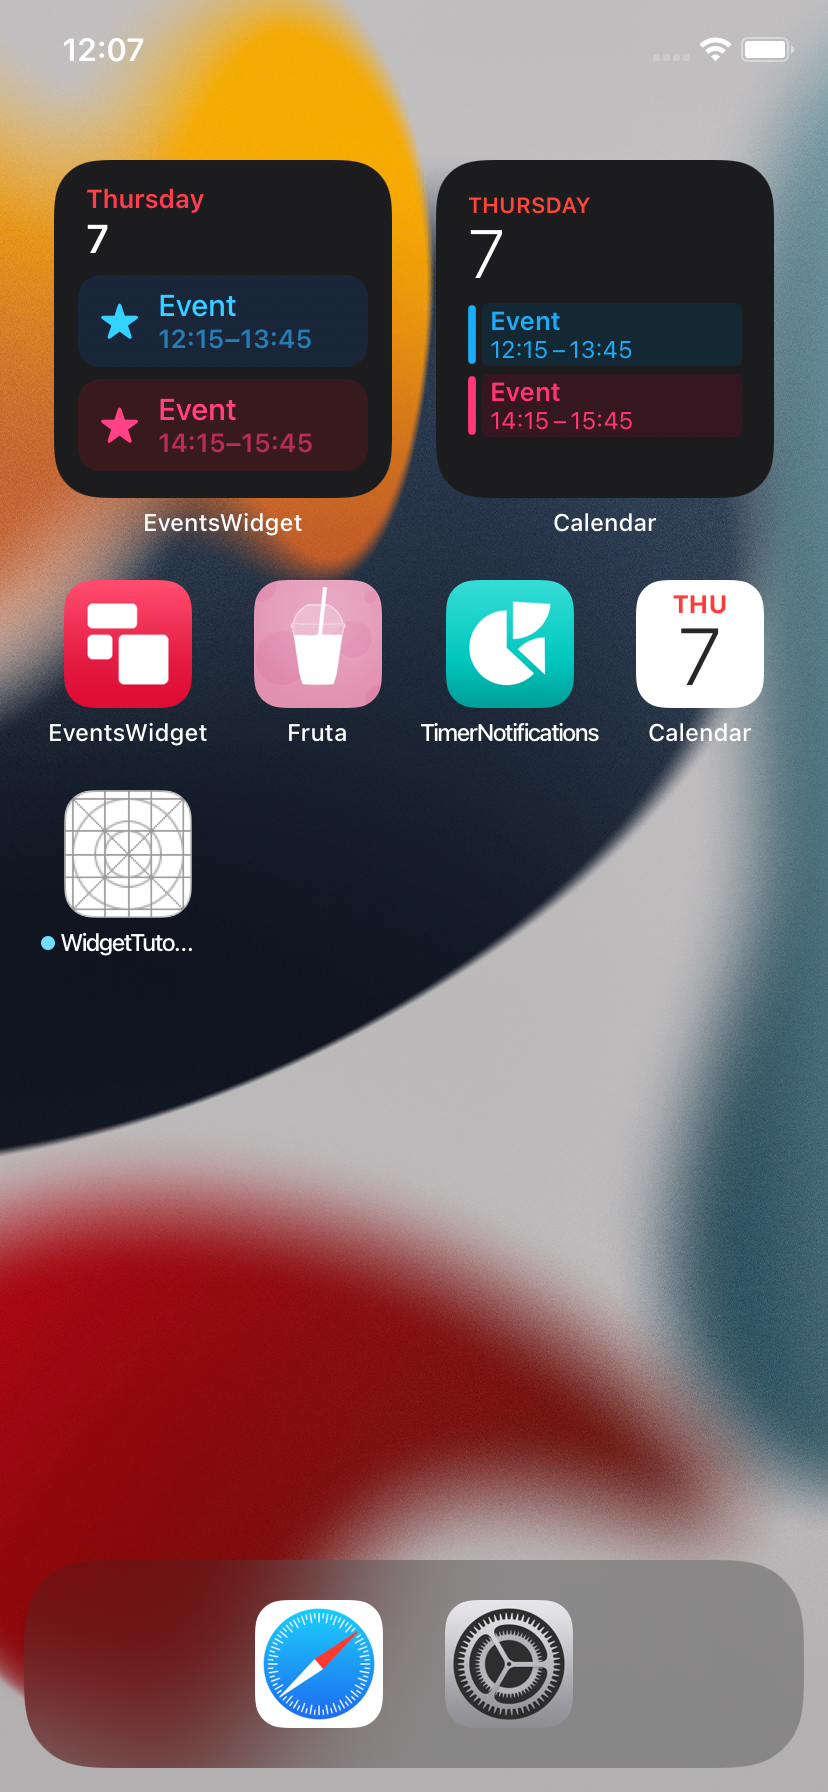
If you do not have a widget yet, you can create include the configuration while creating the widget extension, which allows you to skip step 2.
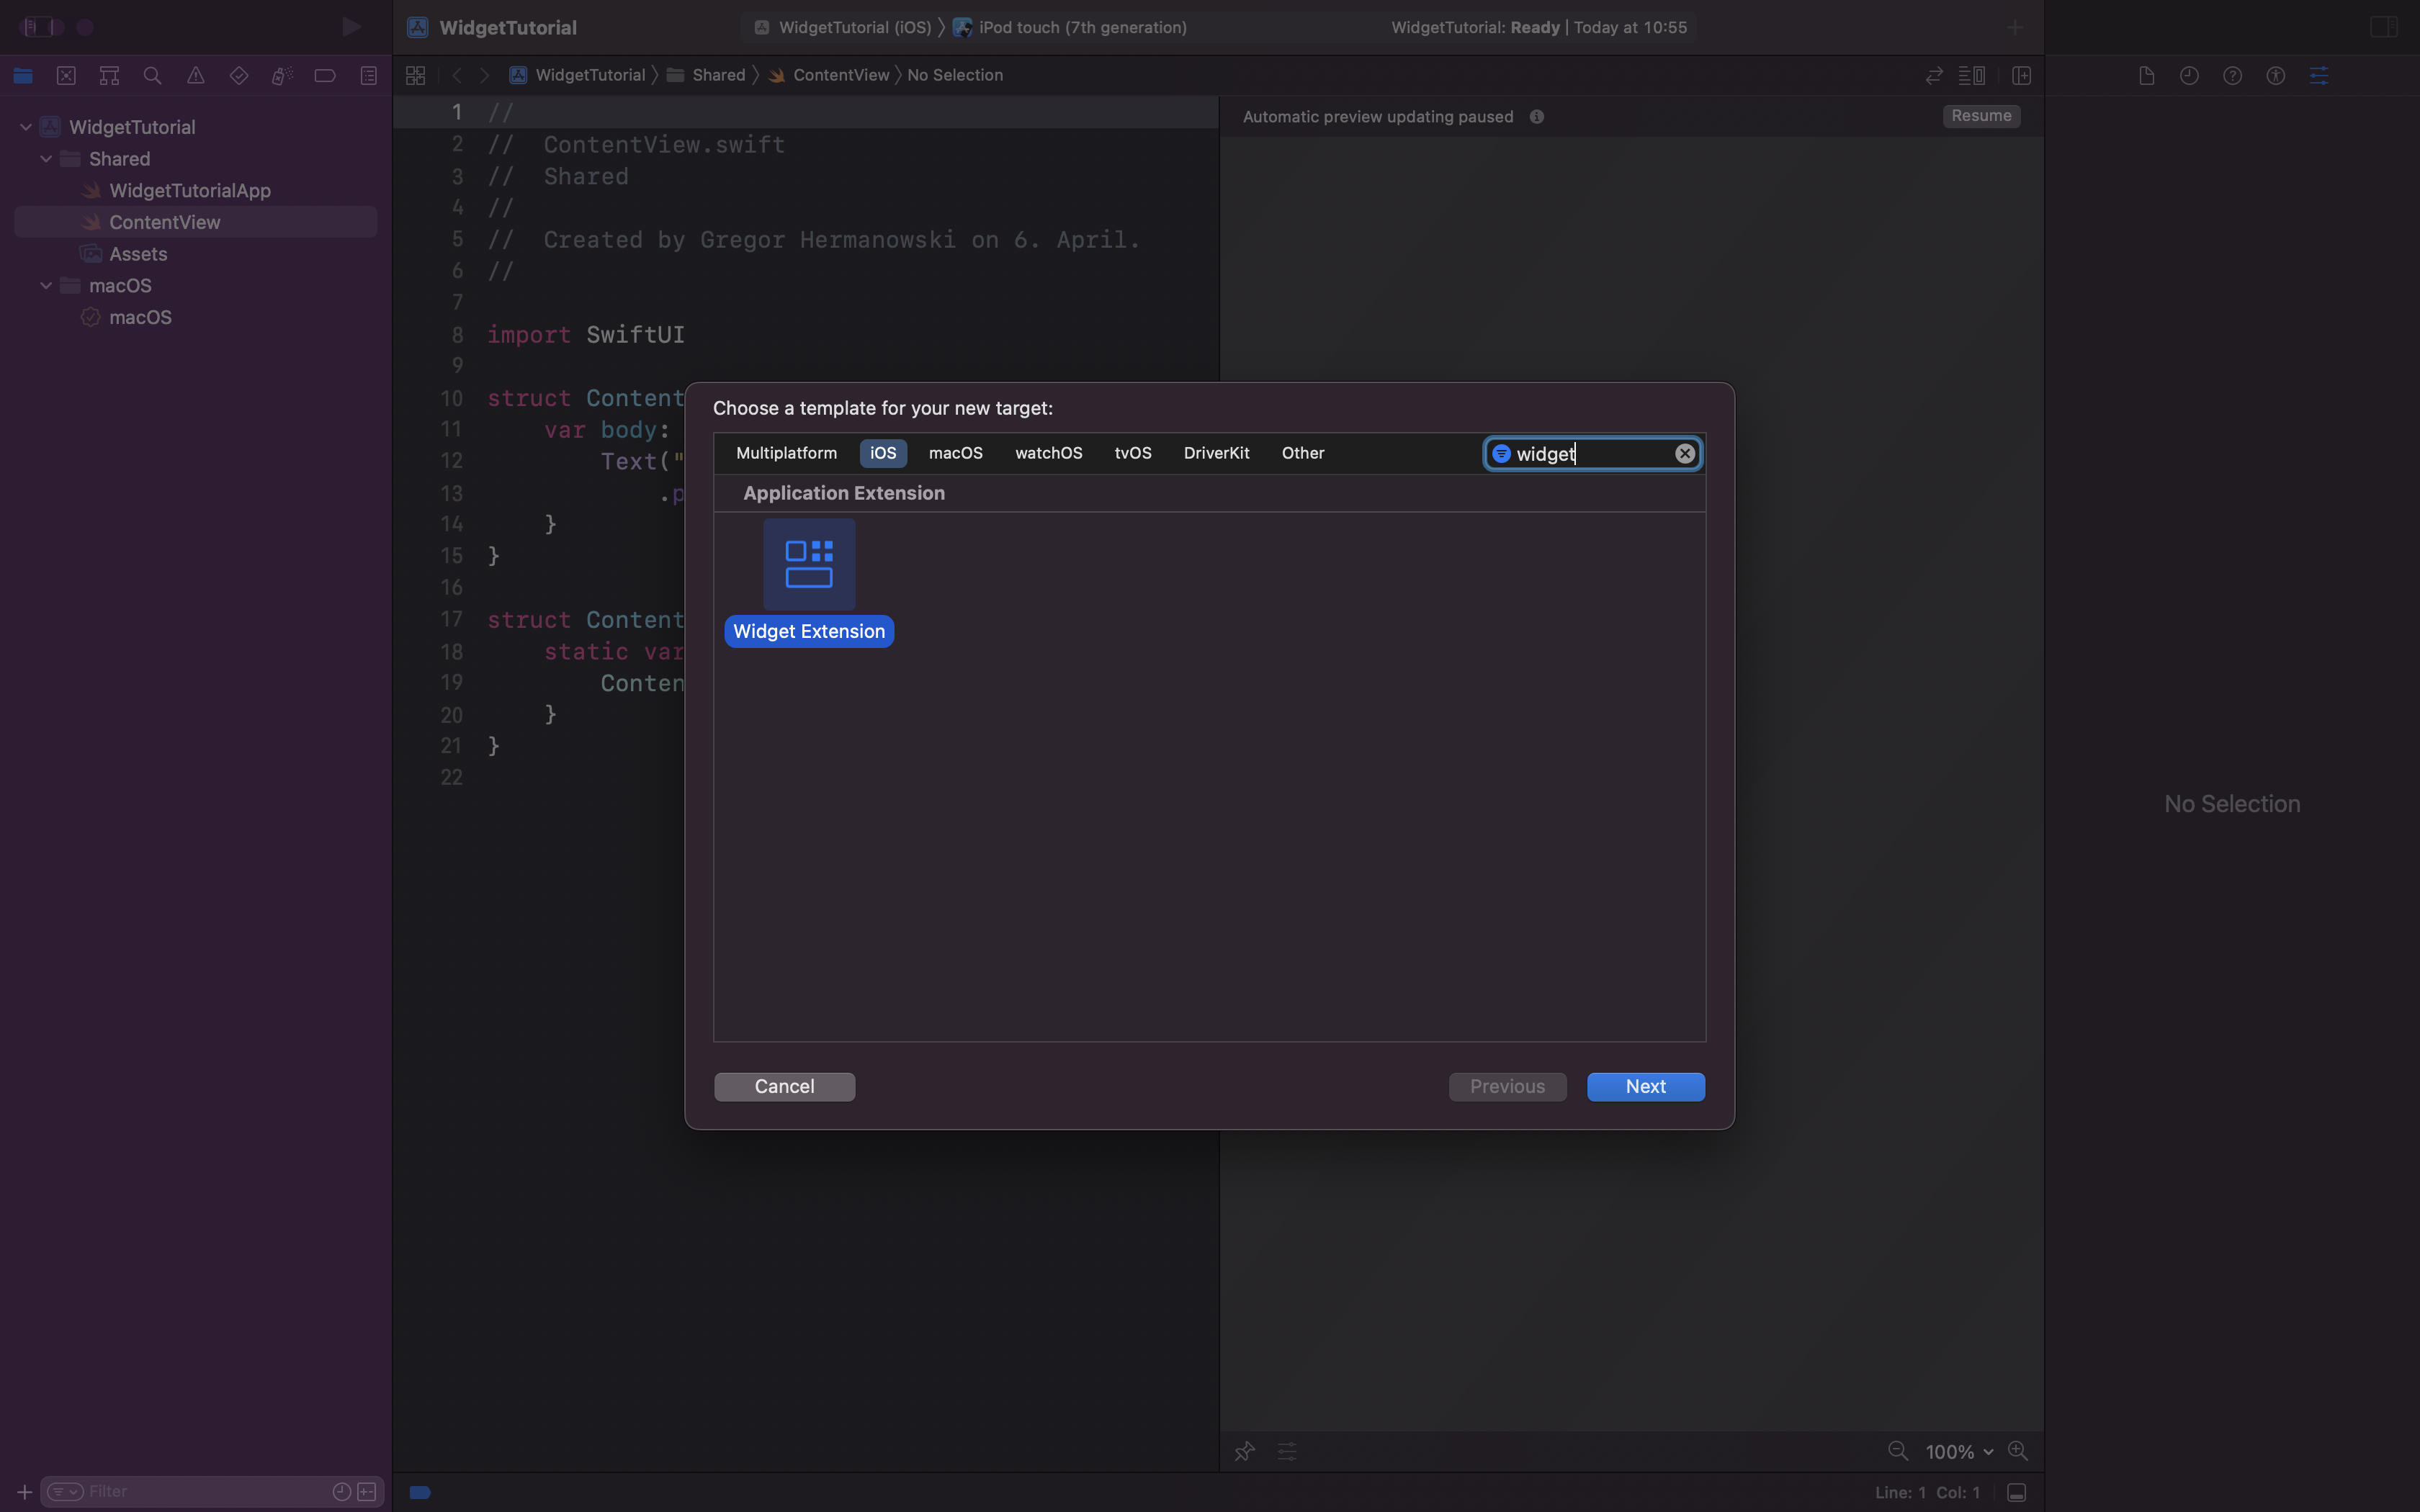
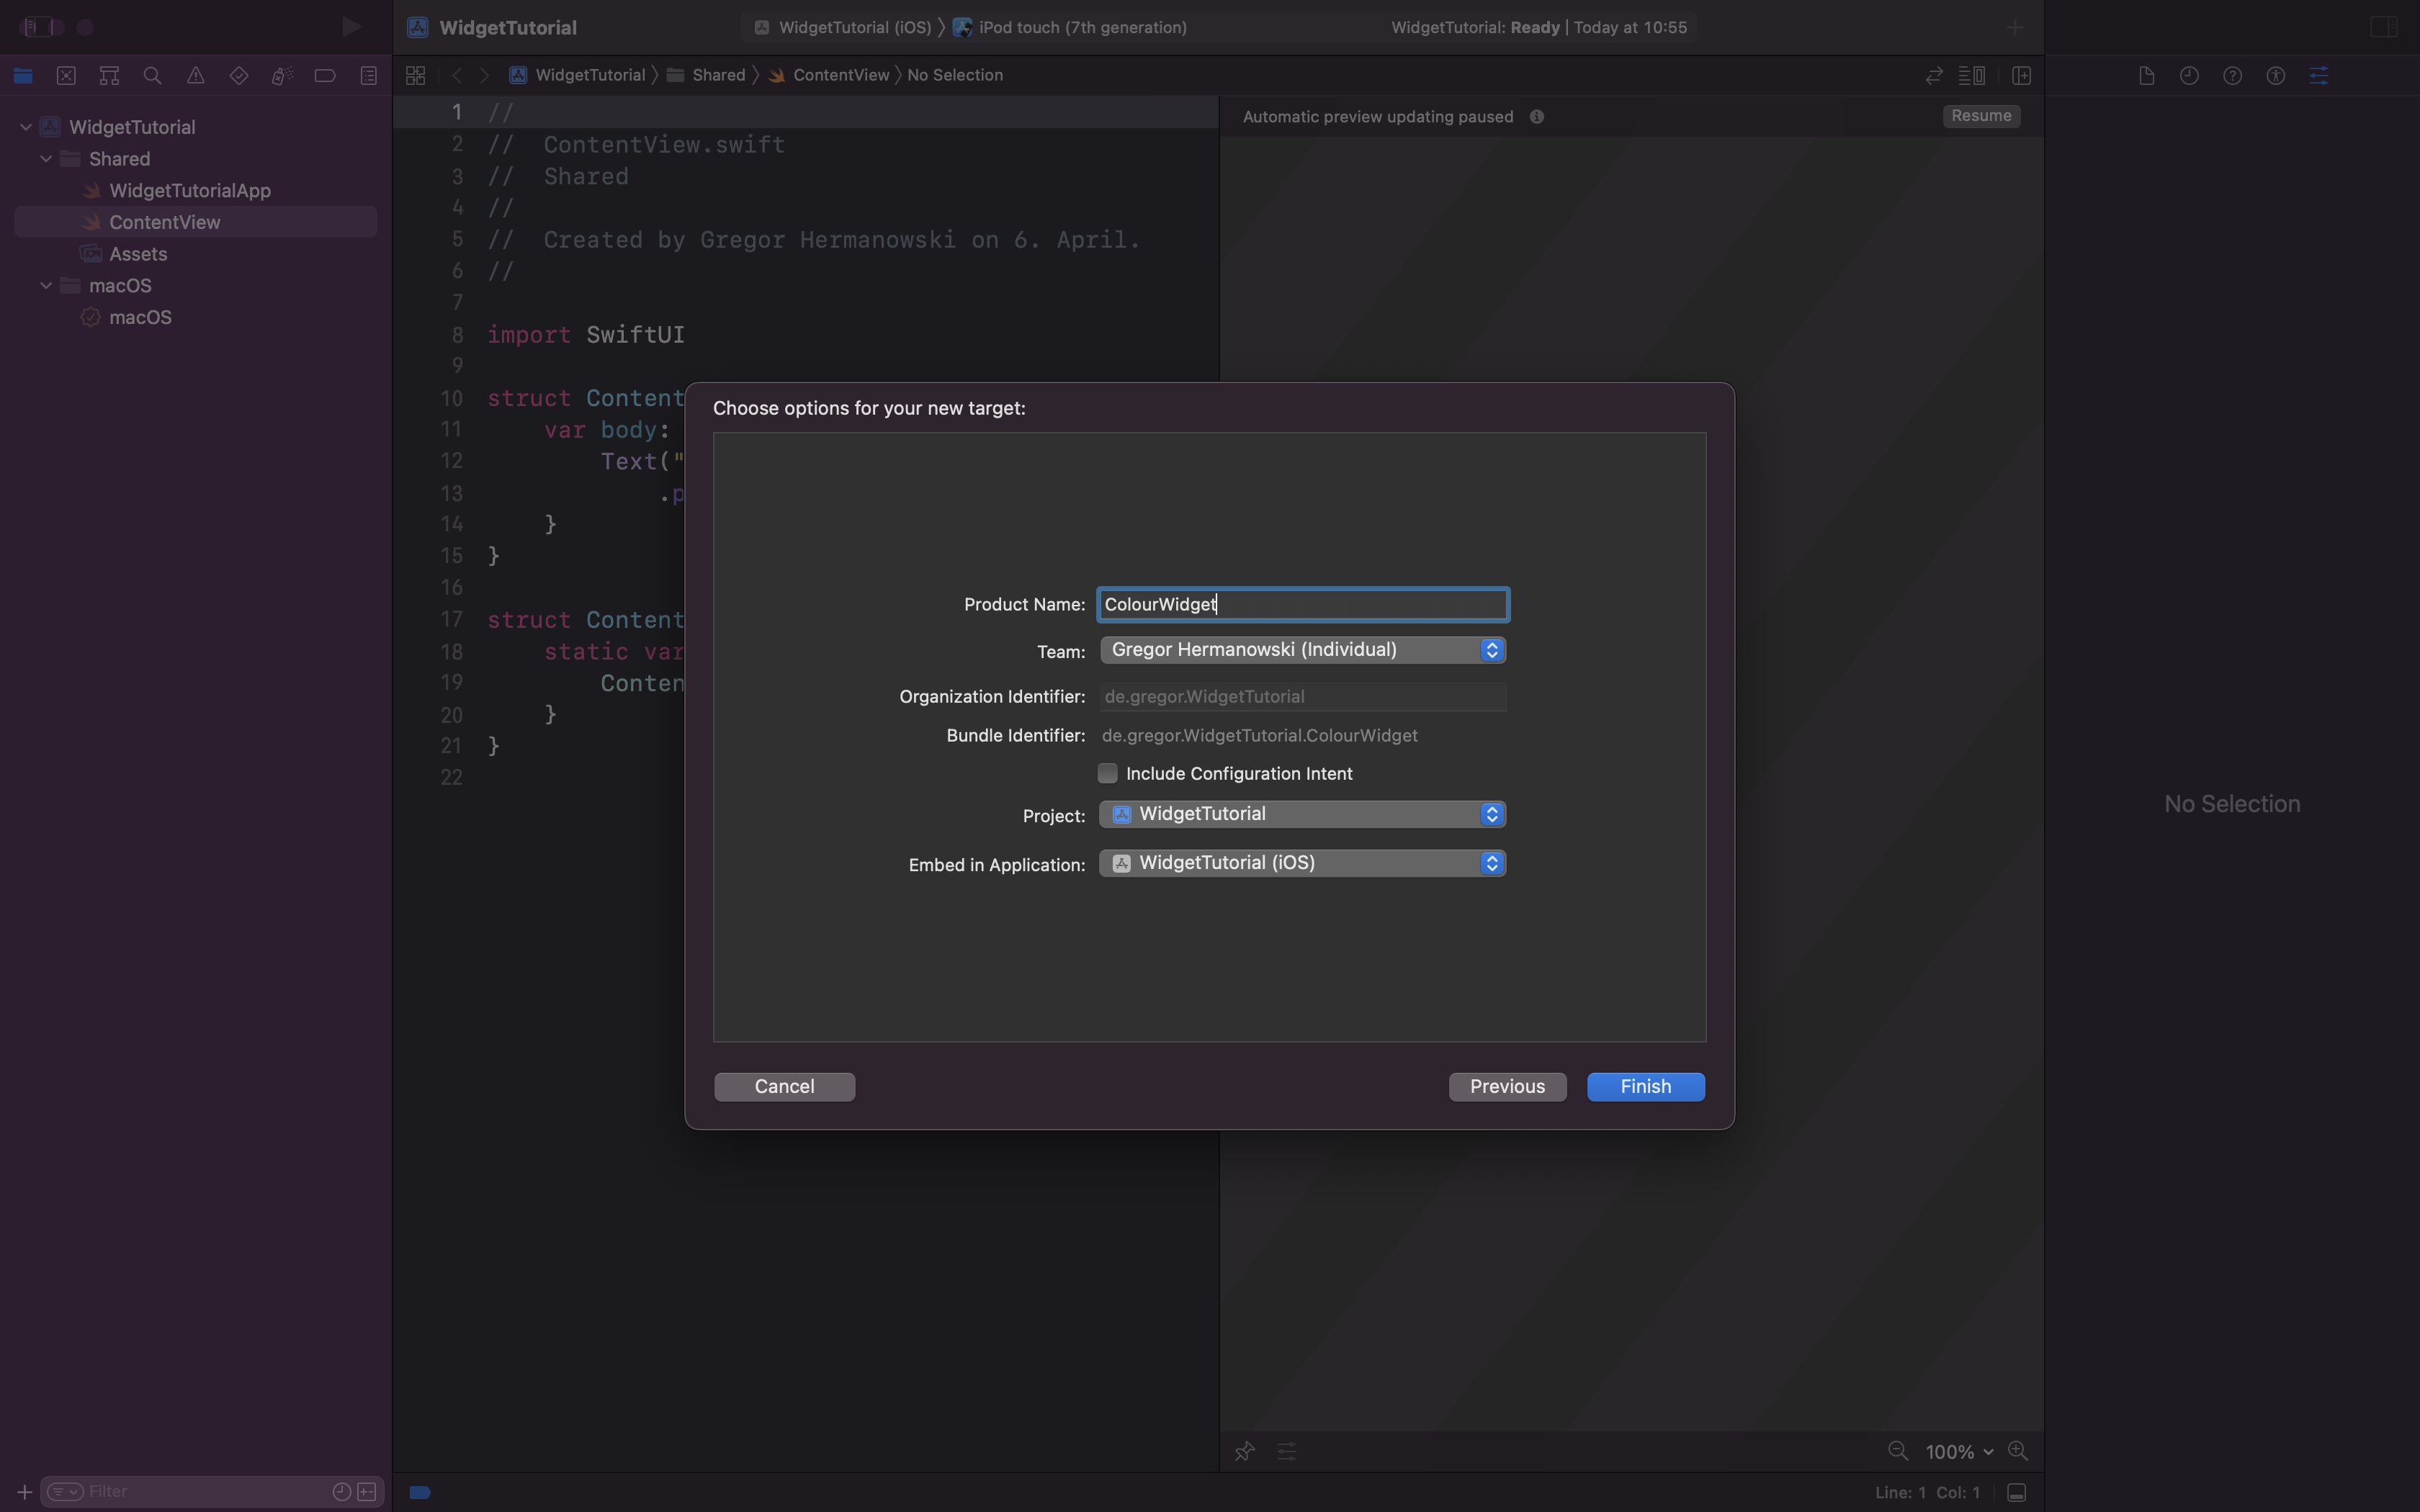
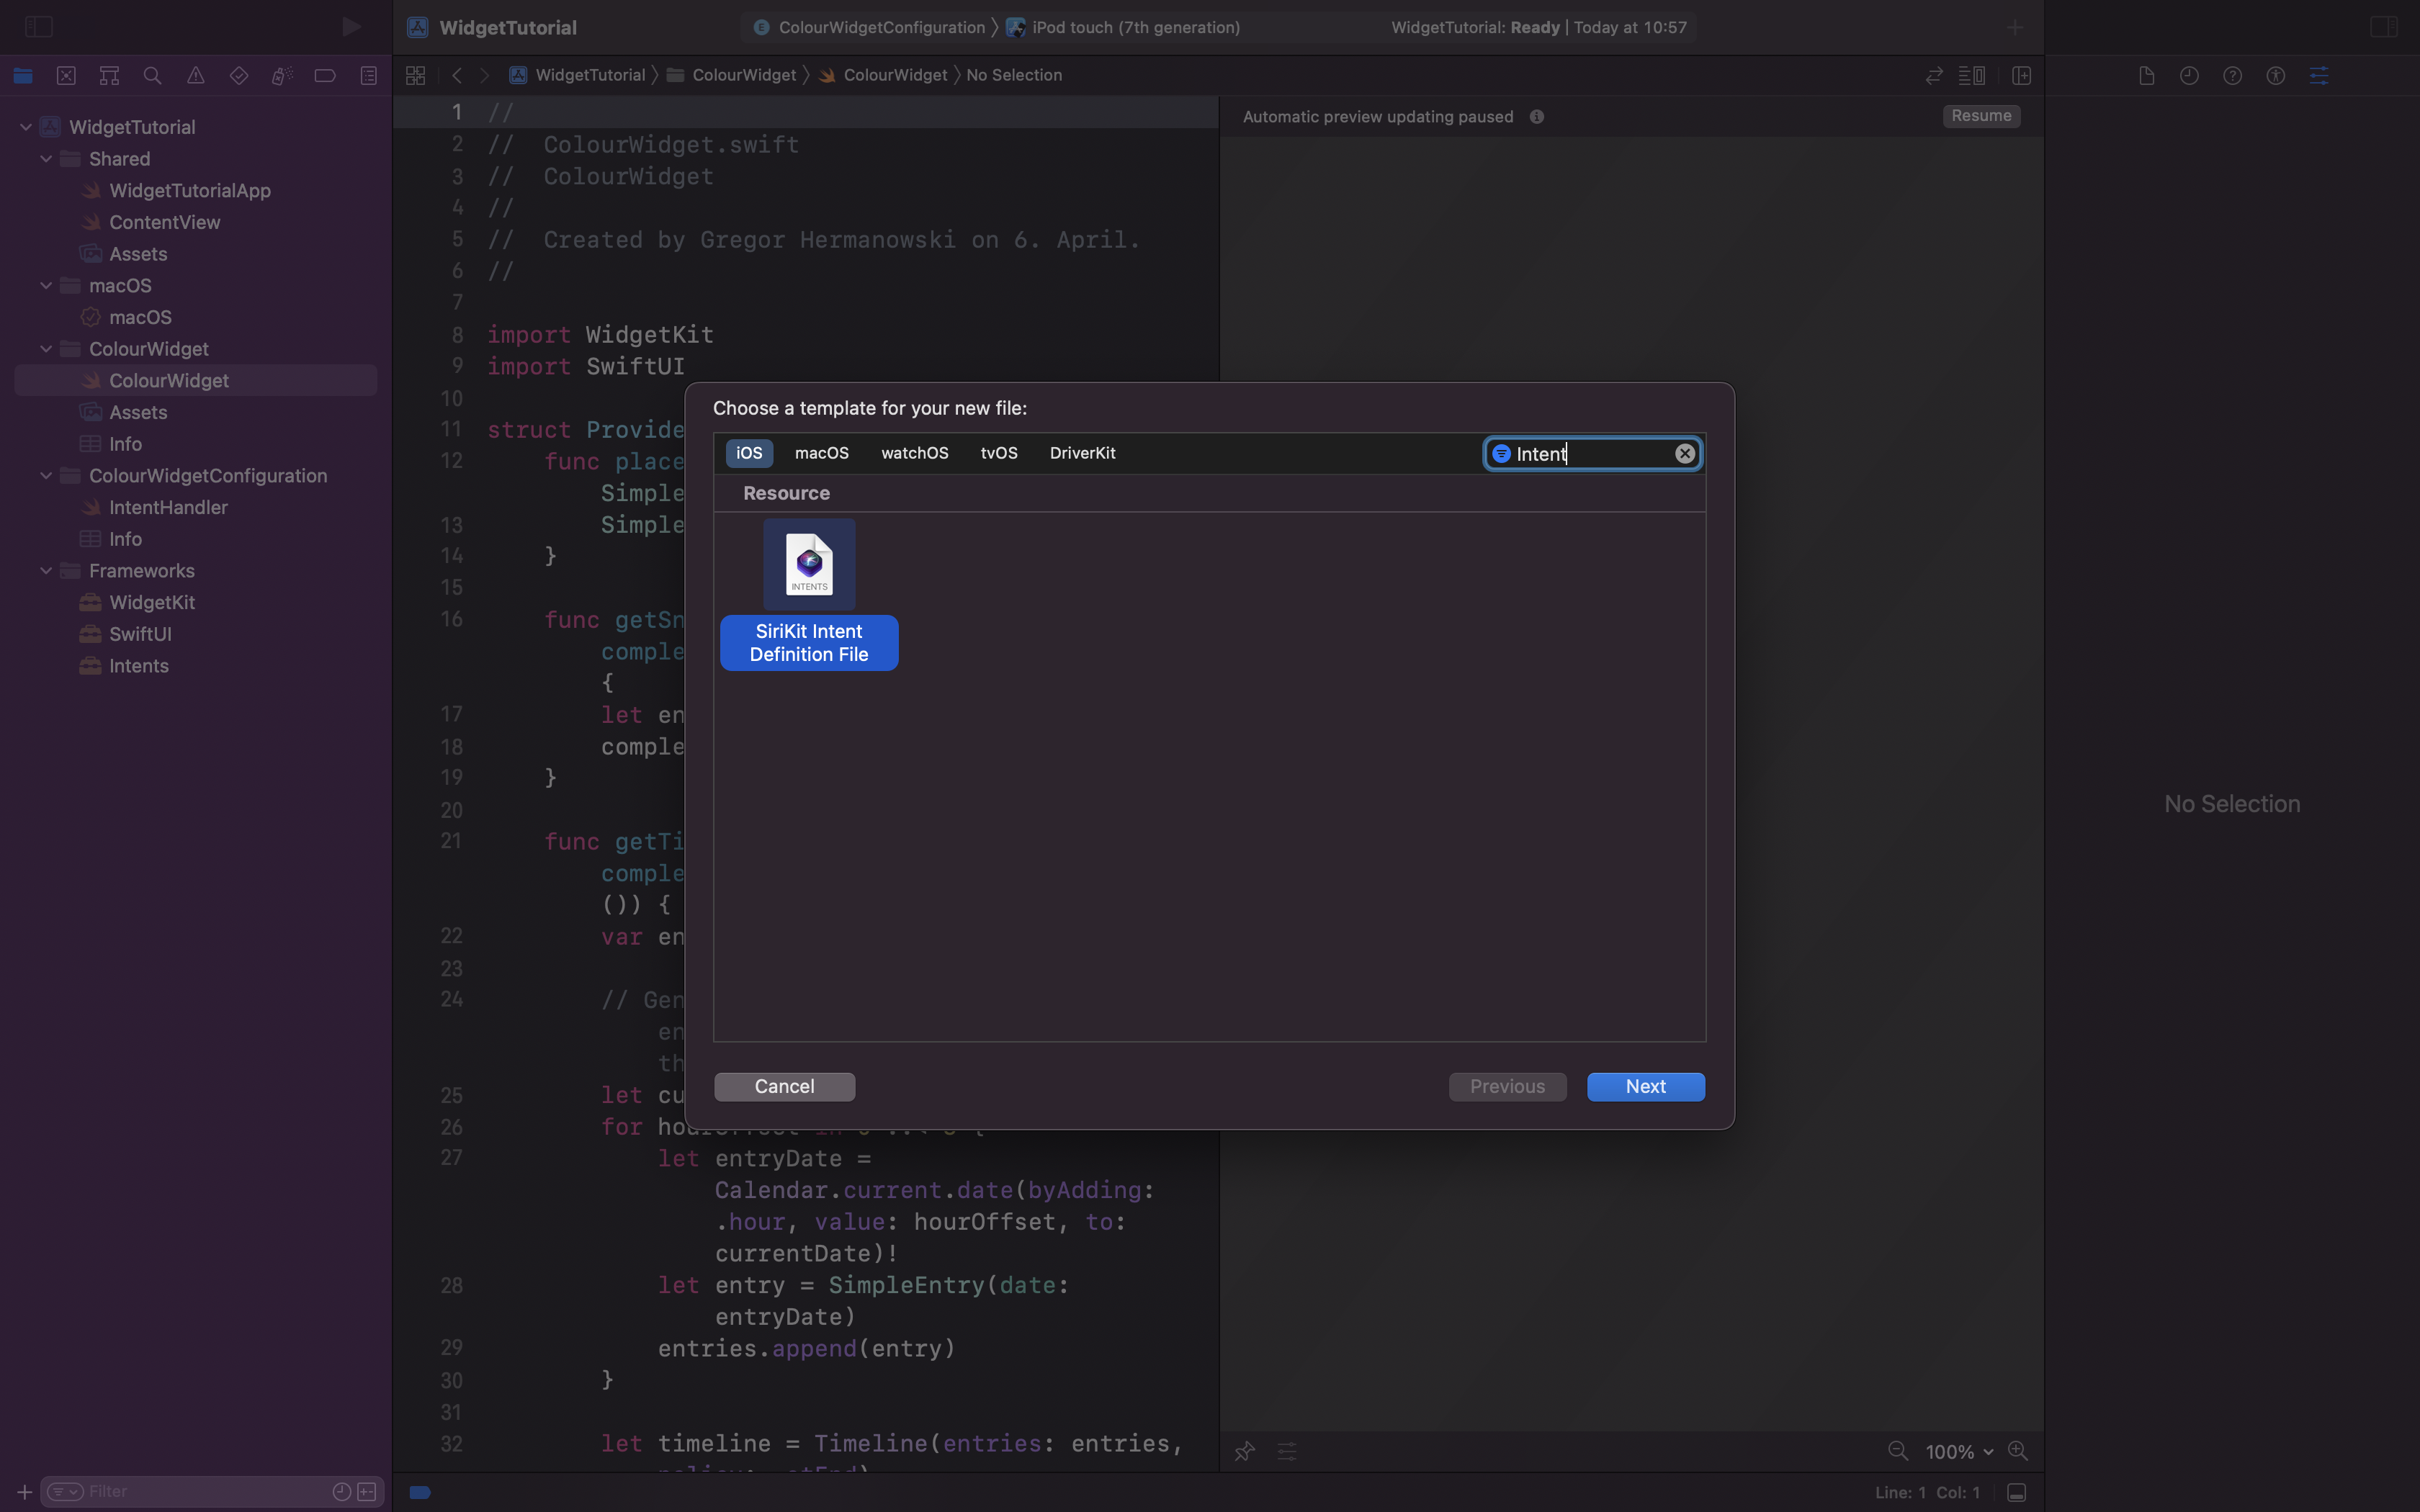
To allow configuration of your widgets, you need to add a new target to your project. Choose the template "Intents Extension".
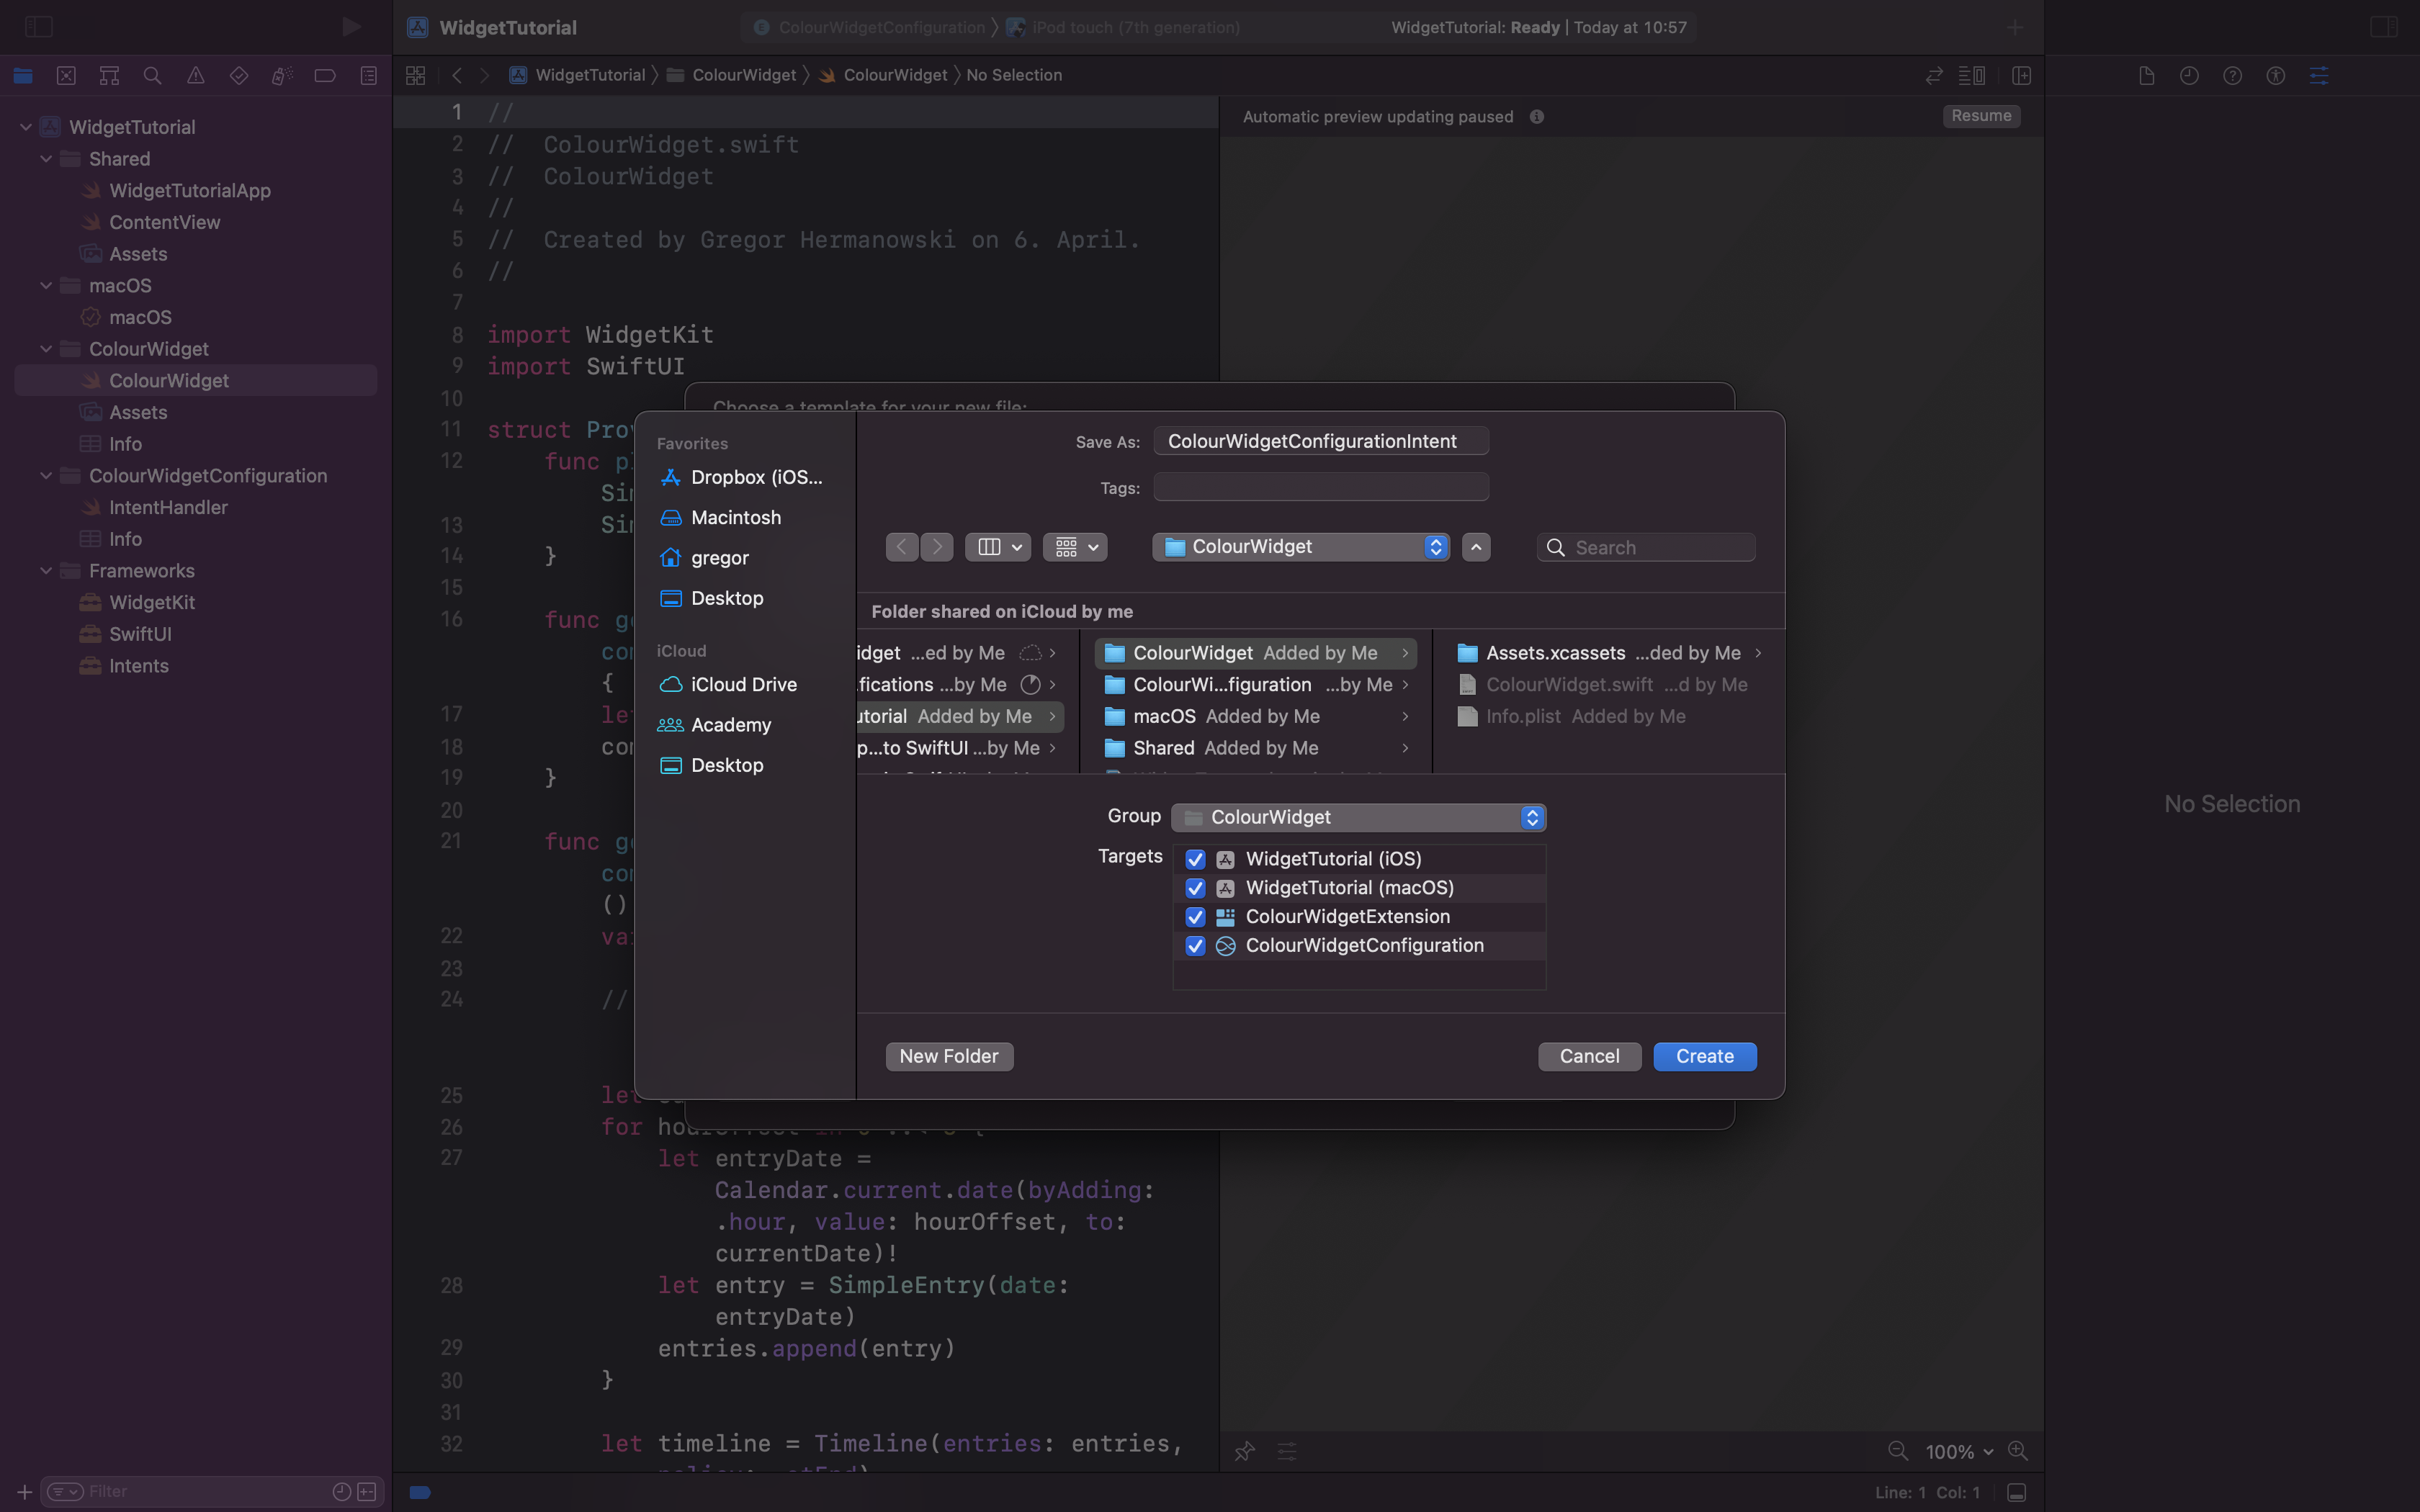
Right click on a file inside the Widget group to add the intent definition file.
Make sure to include it in all your targets.
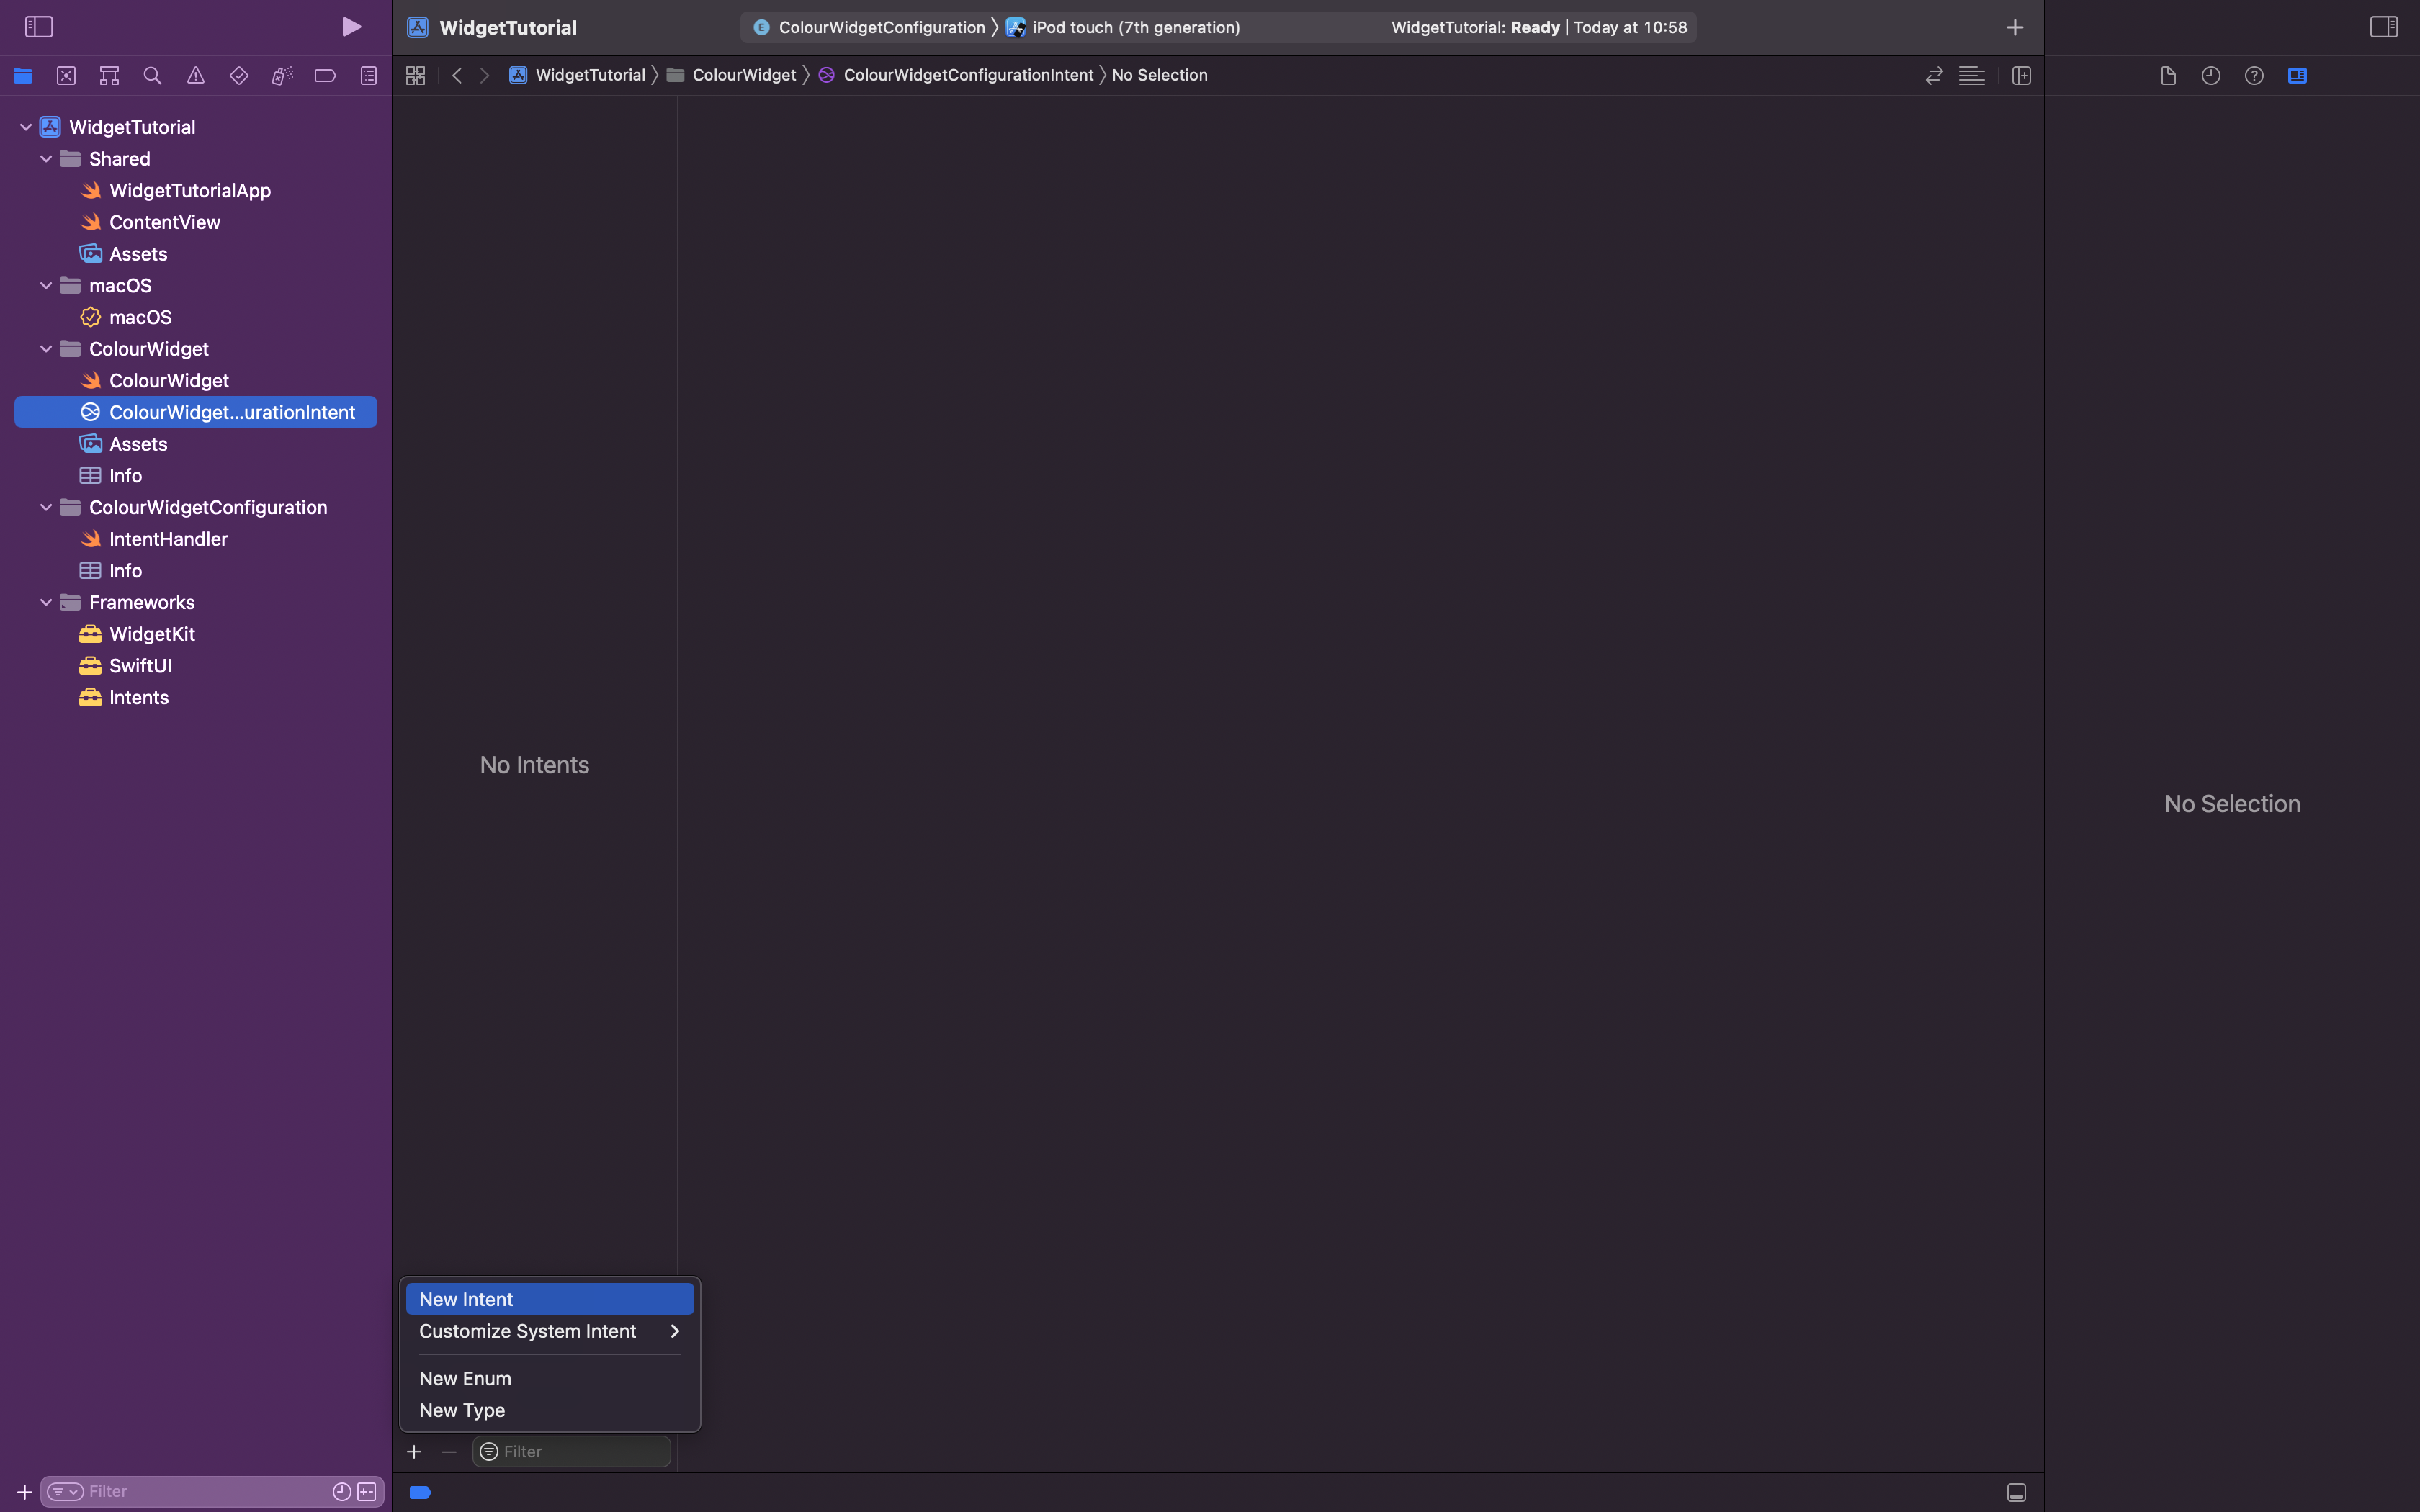
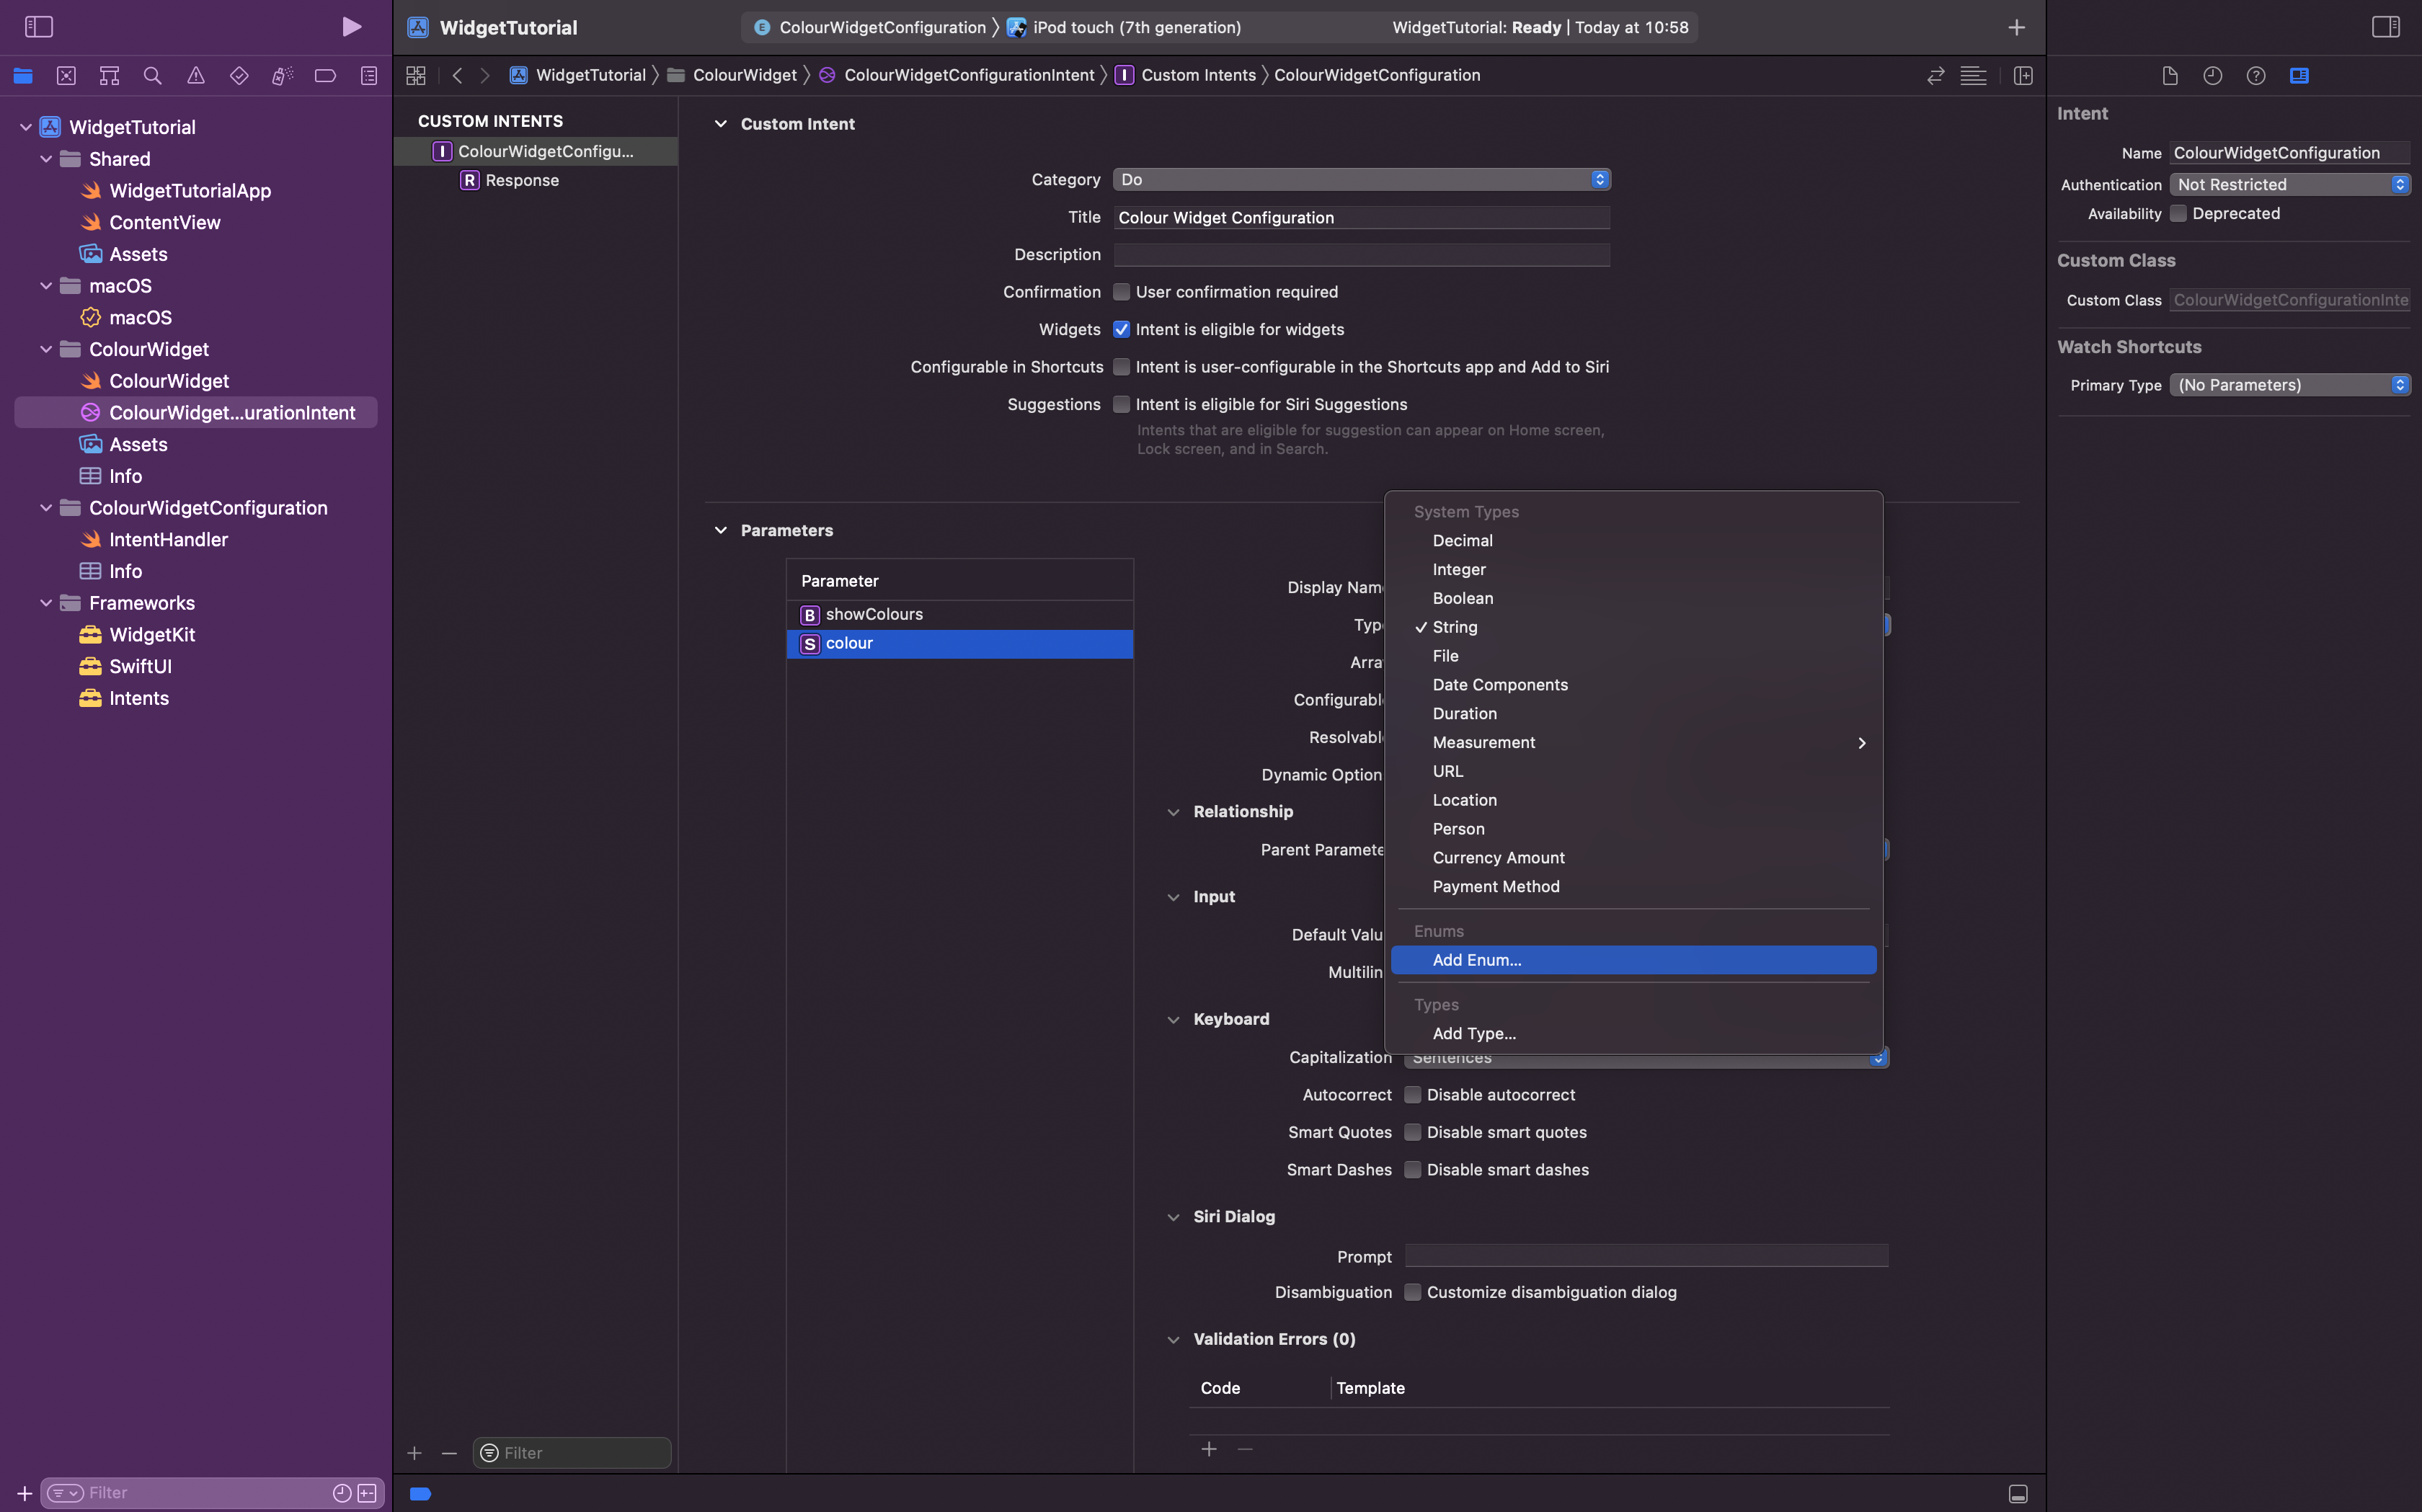
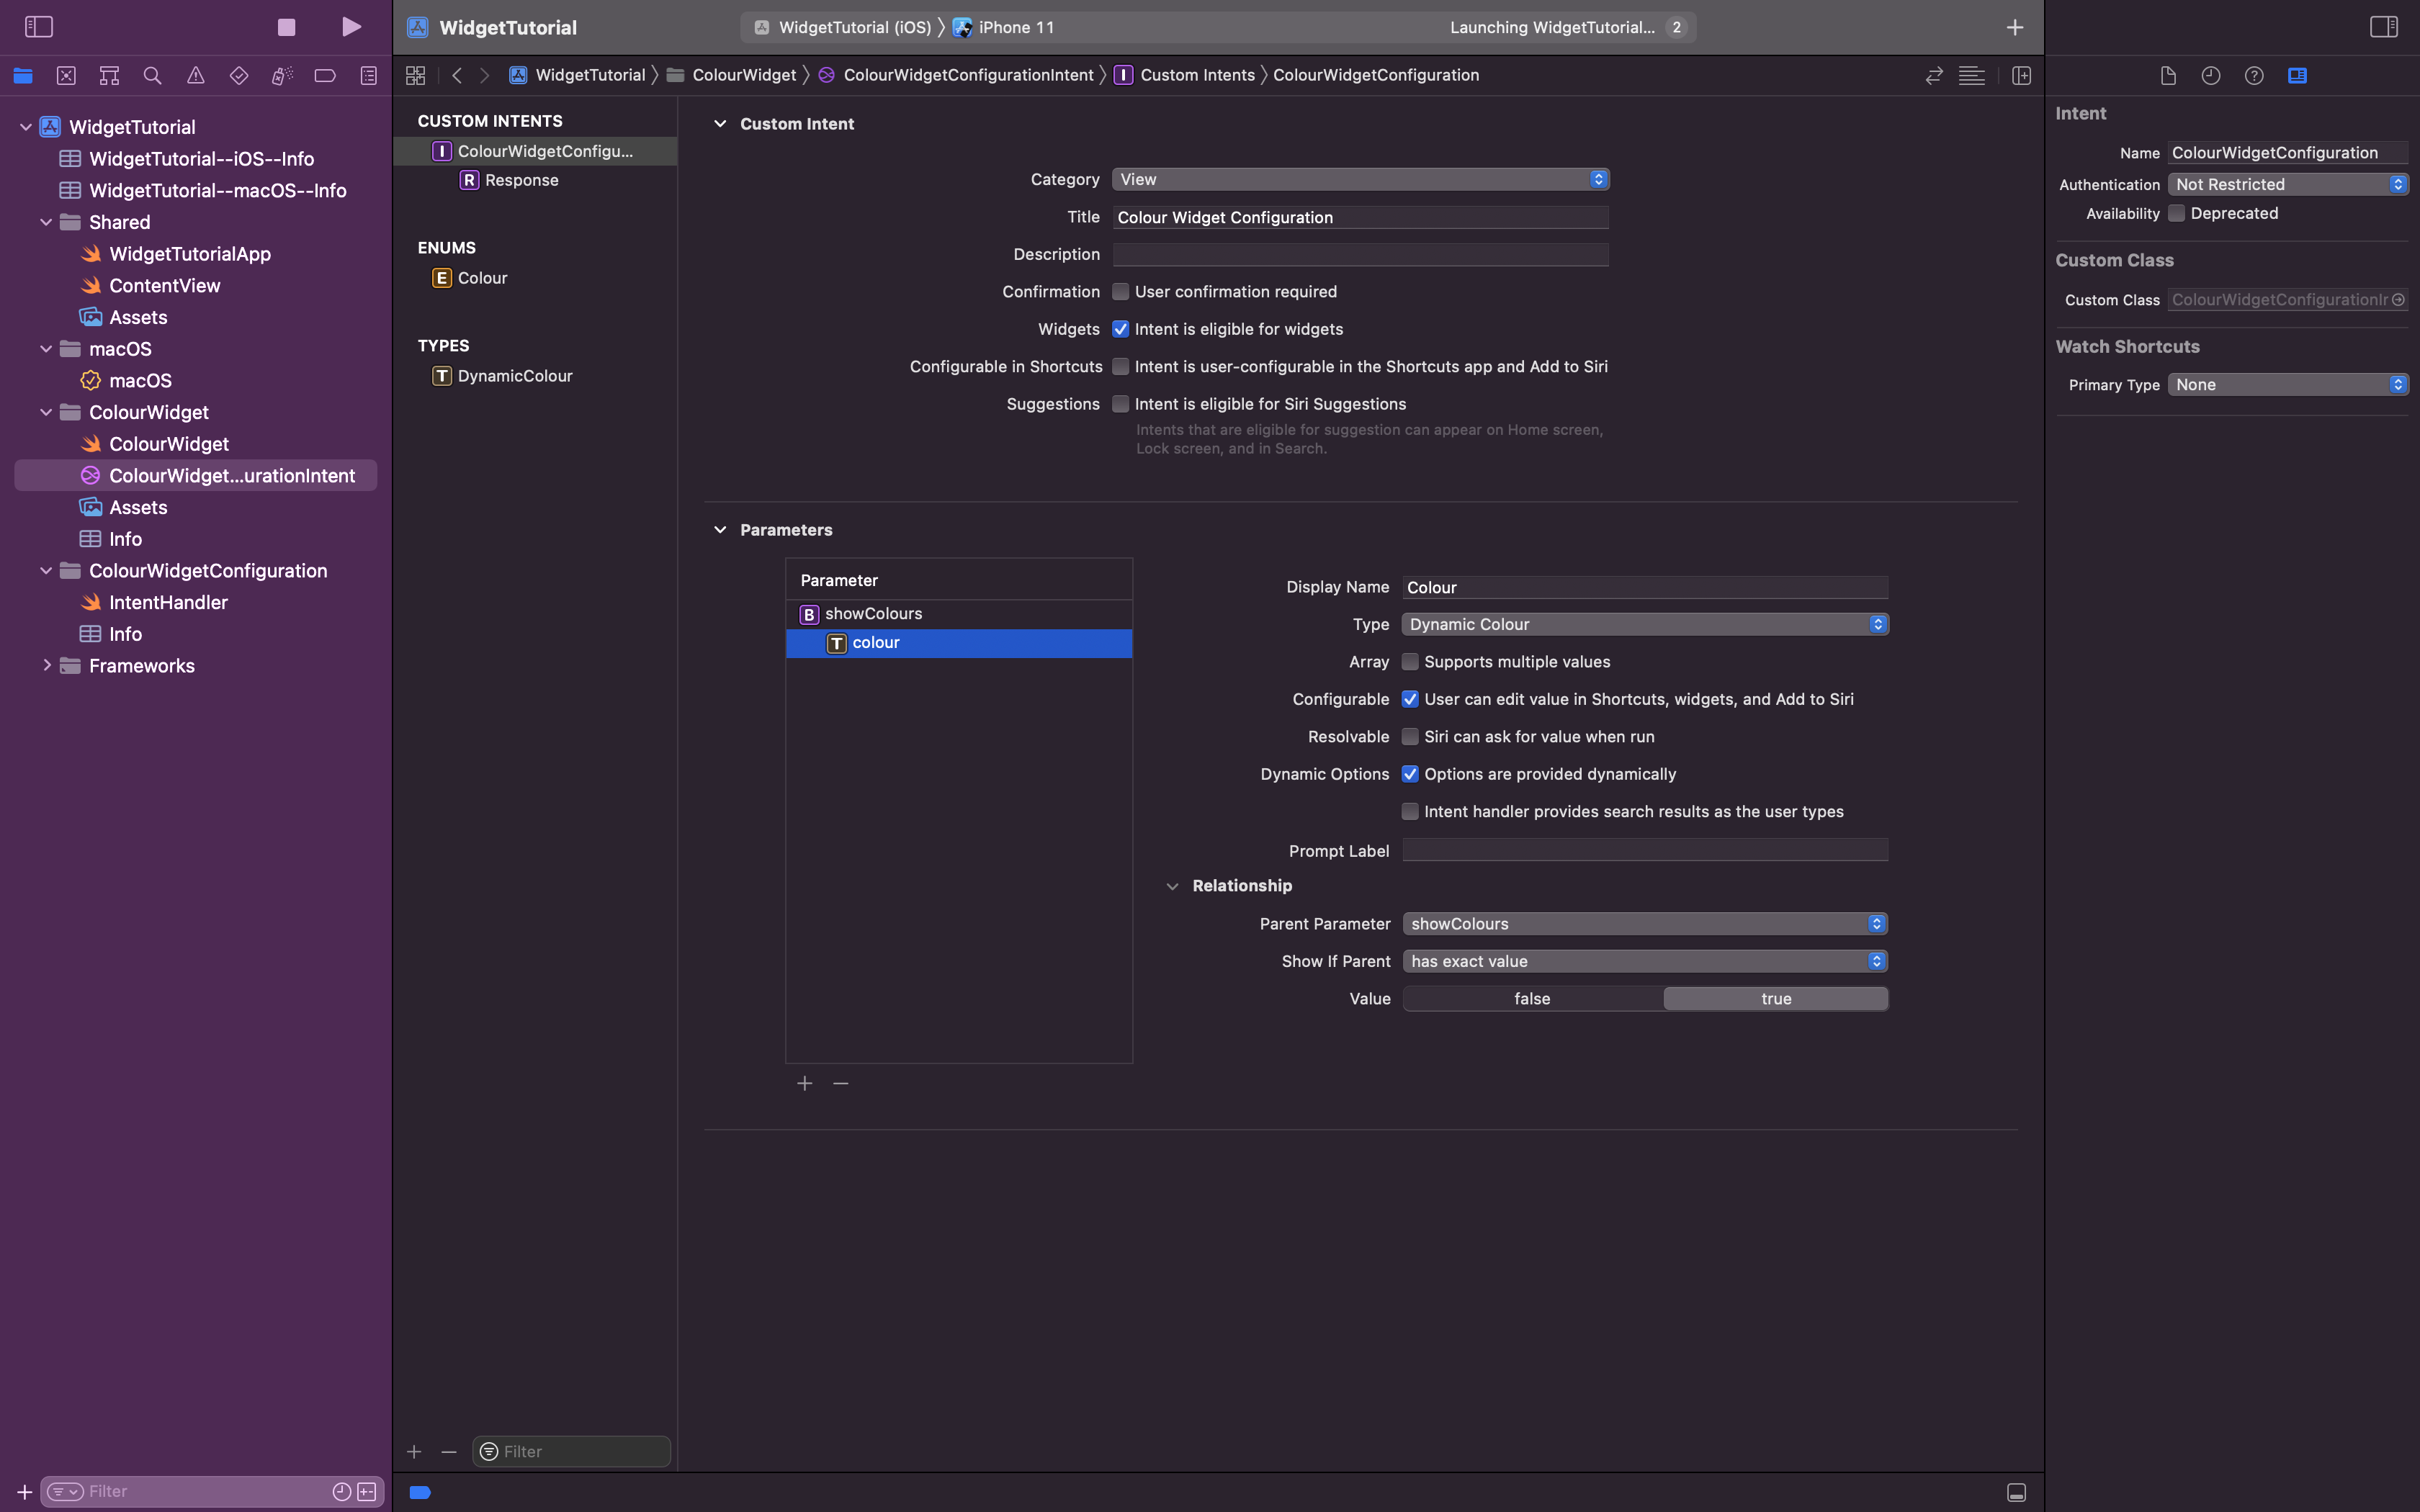
Inside the the intent definition, add a new intent for the configuration of your widget.
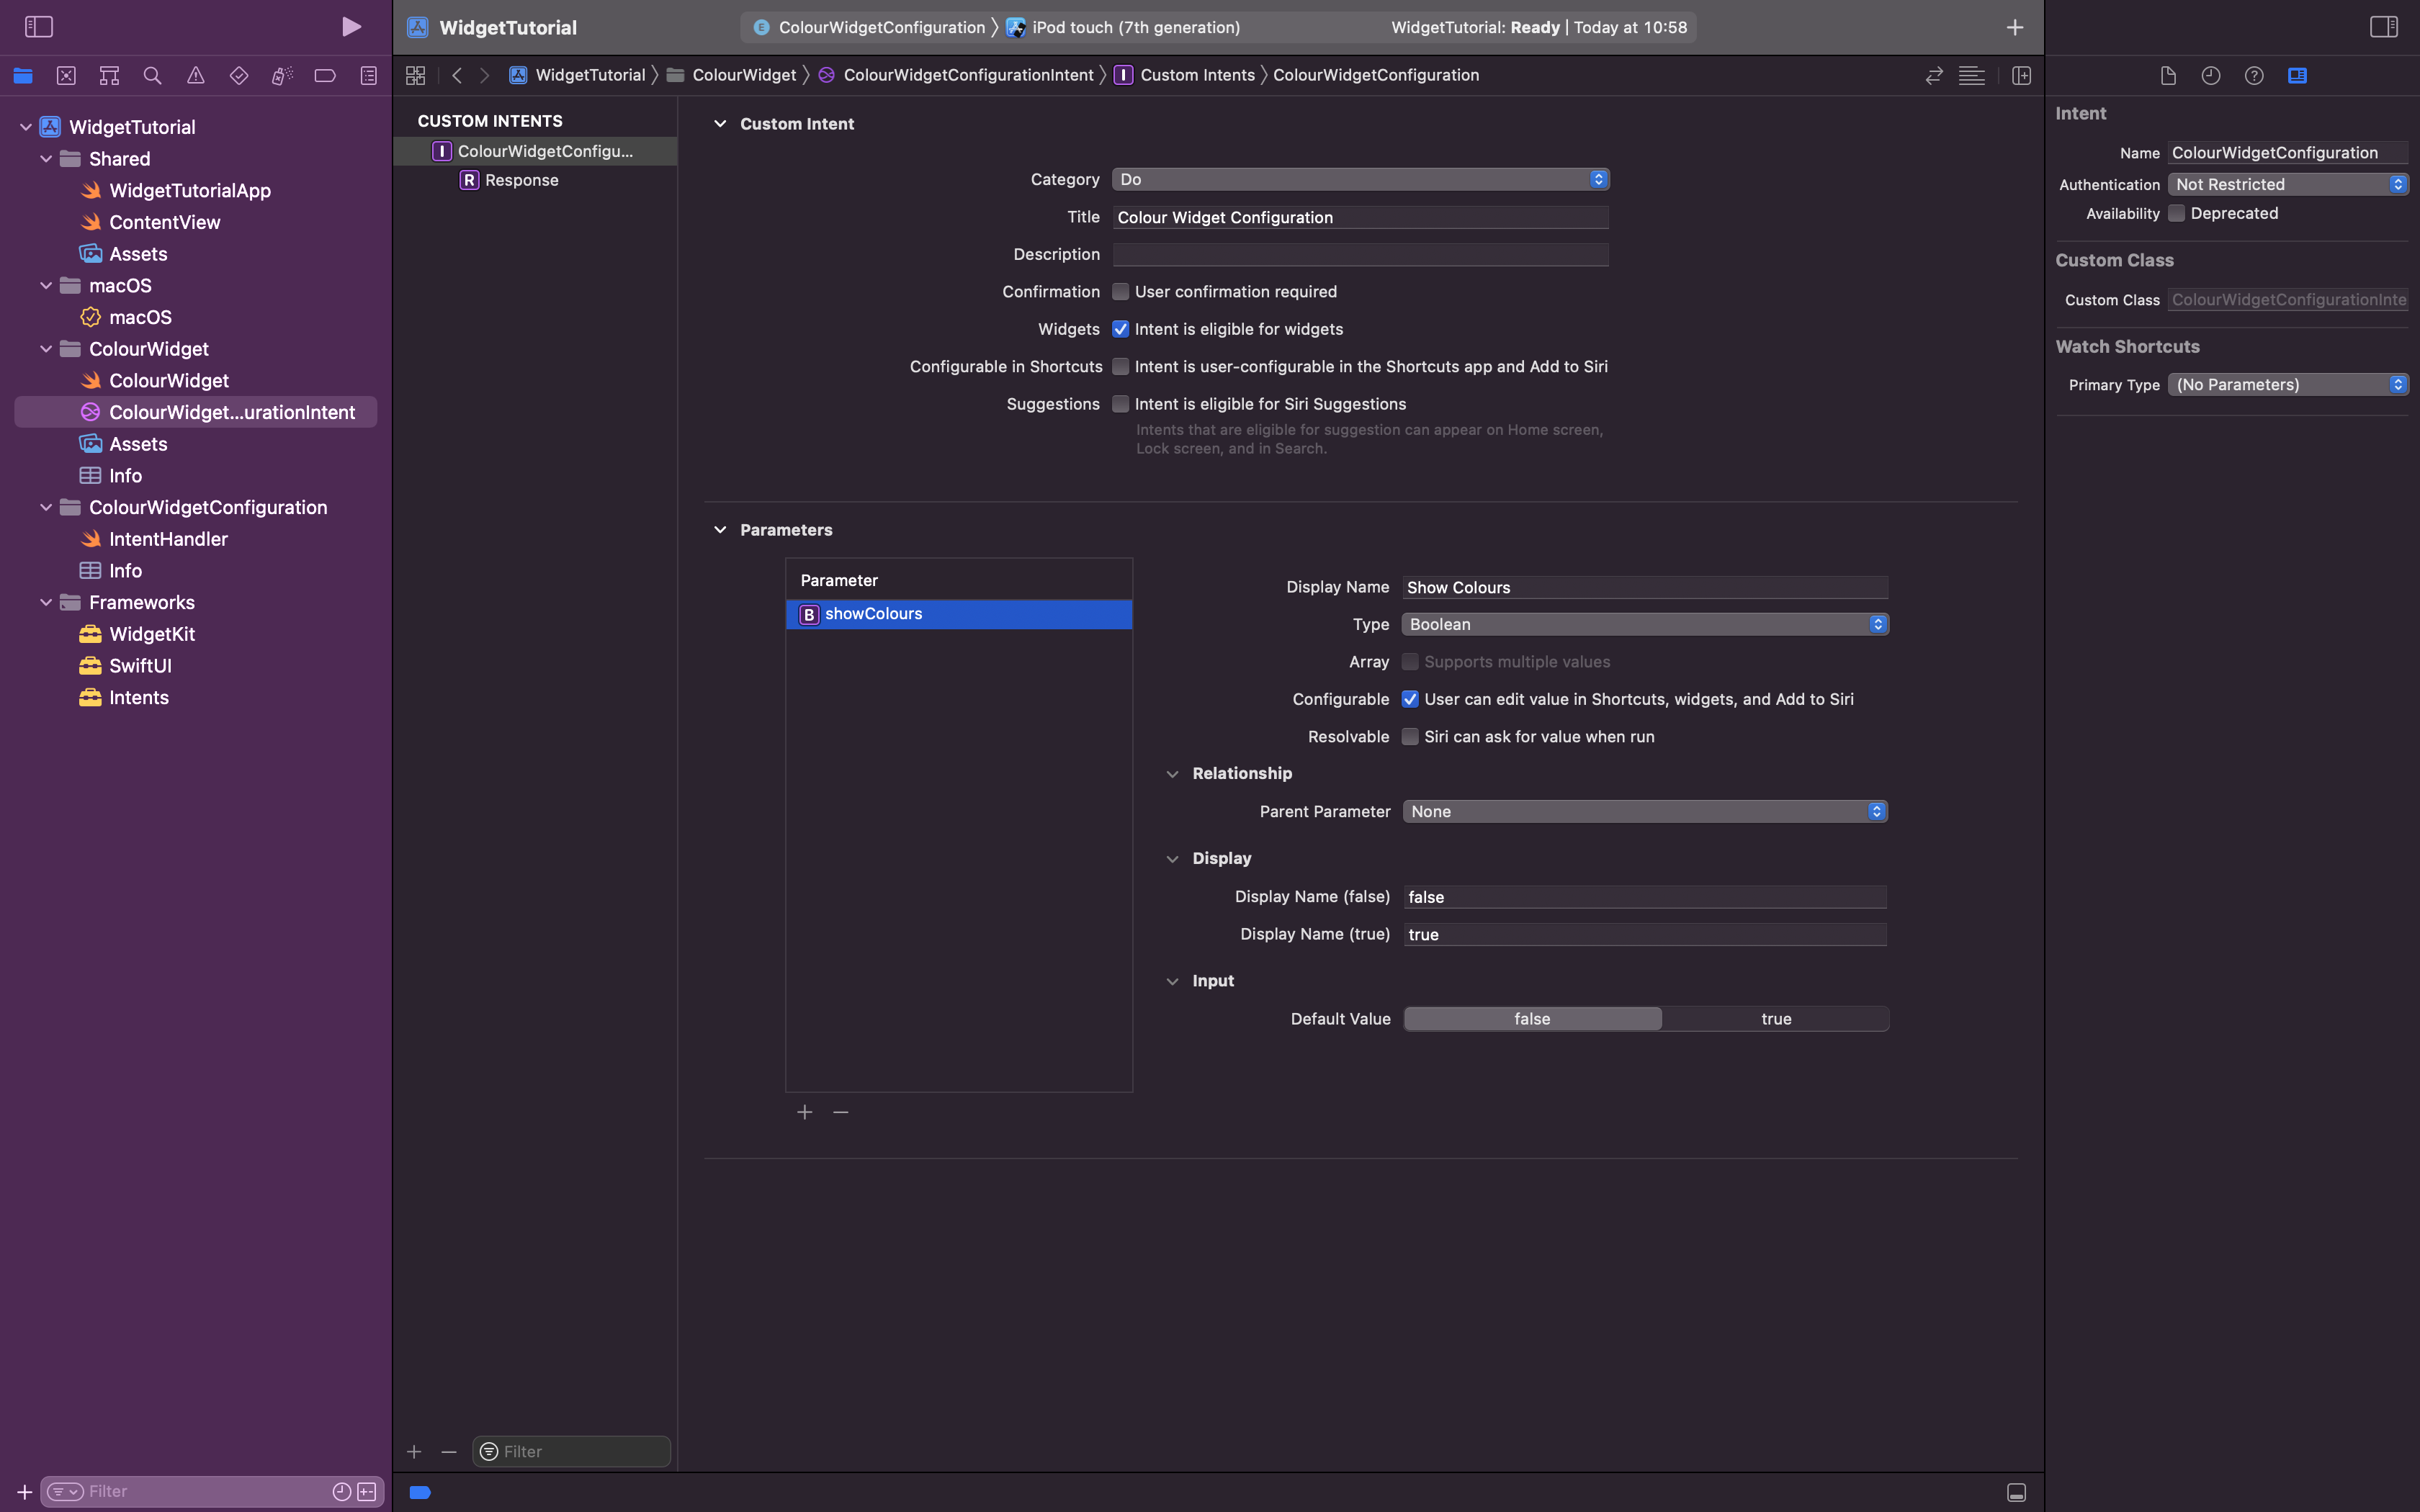
In the first section, click the checkbox "Intent is eligible for widgets" and deselect the others as we do not need them.

Add your options for configuration in the Parameters section. Here, we will add a boolean value.
You can also create custom types that you use in your widget.

In step 9 we will add dynamic options provided by your app.
You can also hide options conditionally by setting a parent parameter for them.
Add a constant to the entry.
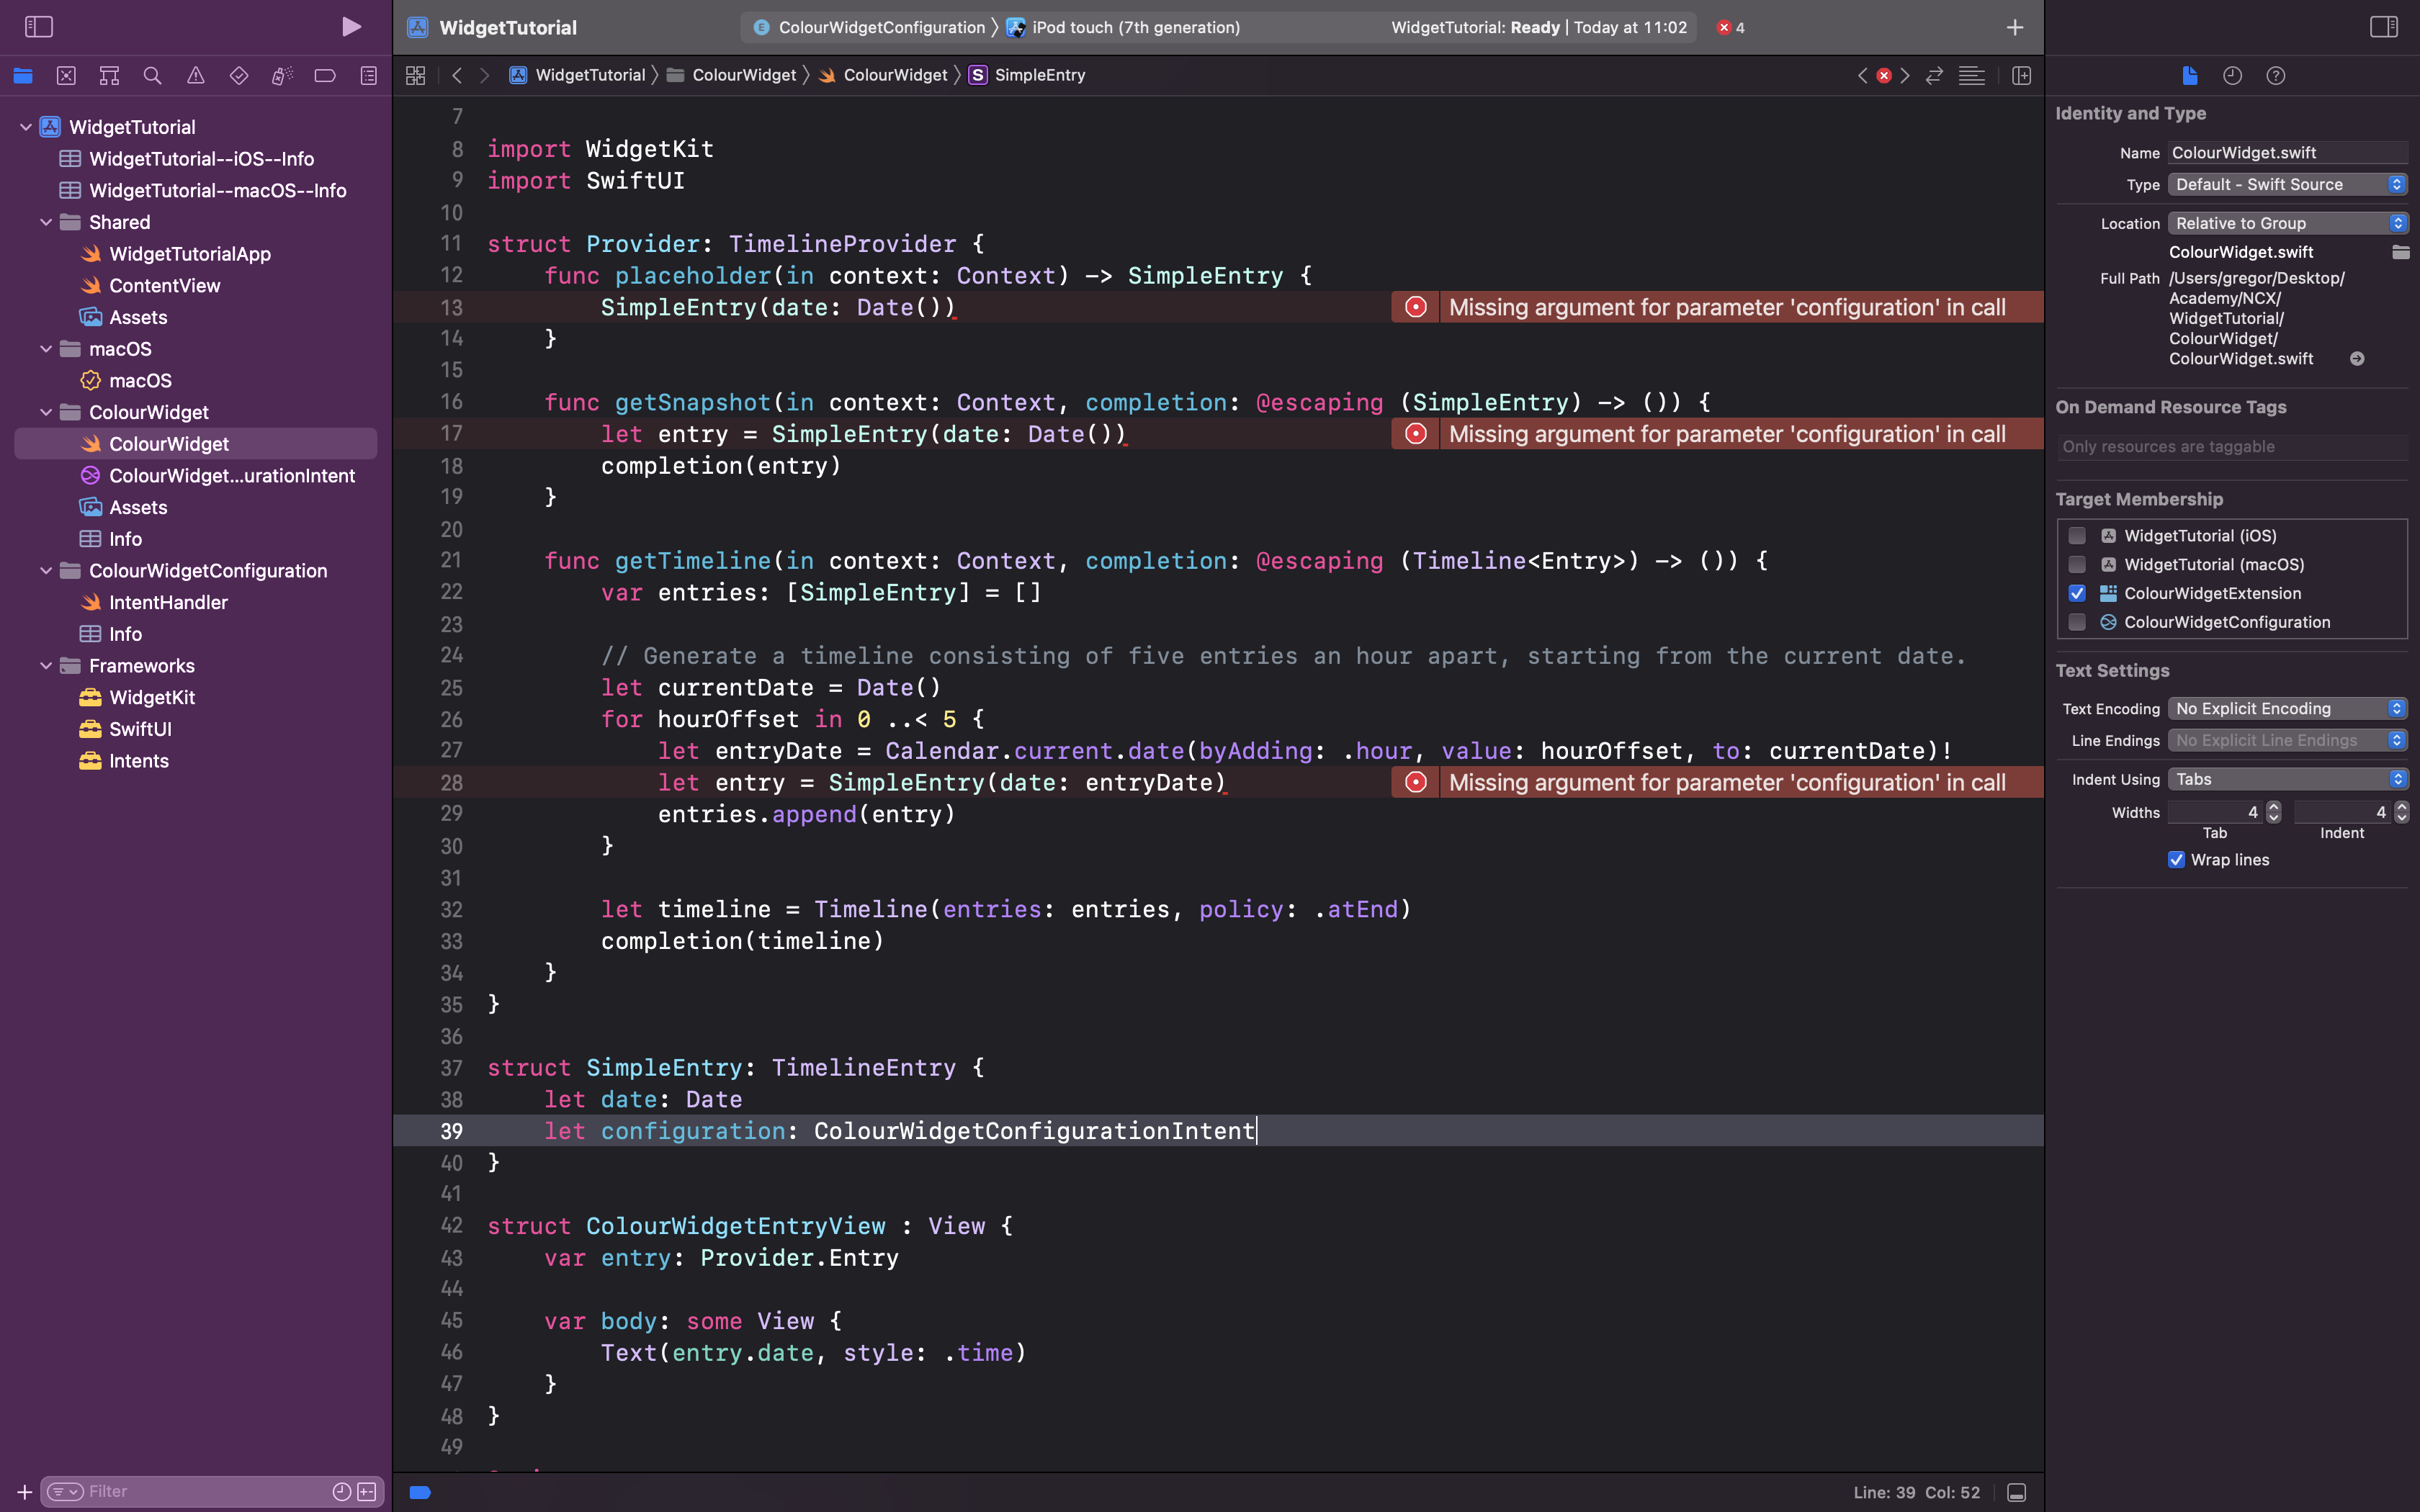
Change its type to IntentTimelineProvider.
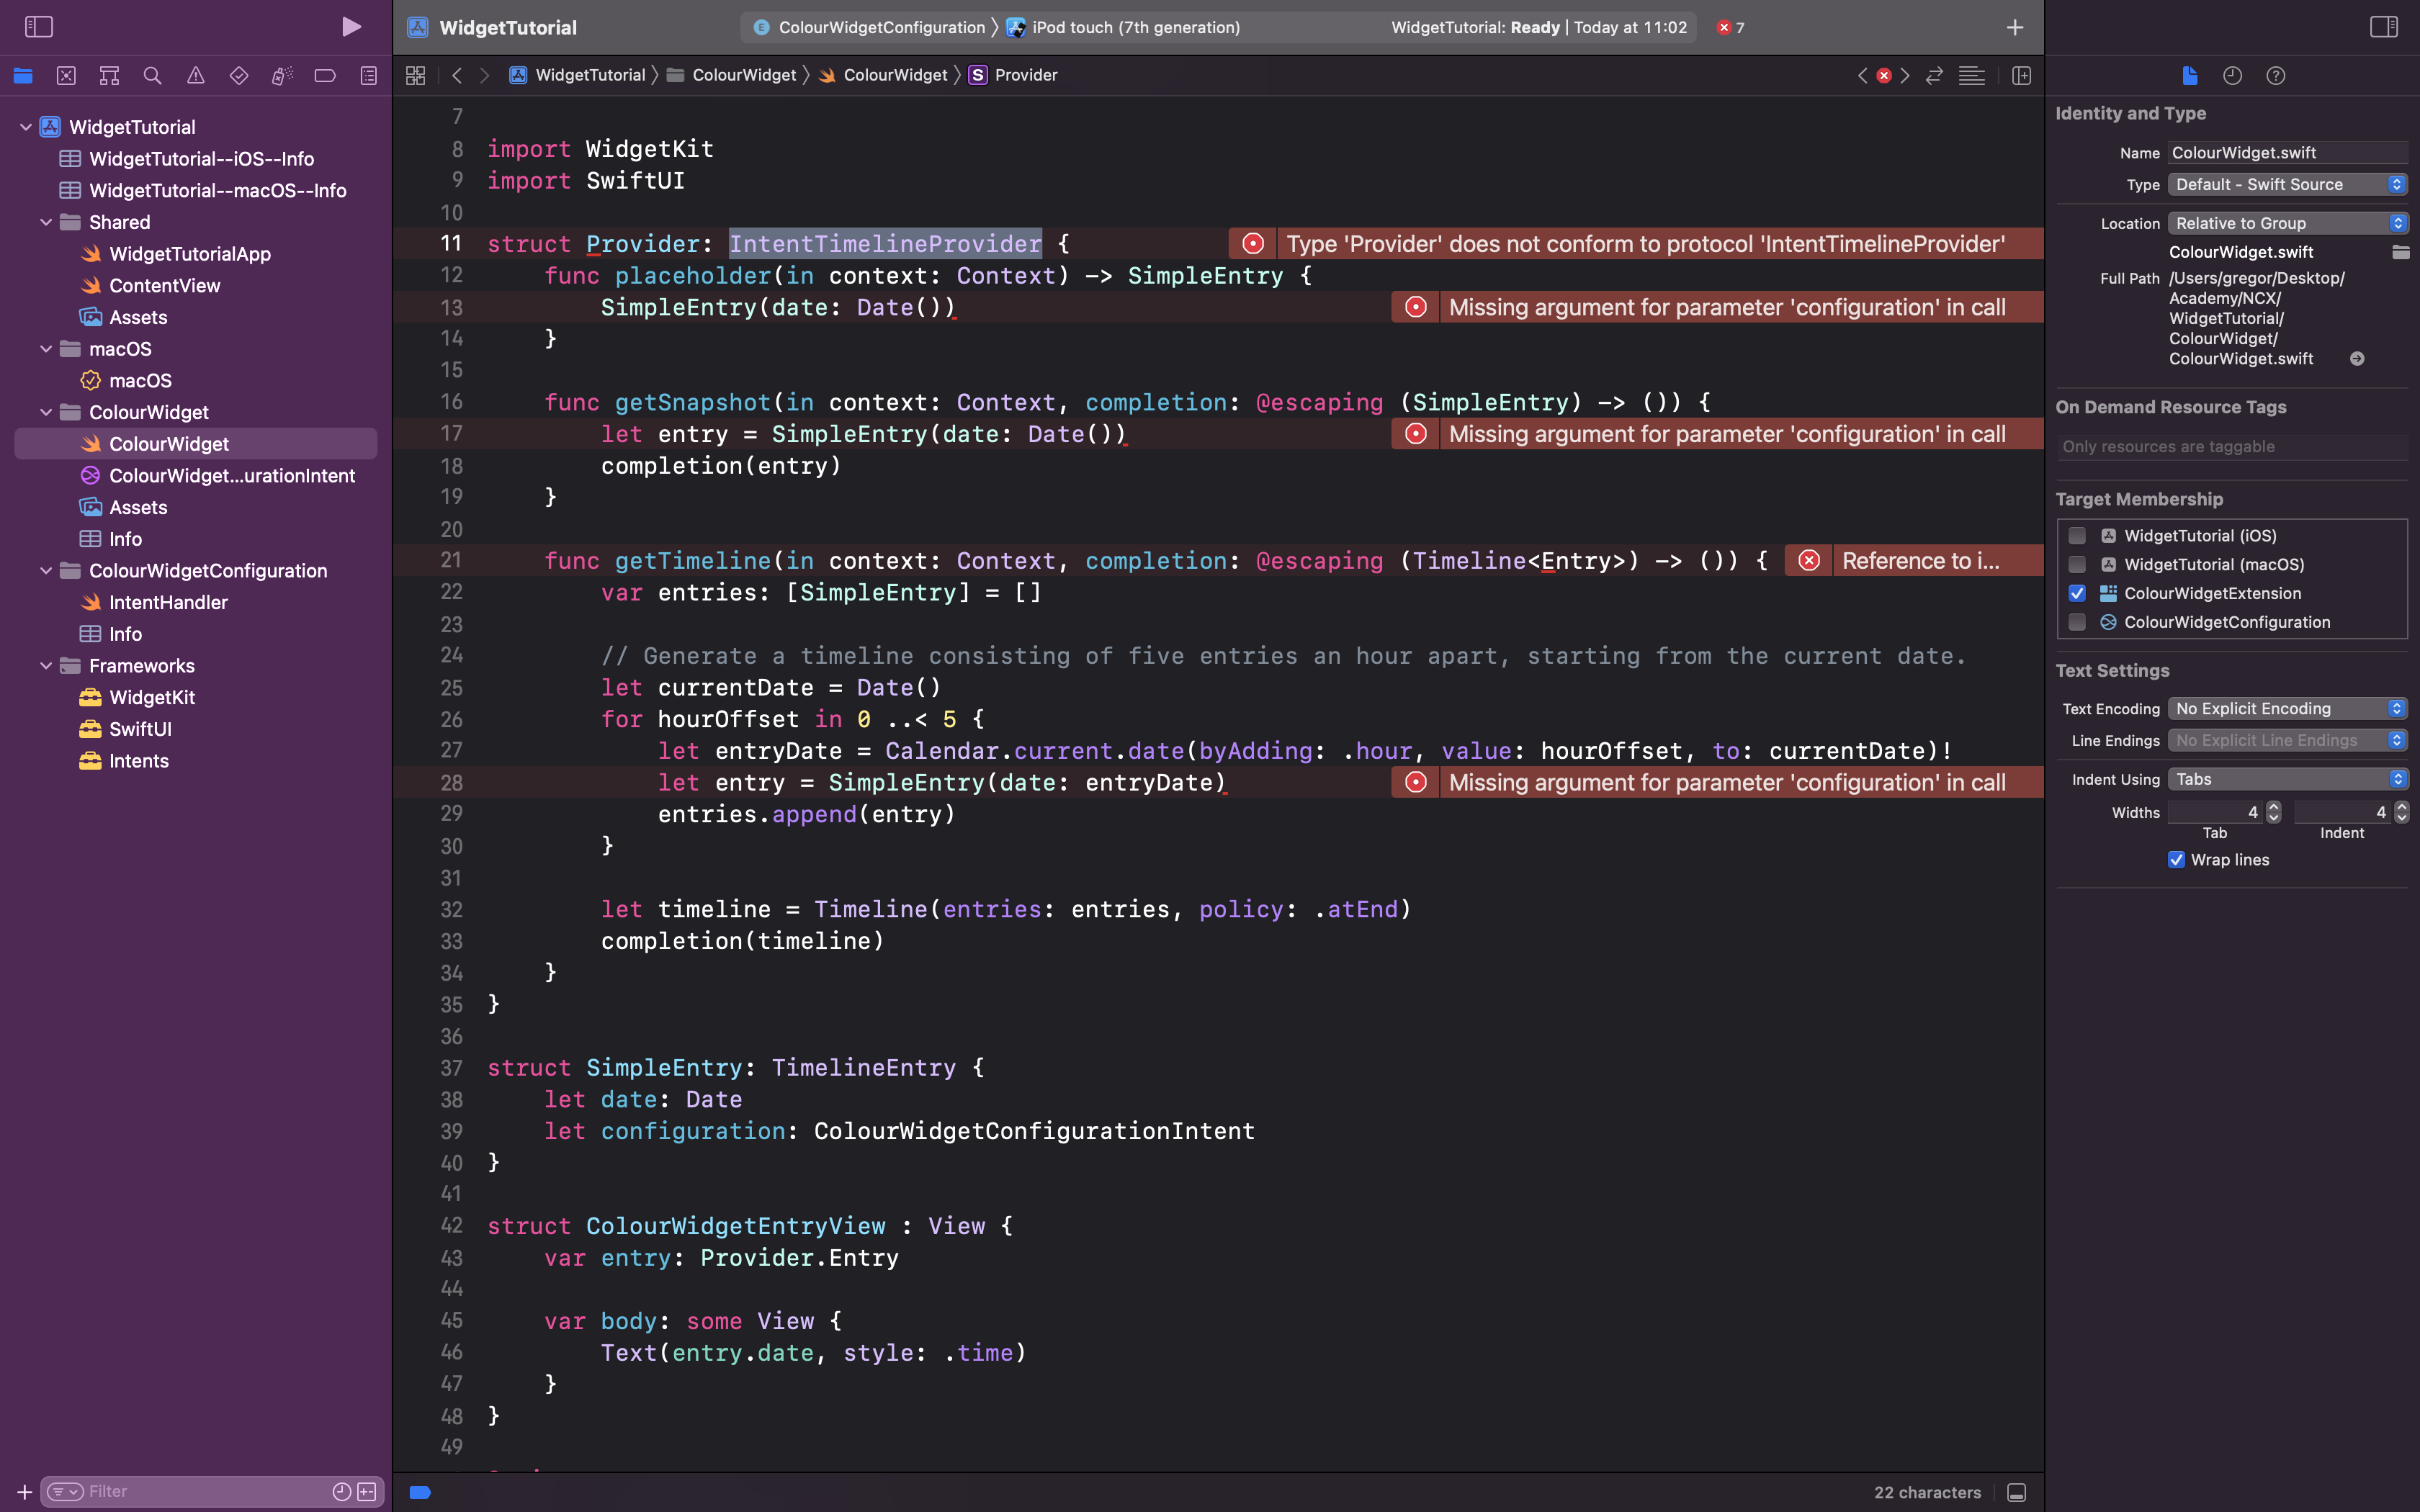
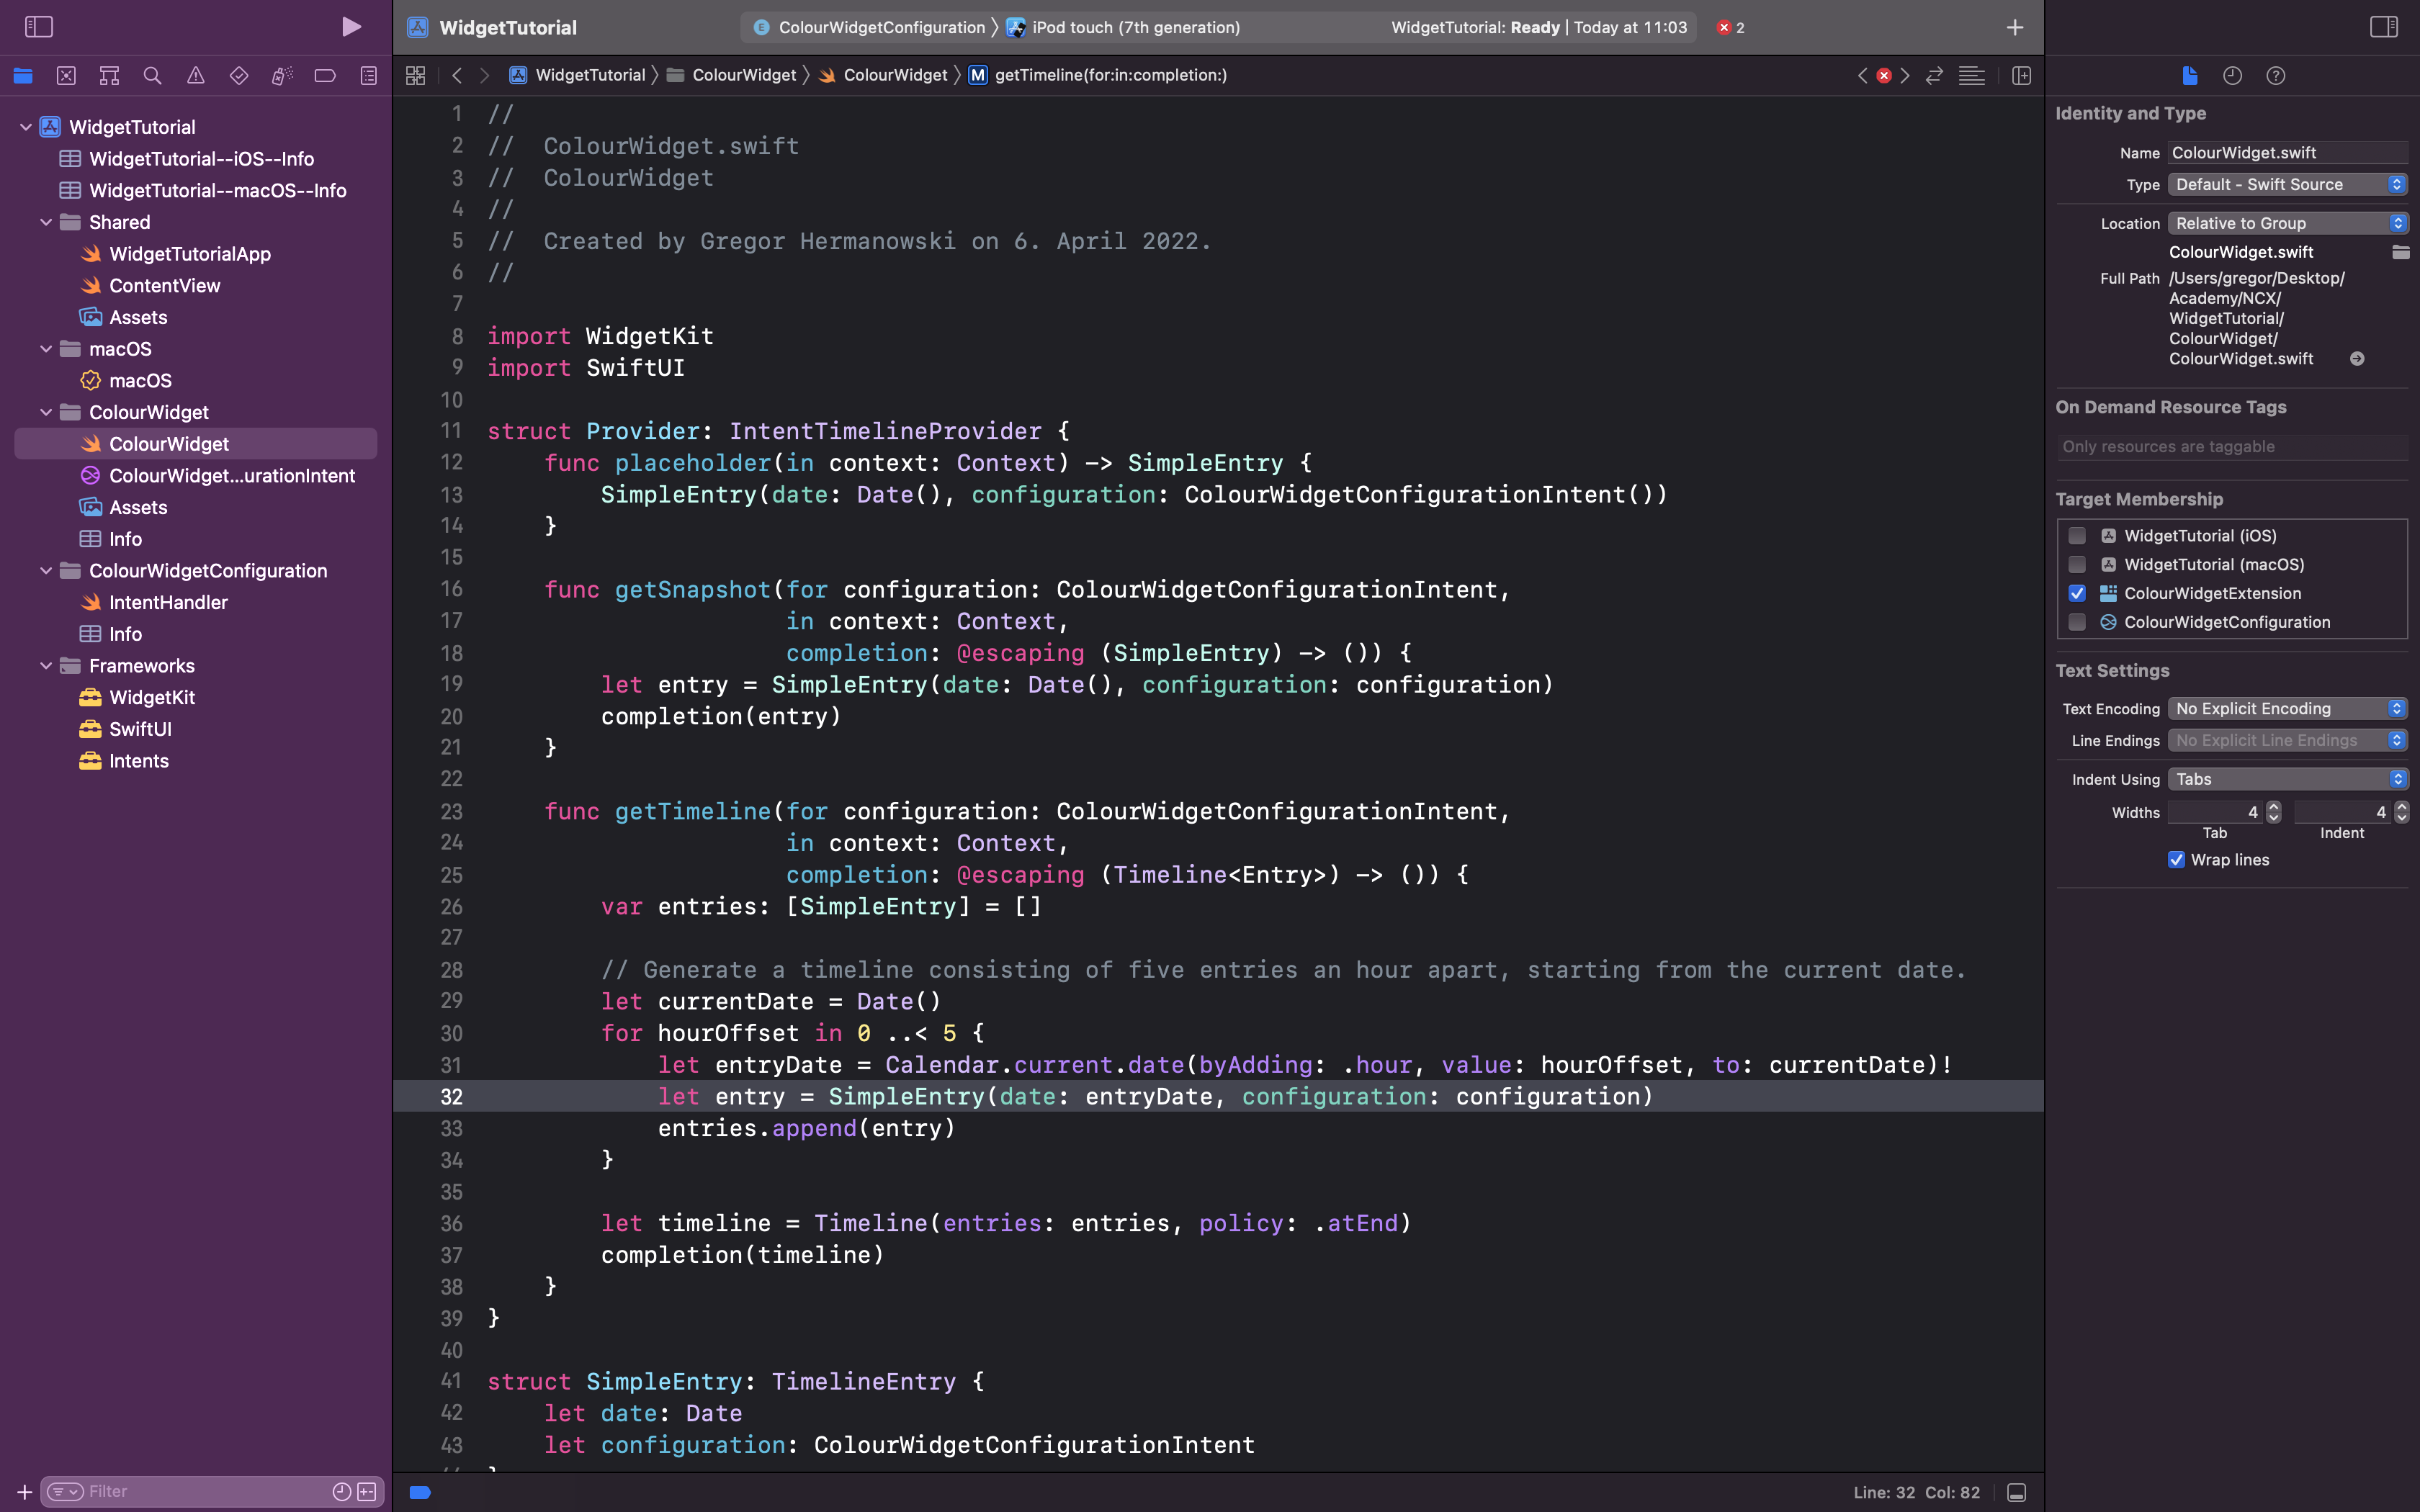
To adapt to the protocol, you need to add for configuration: ColourWidgetConfigurationIntent as the first parameter of the methods getSnapshot and getTimeline.
Next, pass the configuration parameter to the entry initialisers. In the placeholder method, you can initialise a new value of your configuration type.
Replace StaticConfiguration with IntentConfiguration in the widget struct and fill in the parameters like this:
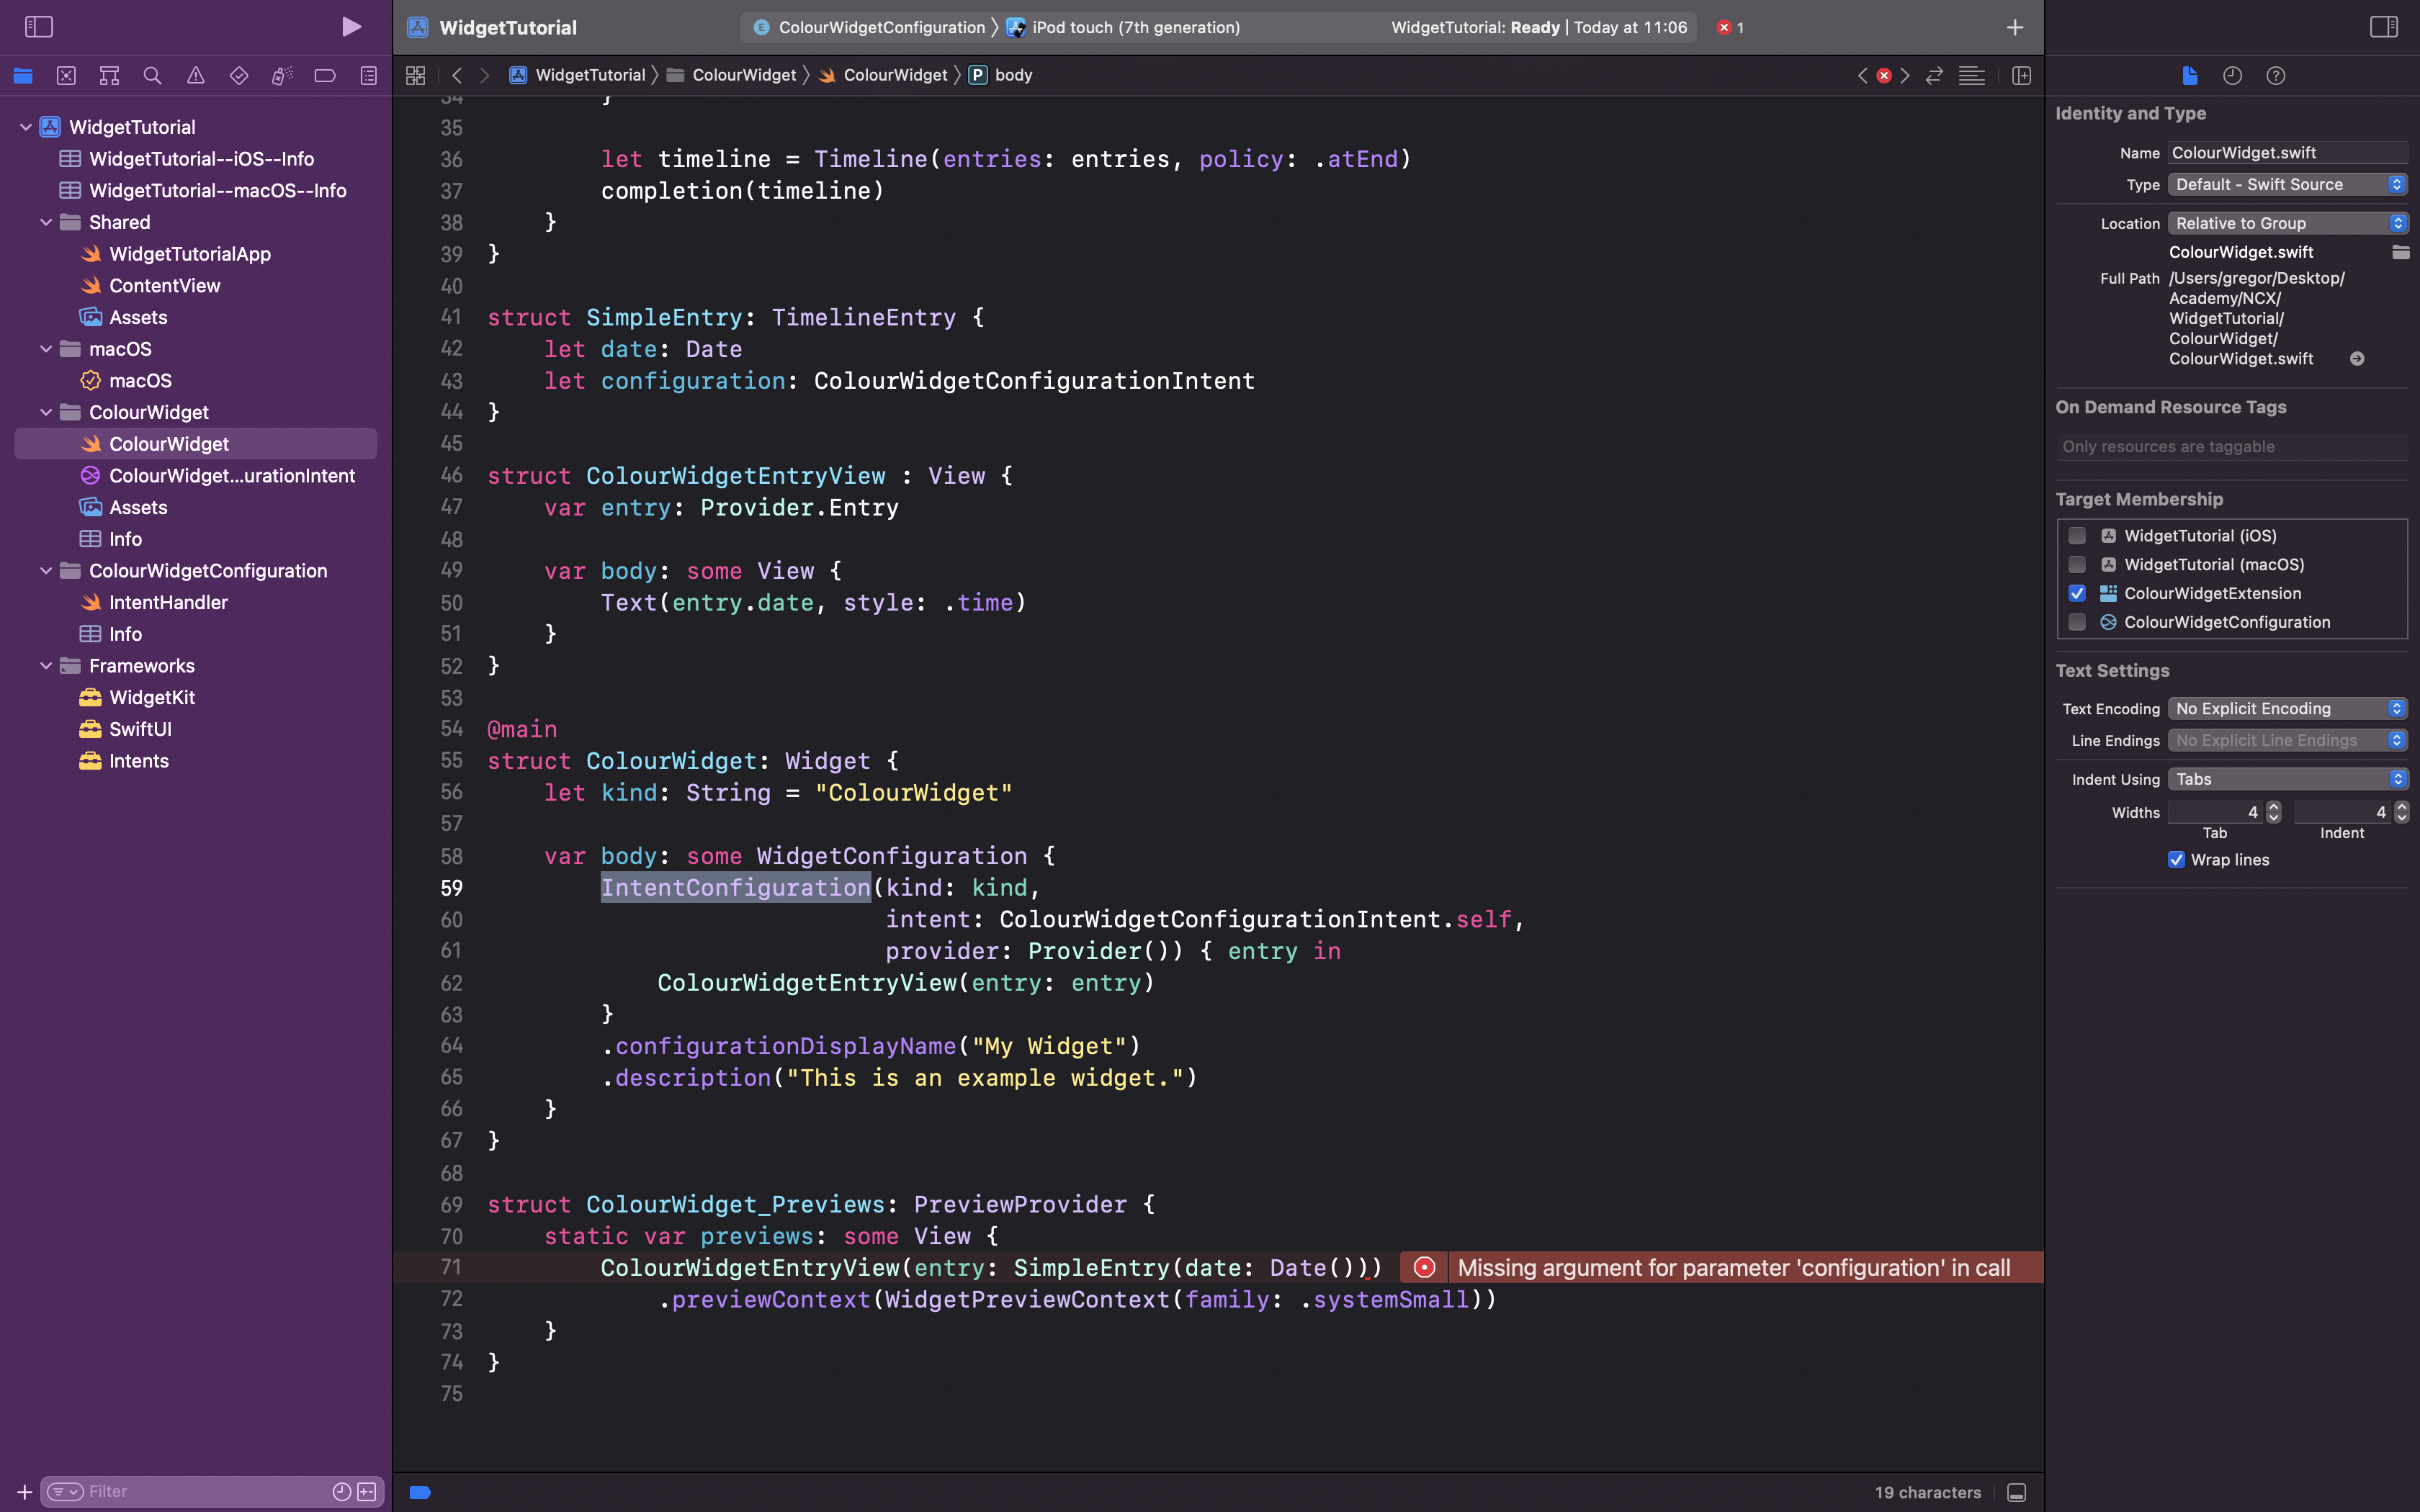
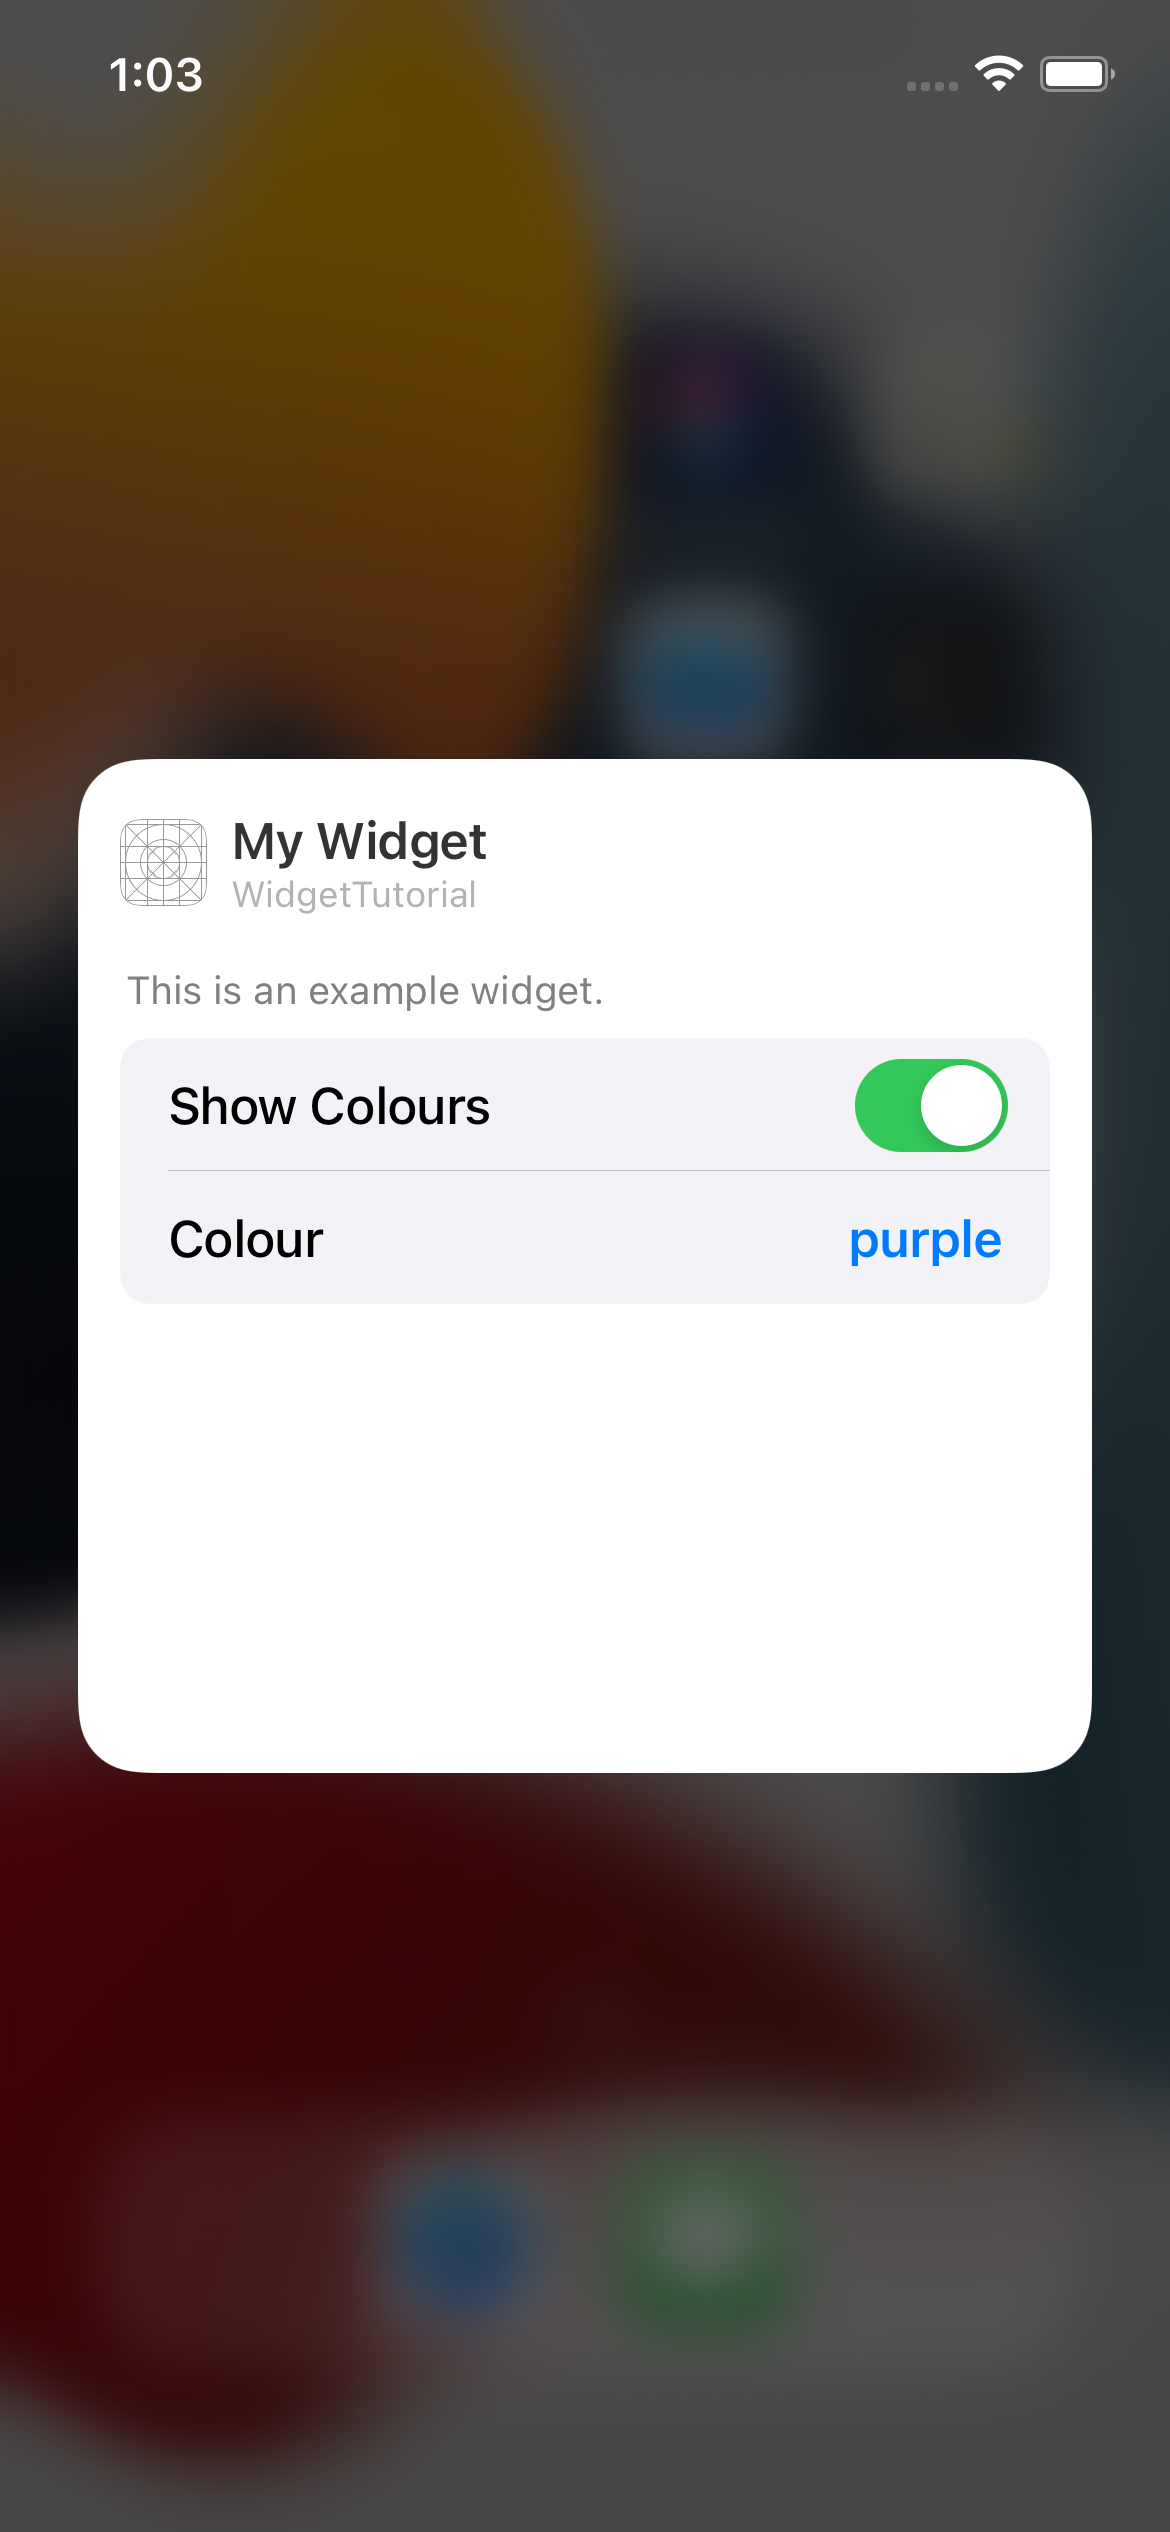
Run the widget extension — not the intent — to test if the configuration appears correctly in the simulator.
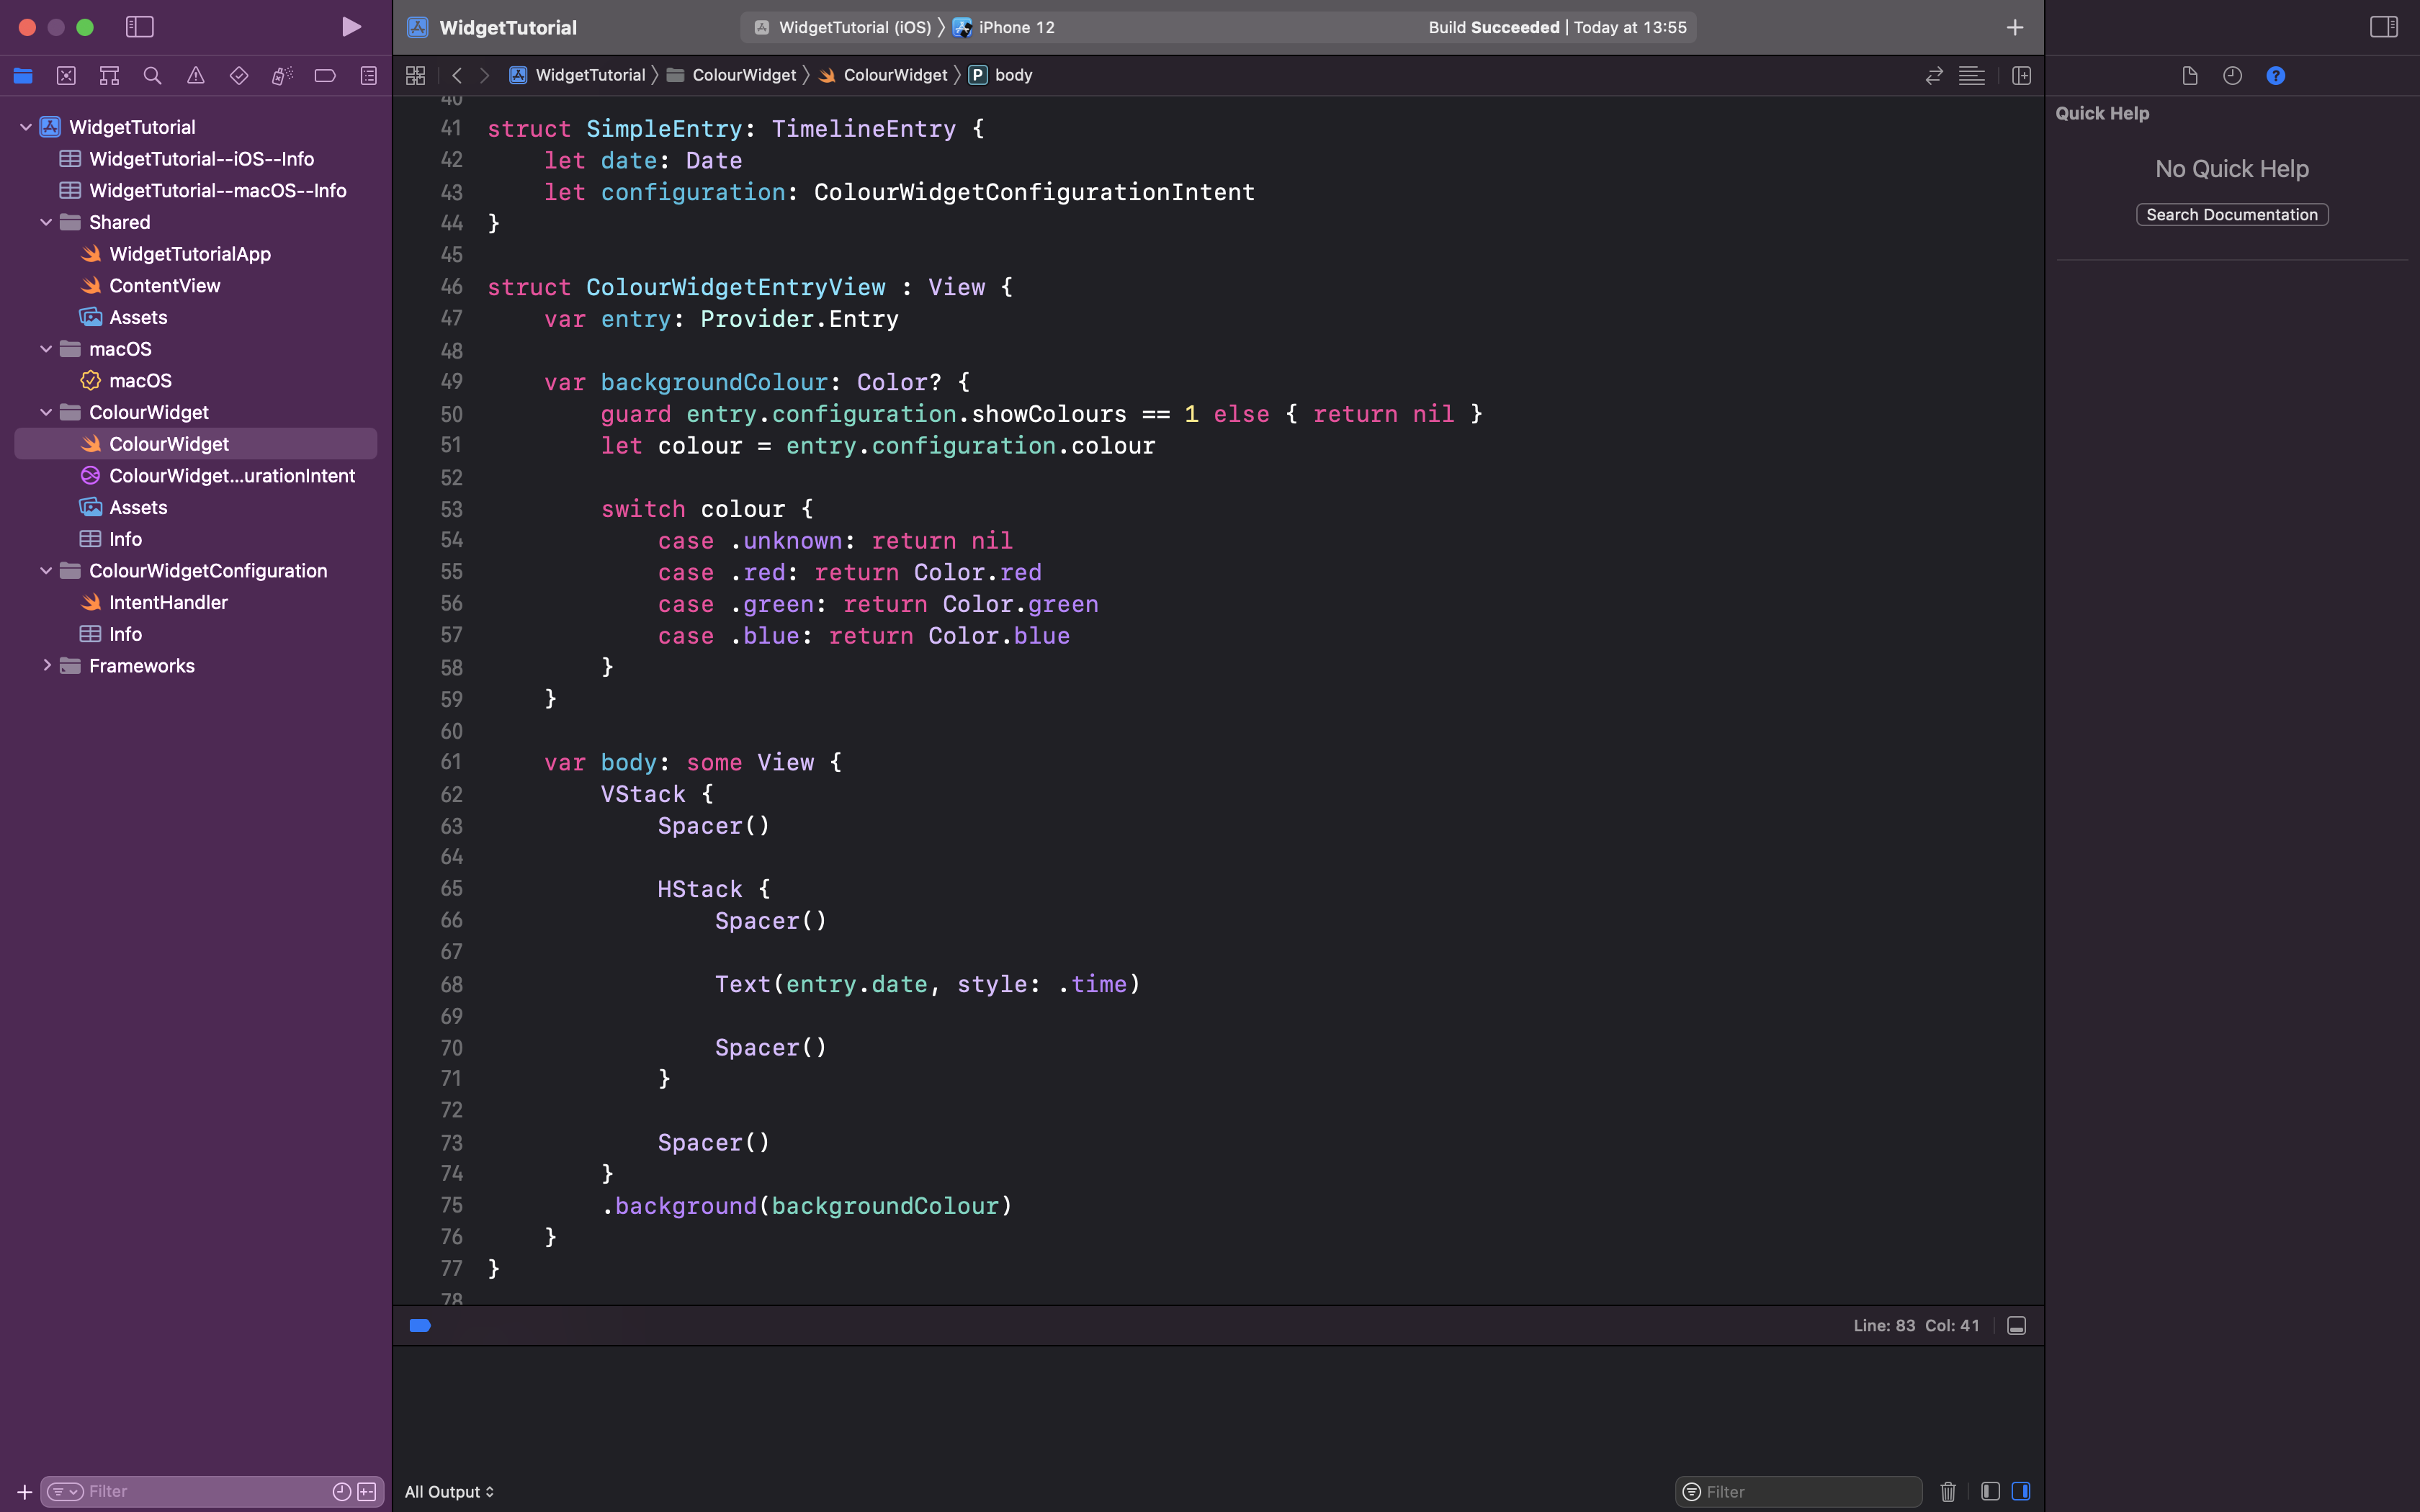
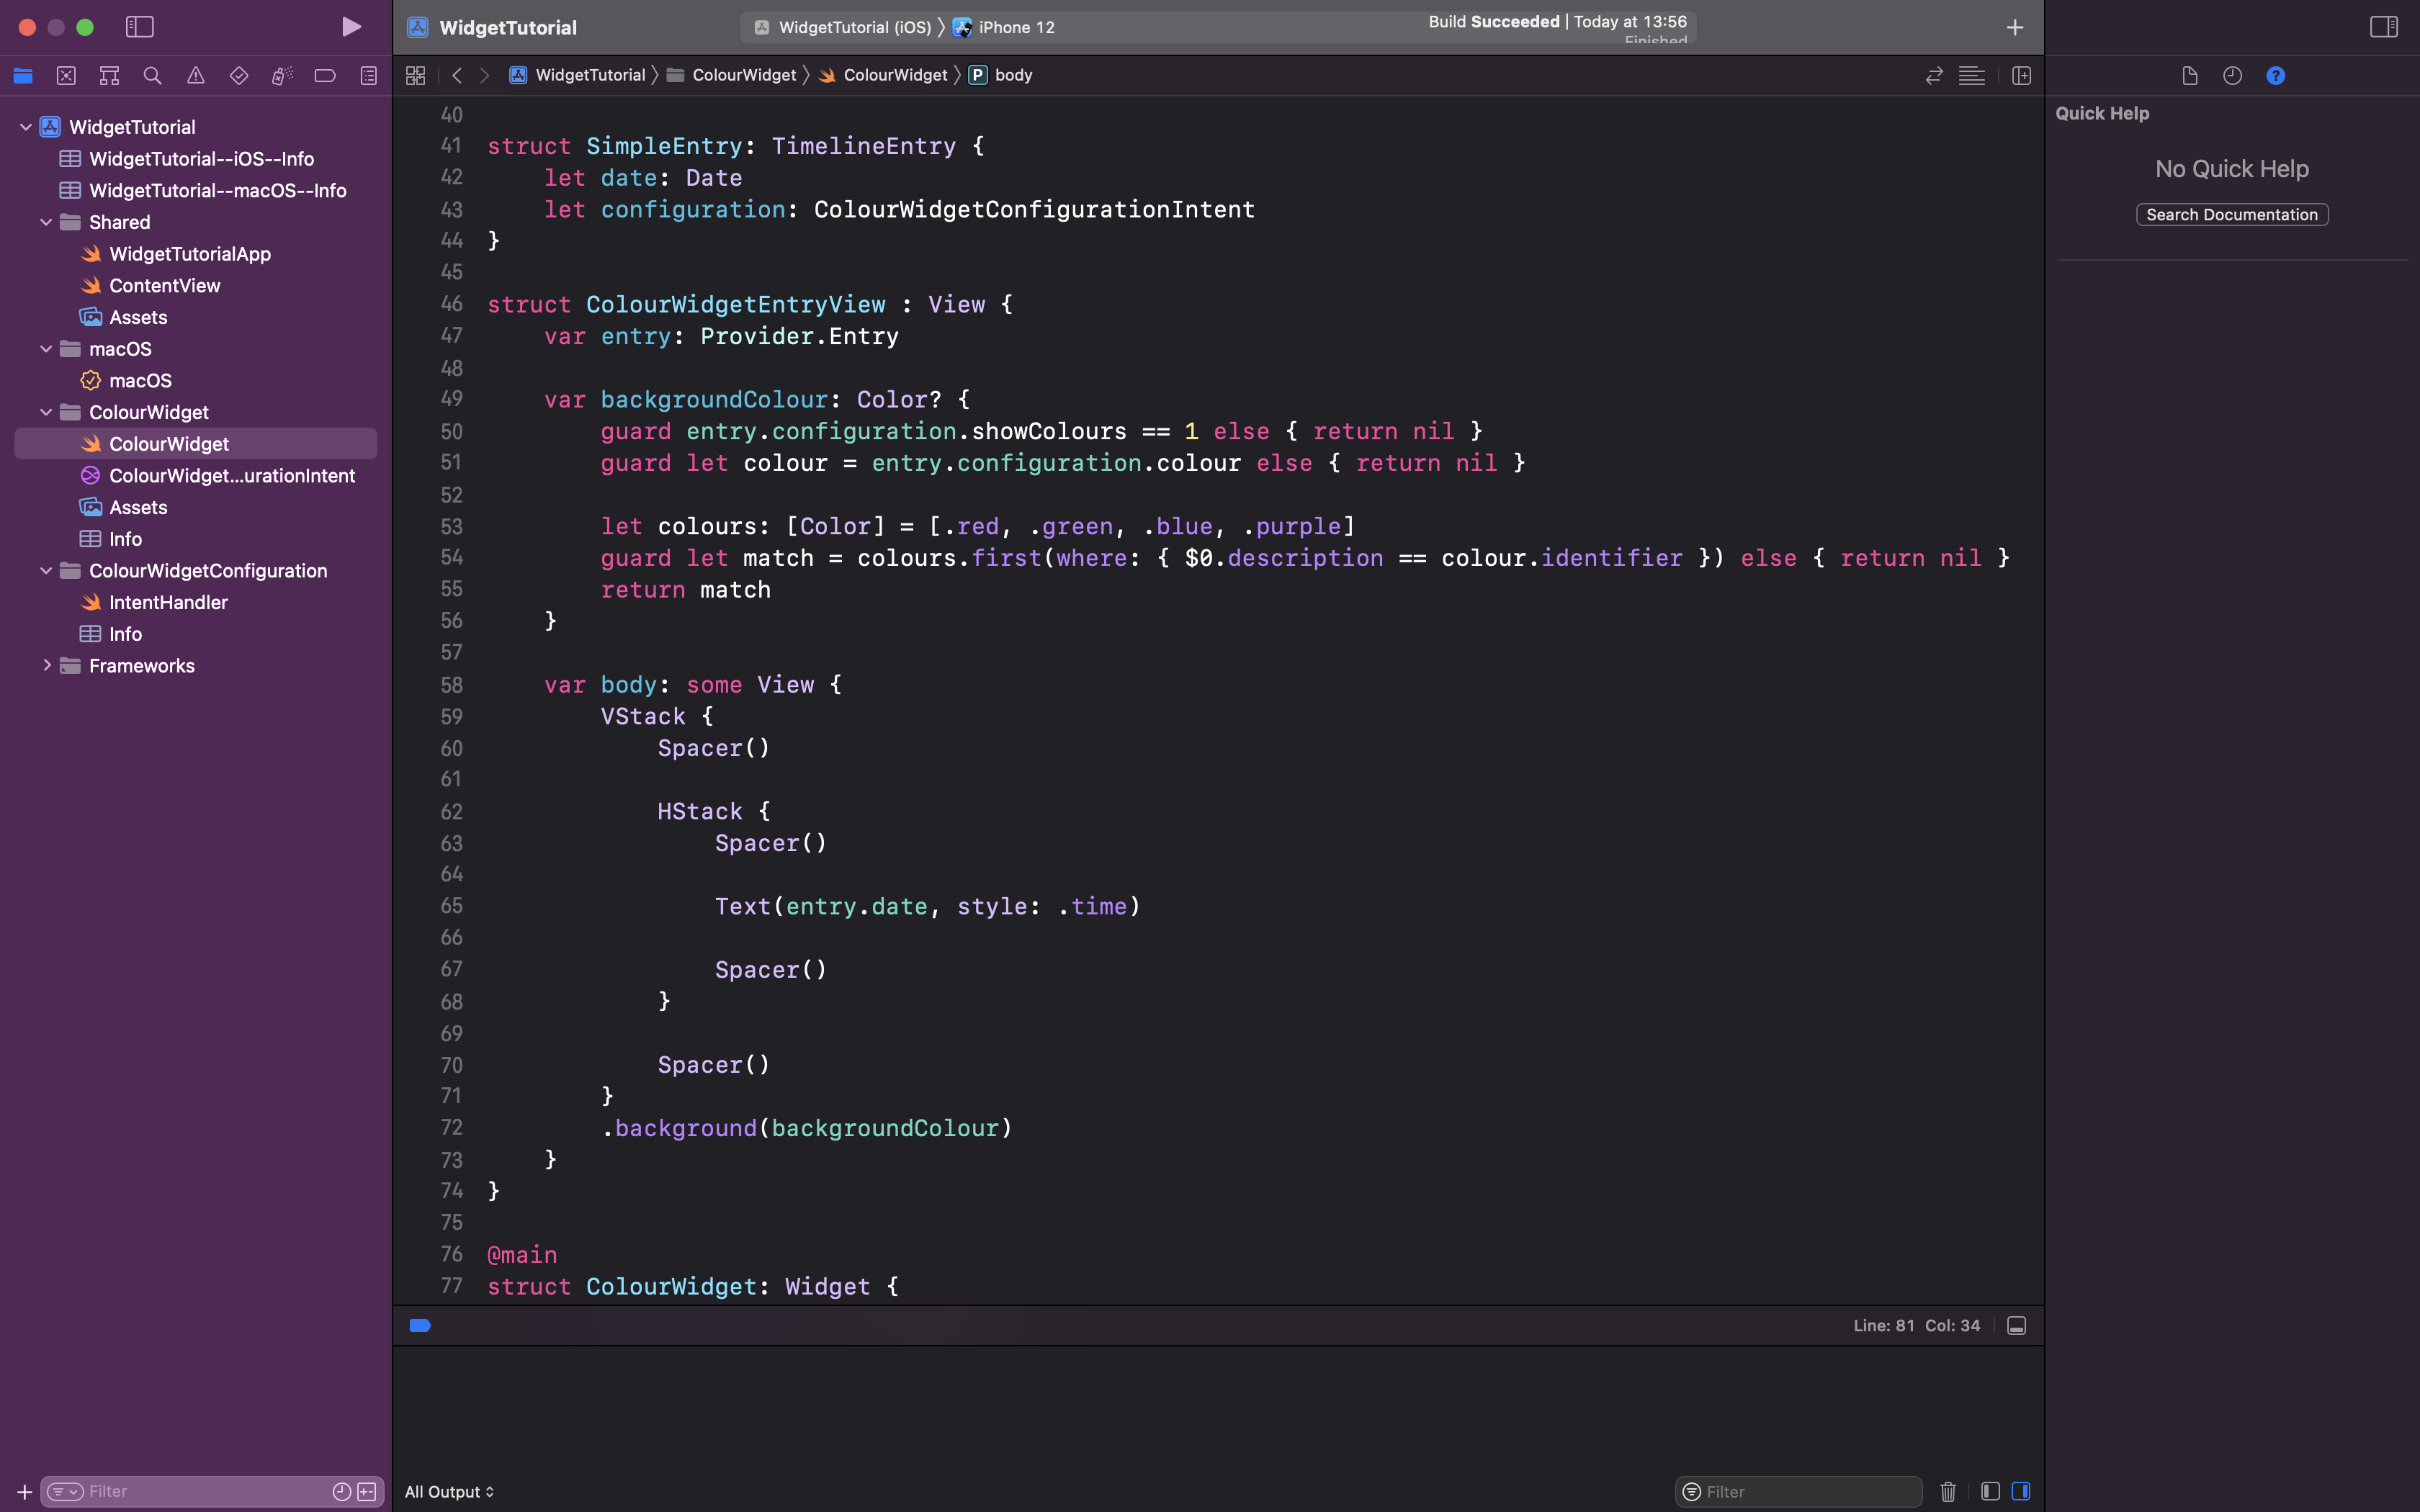
Now you can use the values inside the entry view of the widget.
Note that any boolean values from your configuration will be represented as NSNumbers. 0 is false and 1 is true.
Adding options that are provided dynamically by your app is possible as well. Let's replace our enum Colour with a new type DynamicColour and select "Options are provided dynamically".
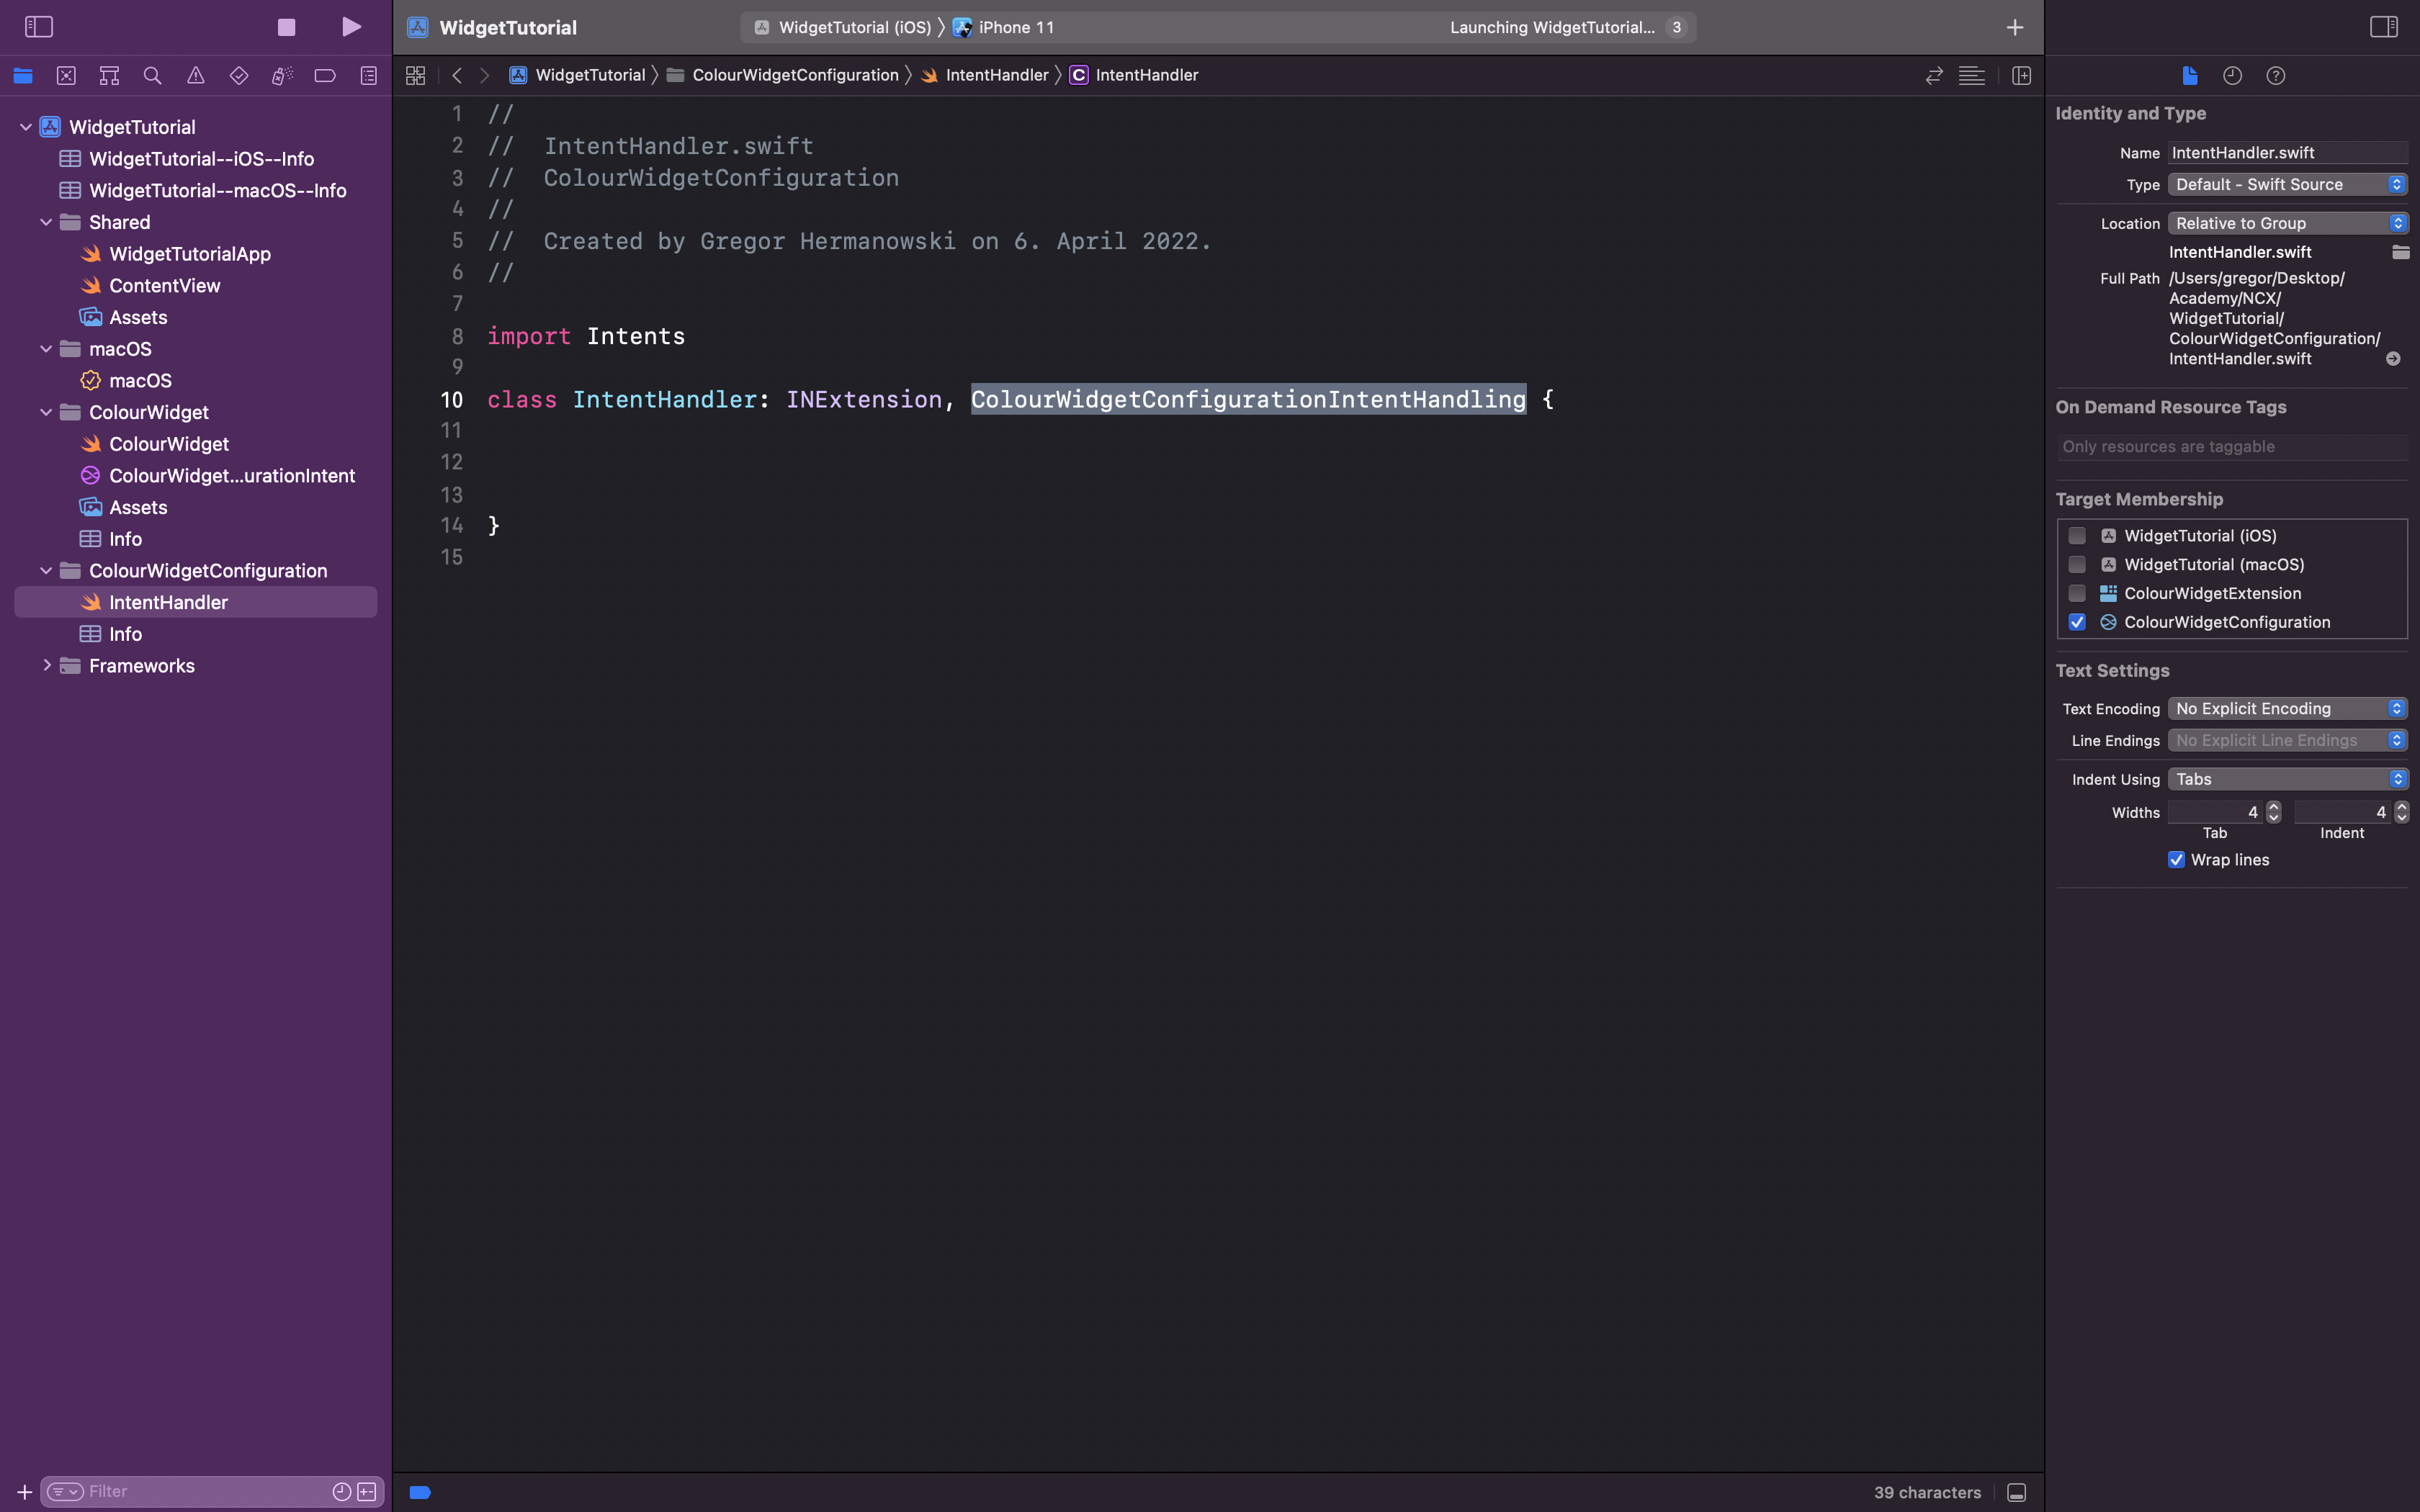
Open IntentHandler.swift. You can remove the method handler because we will not use it.
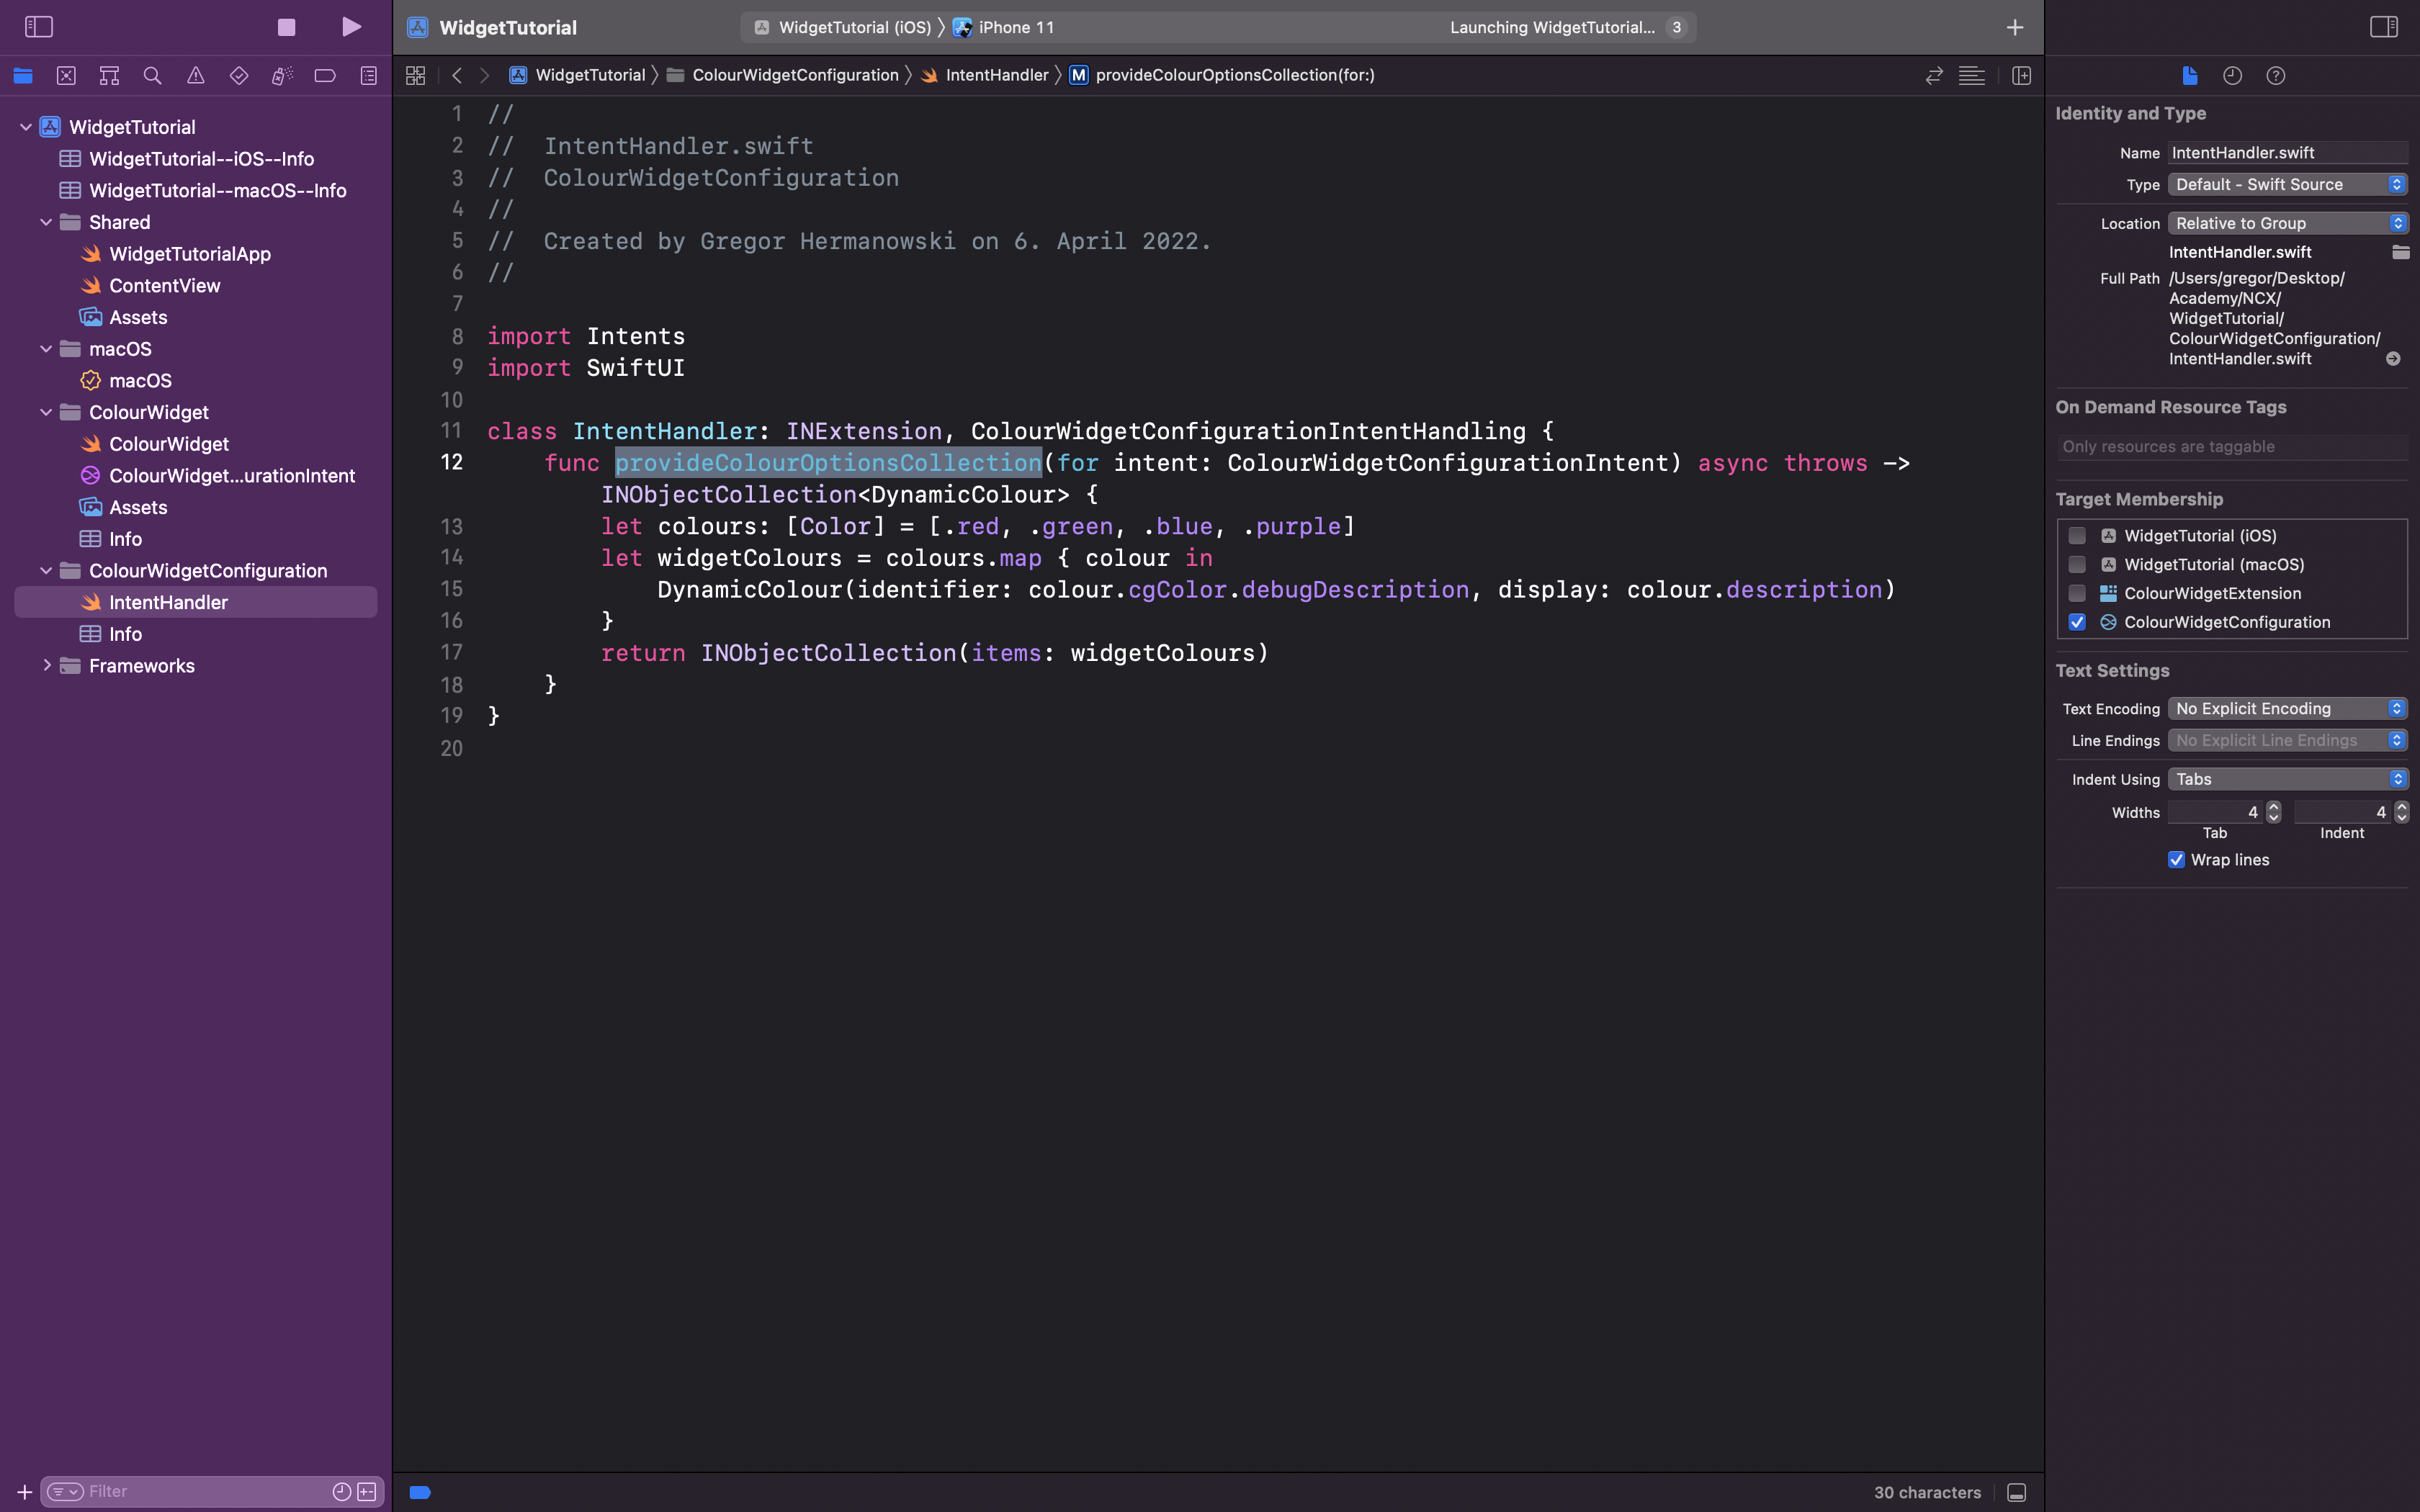
Adapt the class to your app's handling protocol, which was generated automatically for you. Add a method to provide the options. Xcode will suggest you the method name, which will autogenerate it.
To use options from your app, the file that provides the data needs to include the intent in its targets. In this tutorial I will use a static array of colours. You need to convert the type of your app's date to the type used in the struct. Using map is ideal for this.
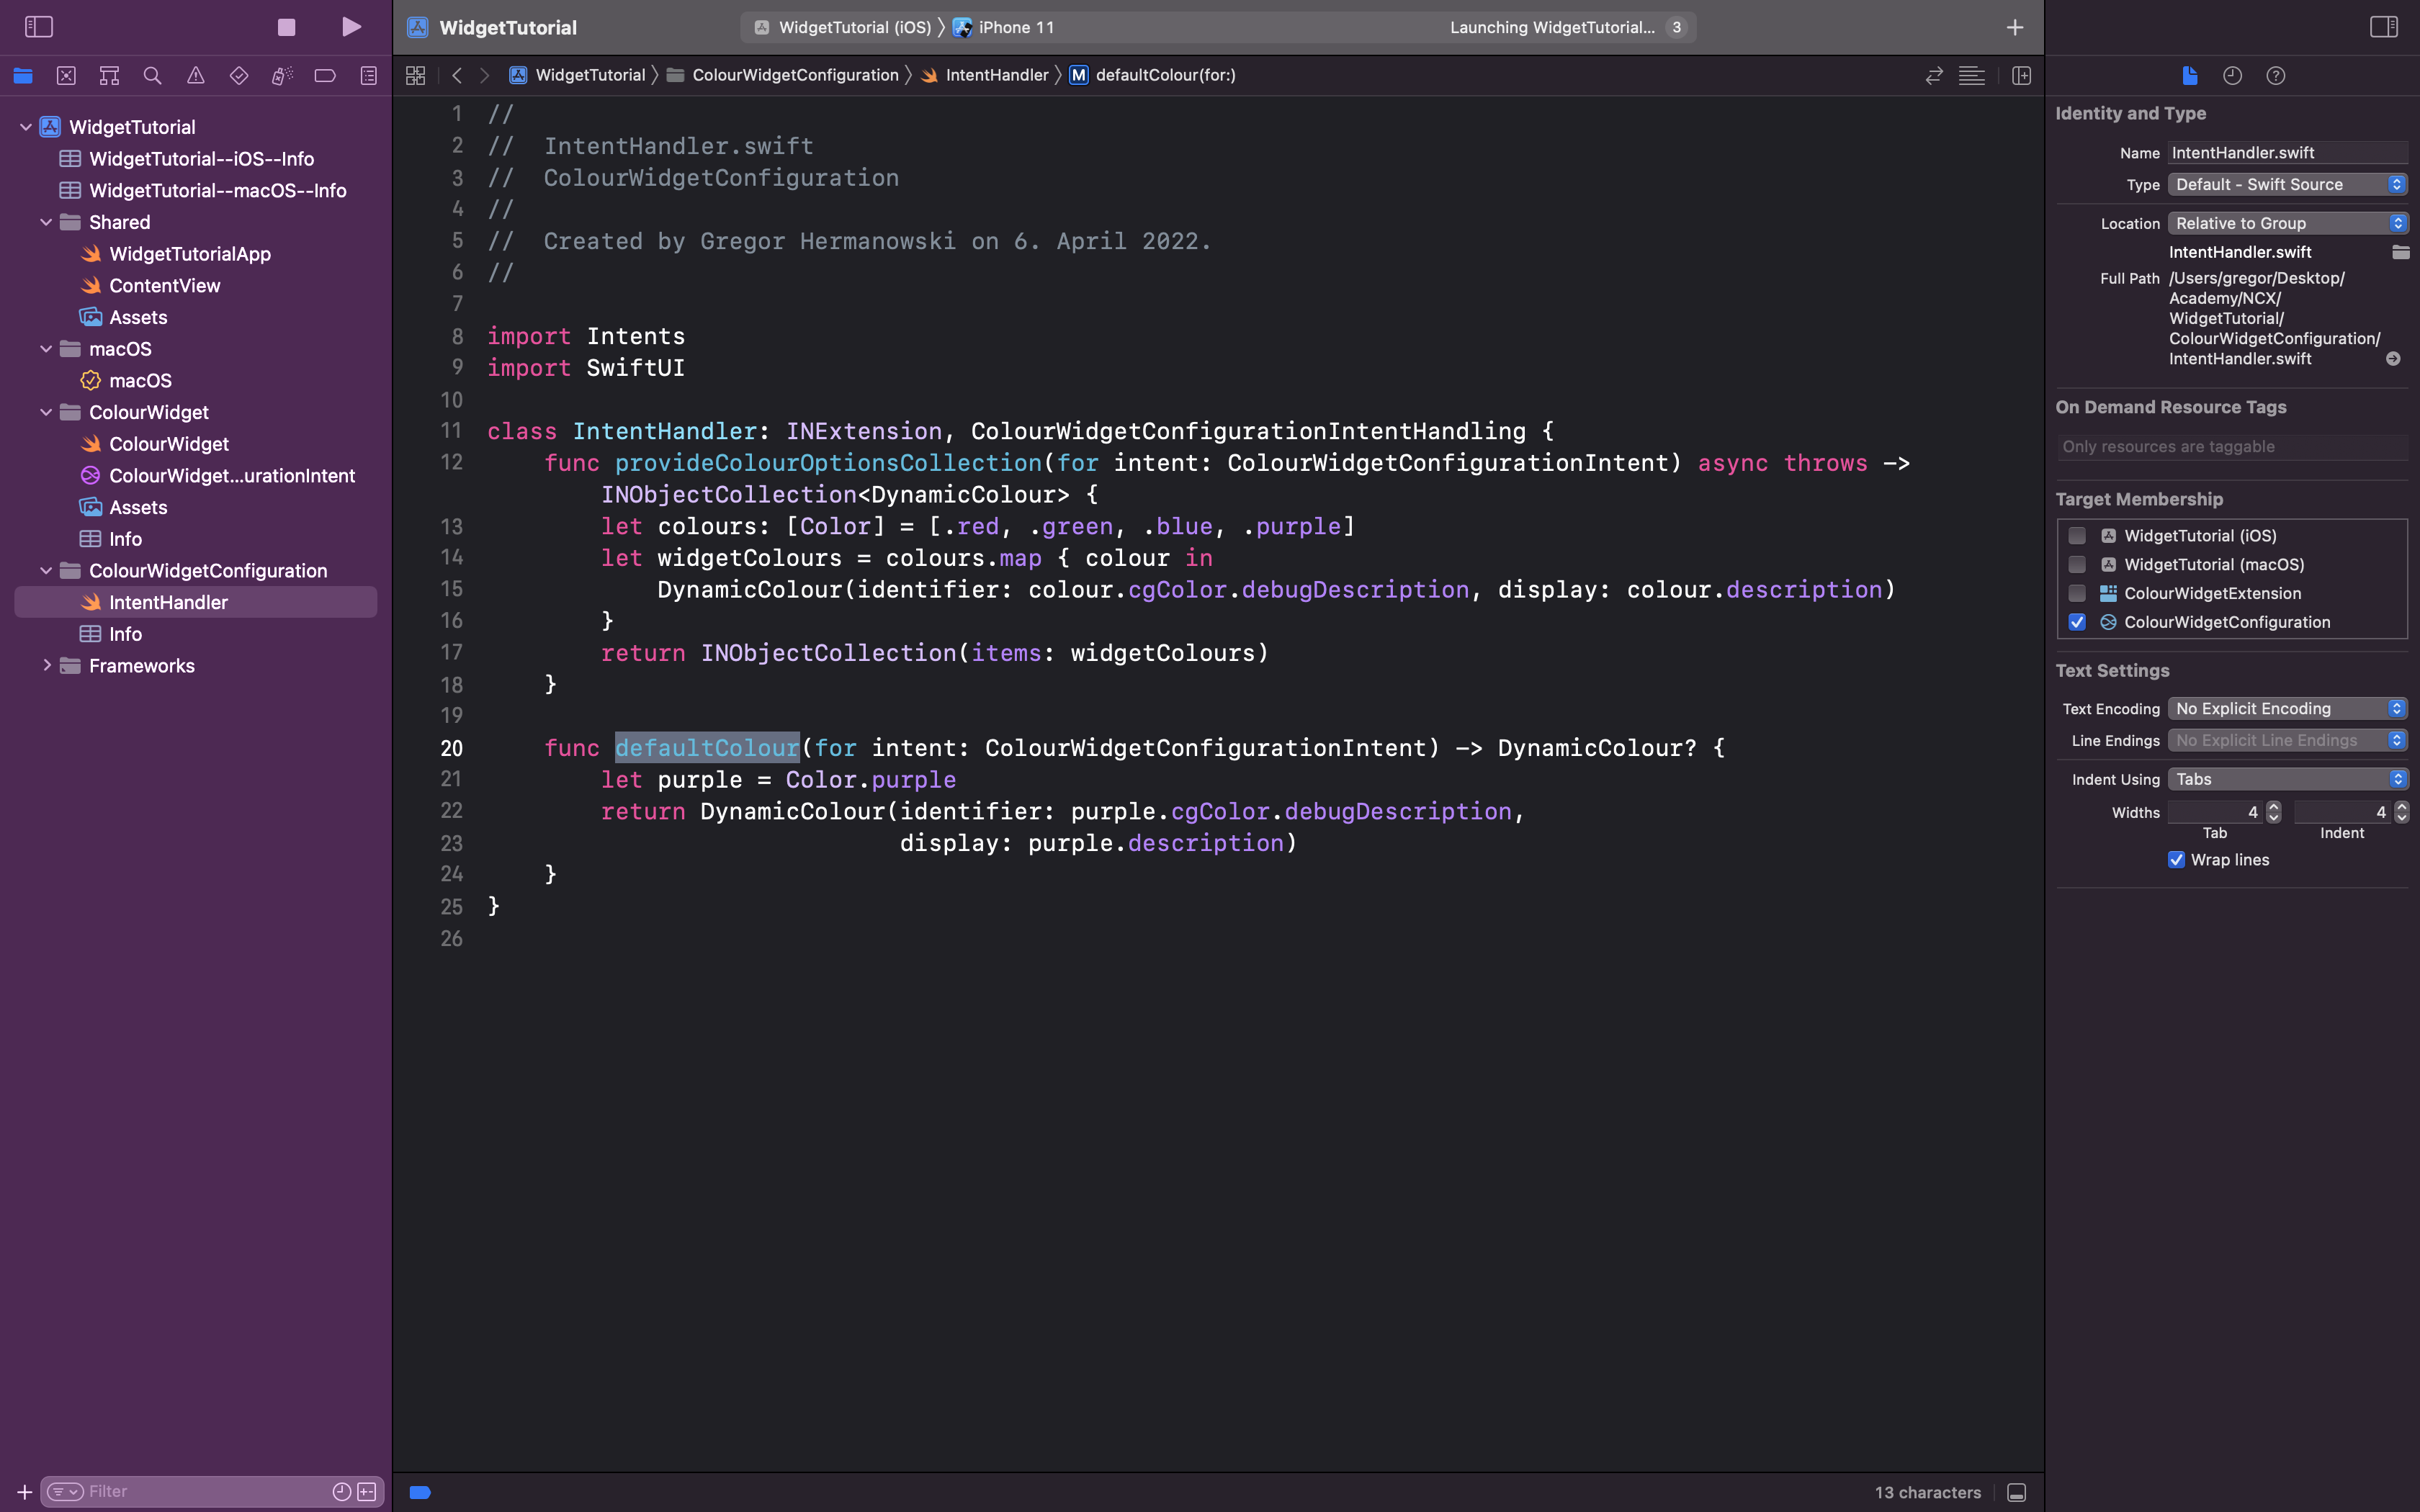
You can also provide a value that is selected by default. As in the previous step, Xcode will suggest you a name for it.
In your widget entry view, you will need to change the type to the dynamic value.
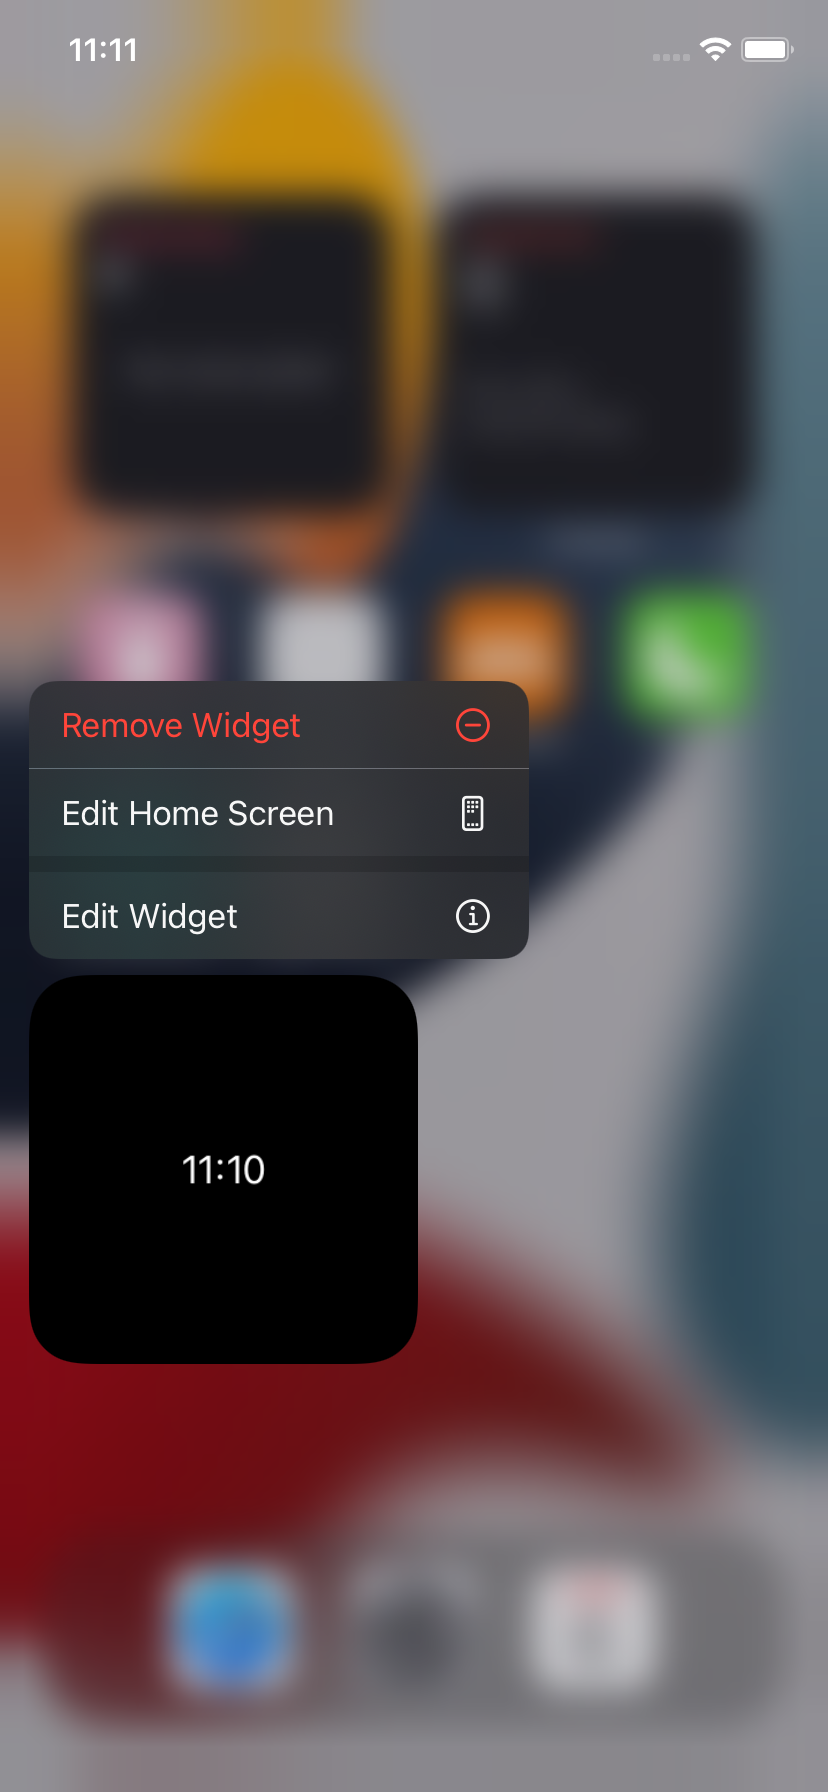
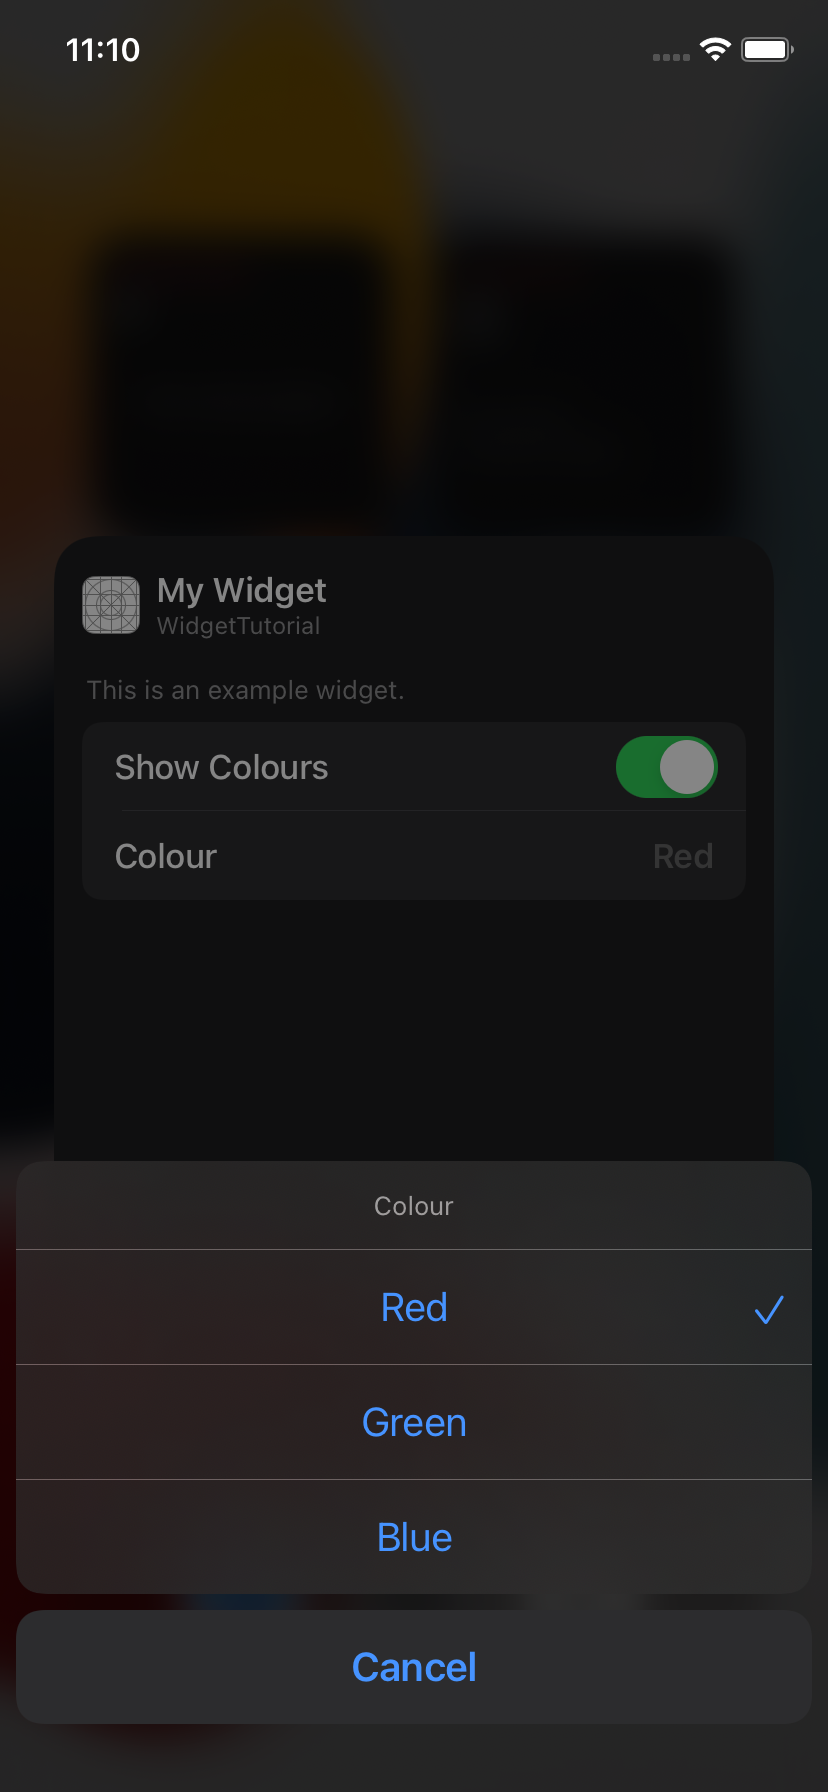
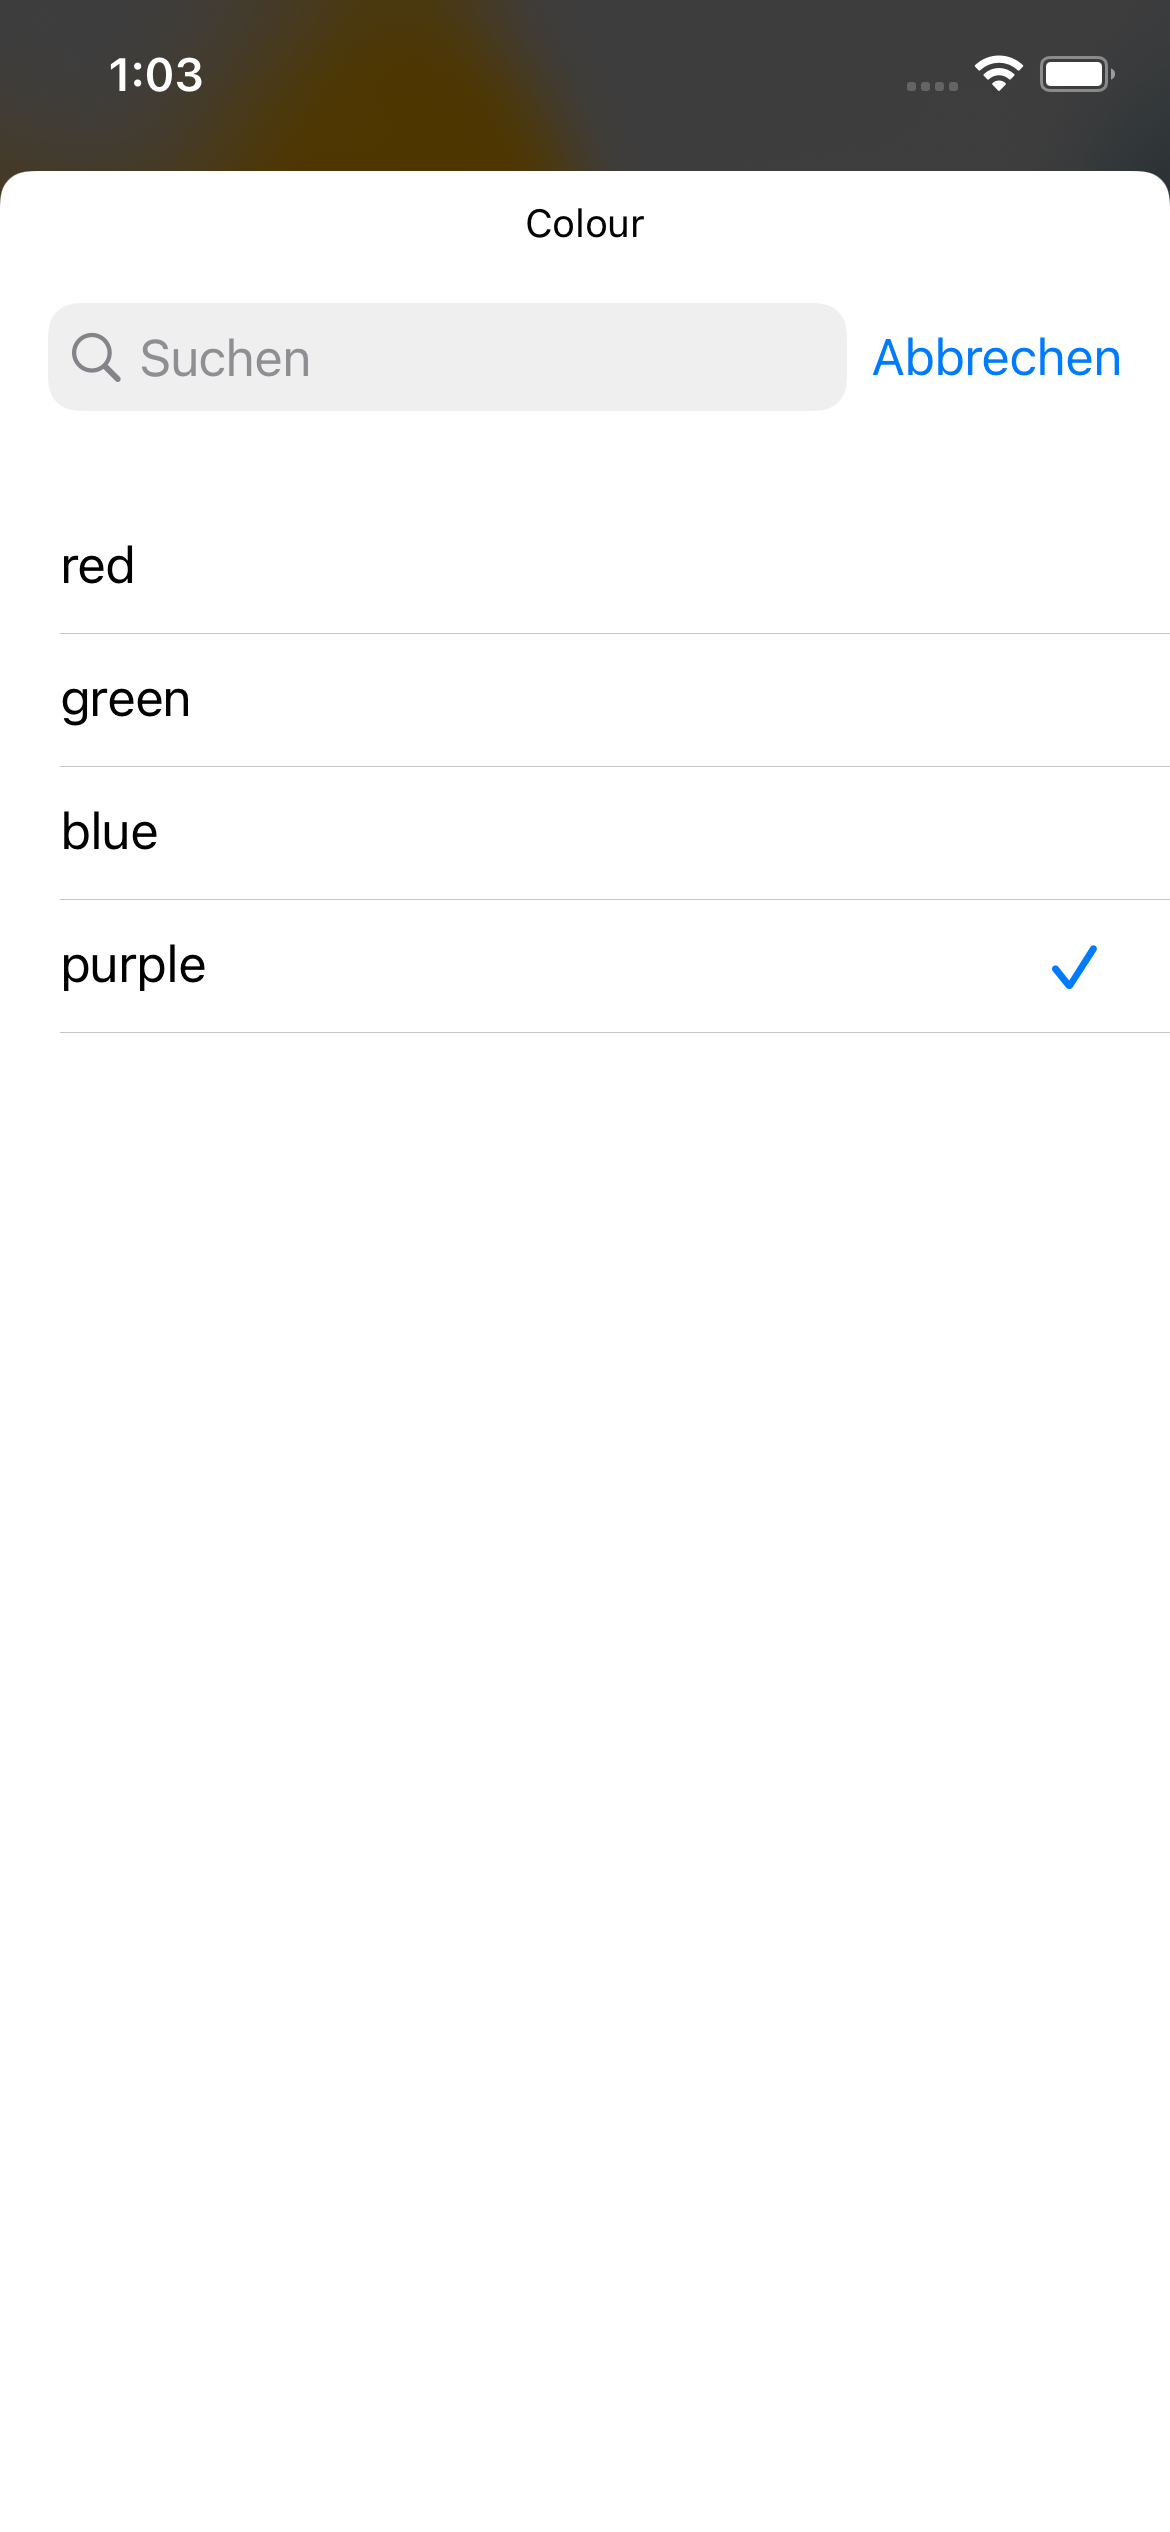
And that's it. The options should now be available in your widget's configuration when you run it in the simulator.
You now know how to add configuration options to your widgets and even how to provide them dynamically. If you want to find out how to allow multiple options to be selected, take a look at my project, EventsWidget. In it, I recreated the widget from the Calendar app, which shows you today's remaining events. The widget can be configured to only show events from certain calendars. The data is fetched using EventKit, which allows access to events stored in Calendar. I also used ContainerRelativeShape to make sure that the corner radius of the events matches that of the widget.