
This guide explains how you can connect your flex sensors with your arduino and get changes in resistance values.
A flex sensor can give a range of changes in resistance values. One side of the sensor is printed with a polymer ink that has conductive particles embedded in it. When the sensor is straight, the particles give the ink a resistance of about 30k Ohms. When the sensor is bent away from the ink, the conductive particles move further apart, increasing this resistance. When the sensor straightens out again, the resistance returns to the original value. By measuring the resistance, you can determine how much the sensor is being bent. However, since we need binary values from our sensors, we are gonna divide the range in two equal halves(in arduino code). Now, one flex sensor gives us 2 values; either 1 or 0. In our latest version of the code, we are using arduino_with_5_flex_sensors.ino (meaning we have connected 5 flex sensors to the arduino), we get 2^5 combination. Since the english alphabet contains only 26 letters, we are left with 6 combinations which will have no mapping.
- Arduino Uno R3 ATmega328P
- Connecting wires
- 5 flex sensors
- Raspberry Pi (With raspbian OS)
- 5 resistors (3.9k ohms)
- USB cable(Arduino to RPi connection)
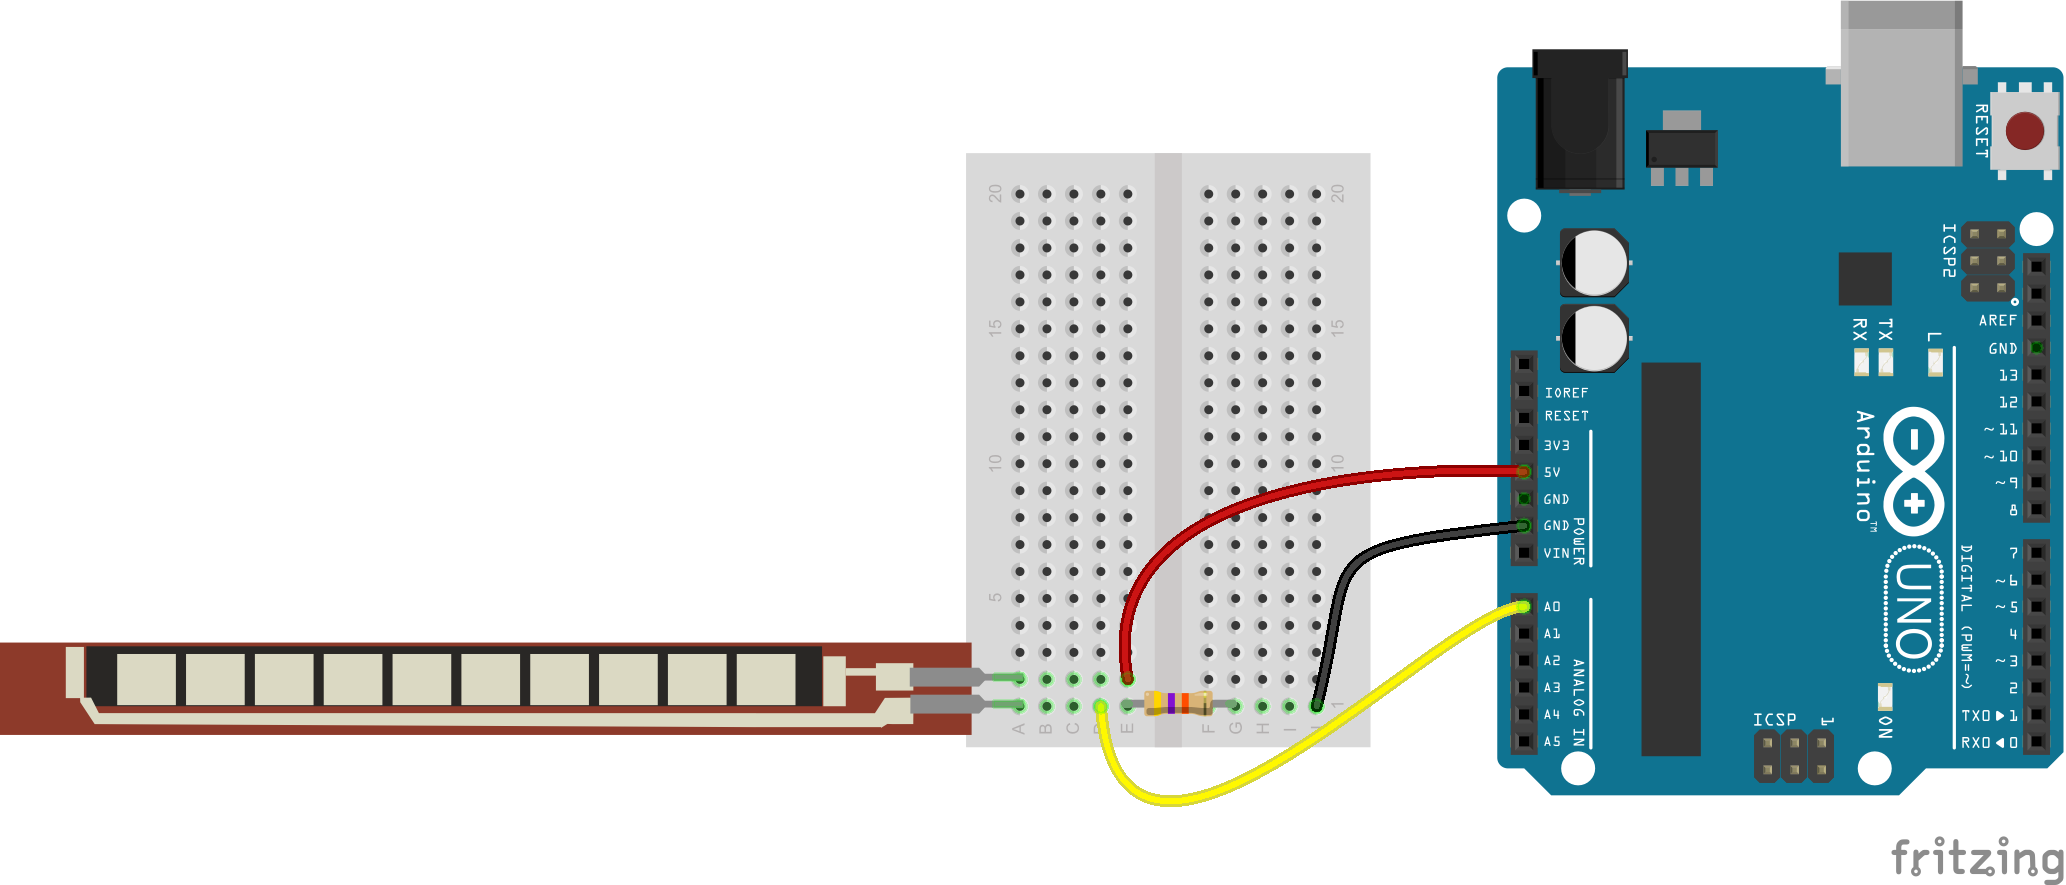
You can see below how you can connect one flex sensor to the arduino uno board.
However, we are using 5 flex sensors, and their connections is as shown below:

To upload your code into your arduino uno, you will need the Arduino IDE and you will need to connect your arduino to your PC with the included USB cable. Learn more about that here. Now connect your sensors as shown above and upload this file if you are using only two flex sensors or this flie if you are connecting 5 flex sensors as shown above.
In case of 2 flex sensors complete the connections as shown with input pins being at A0 and A1. In case of 5 flex sensors, connect the input pins to A0,A1,A2,A3 and A4.
Once the code has been uploaded, it will be executed and a small window should appear showing the output of the sensors. If all sensors are straight, the default value will be 'NO'. However, once you bend your sensors, the values should change and instead show other alphabets.
Now that you have tested your output to be accurate, use the included USB cable of your arduino and connect your Raspberry Pi to your Arduino.
Now go back to README.md and start reading from Prerequisites.